
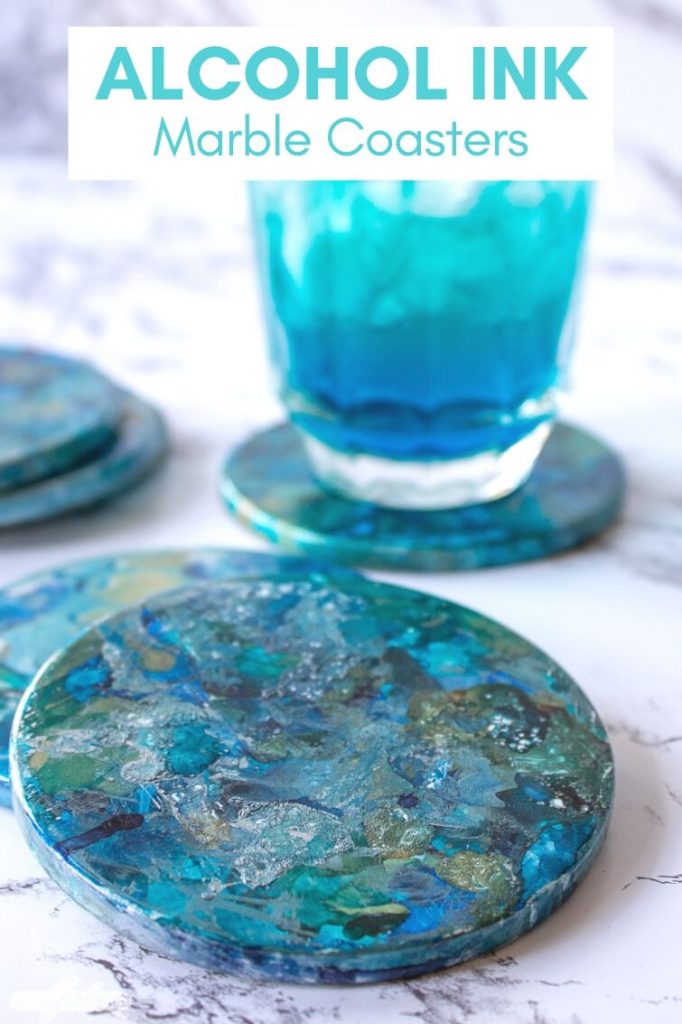
Use a heat gun to create vibrant marbleized alcohol ink coasters to match your favorite cocktail.
I had so much fun making these alcohol ink coasters. They’re the perfect match for my Carolina blue cocktail, too!

This is one of those messy, unpredictable craft projects that forces me break out of my perfectionist tendencies. It’s impossible to know exactly what the finished project will look like. It all depends on how the ink flows and blends together.

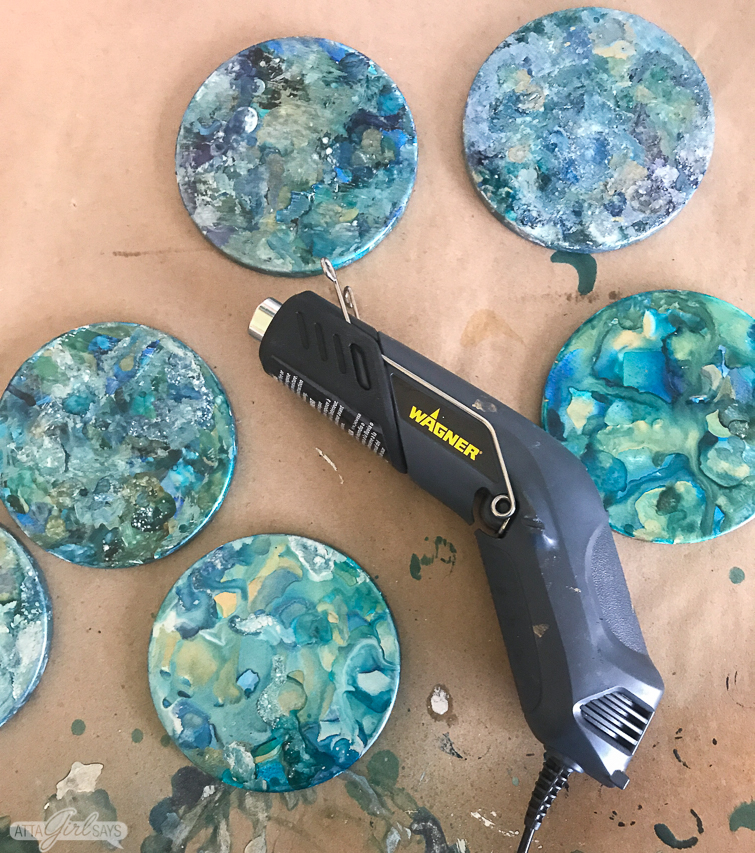
Like snowflakes, no two alcohol ink coasters are alike! But therein lies their beauty.
Alcohol ink coasters make a nice handmade gift for Christmas or birthdays, and they’re also the perfect host or hostess gift for New Year’s Eve. You could give a set along with glittered champagne glasses.
You can also use alcohol inks to make gorgeous pendants out of oyster shells!
This is a sponsored post, and it contains affiliate links for your shopping convenience. Read my full disclosure policy here.
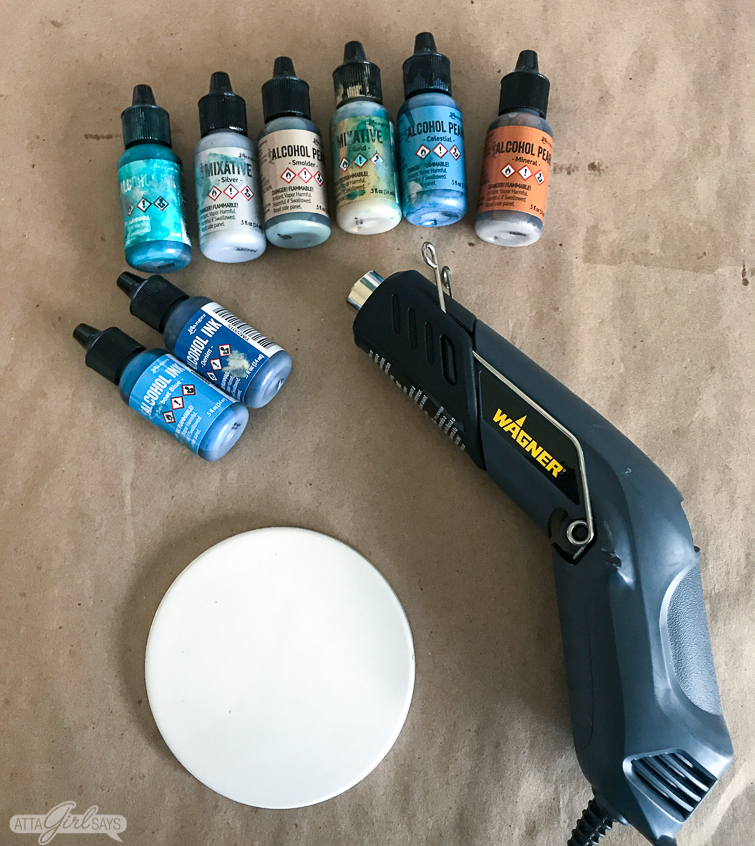
I’ve been obsessed with heat gun projects lately — embossing, foiling and wood burning all the things with my Wagner heat guns. For the alcohol ink coasters, I used the Wagner HT400 heat gun that is perfect for all kinds of crafts and small household projects.
Supplies to Make Alcohol Ink Coasters
- Wagner HT400 heat gun
- White ceramic glazed tiles or coasters (I found my round glazed coasters at Michael’s, but you can also use glazed tiles from the hardware store)
- Alcohol Inks (I used an assortment of blue and aqua alcohol inks, metallic mixatives and alcohol pearl inks)
- Rubber gloves
- Dropcloth
- Rubbing alcohol in a spray bottle (optional)
- Fine-grit sandpaper (optional)
- Inexpensive child’s paint brush (optional)
- Dishwasher safe decoupage medium or clear spray sealer
- Foam brush
- Adhesive felt pads
How to Make Alcohol Ink Coasters
Before starting, make sure you protect your work surface with plastic sheeting, a trash bag or a nonporous dropcloth. Alcohol inks will bleed through paper and stain the surface beneath. It’s also a good idea to wear rubber gloves to avoid staining your hands with the inks.

Shake alcohol inks, especially the metallic and pearlescent colors, well before using. Add random drops of the regular alcohol inks, metallic inks and alcohol pearls on the glazed tile. (Make sure you’re using a glazed tile and not a porous one for best results.)

You can add drops of color inside other colors to create cool effects.

Starting on low setting, use the heat gun to make the ink flow to create marbleized patterns. For better ink flow, you can spritz the coaster lightly with alcohol. This will dilute the colors and make them less vibrant, but you can get some cool patterns.

Apply more heat and move the heat gun closer to the surface of the coaster to add texture. As the inks heat up, they will begin to bubble.
Be mindful that the ceramic coasters will be hot to the touch when using the heat gun. It’s best to let them cool before handling the coasters.

Continue adding drops of alcohol ink and applying heat until the entire coaster is covered with pigment. As the inks dry, you may want to layer different colors on top of one another to achieve unique effects.
You can create the look of veining by tilting the coasters from side to side and allowing the ink to flow freely. I find that you get the most natural looking flow when you tilt the tiles slowly.

If you like, you can an inexpensive child’s paint brush to brush the ink on the sides of the coasters and to create an impressionistic effect on the top.
Allow the coasters to dry for several hours or overnight. Once the coasters are completely dry, you can use a fine grit sandpaper to smooth out any unwanted texture. Or you may opt to leave the texture.
Seal the coasters before use by applying several coats of dishwasher-safe decoupage medium with a foam brush. Use a light hand when applying the first coat, and make sure the ink is completely dry first. You can also spray them with a clear, gloss sealer.

Apply adhesive felt pads to the bottom of the coasters to protect furniture.
Pin This! Marbleized Alcohol Ink Coasters
Every month, I’m sharing a new DIY project in partnership with Wagner using their paint sprayers, heat guns, rollers and other tools to inspire you to try them out for your own DIY projects.
Don’t miss these other projects of mine using Wagner products:
- DIY Outdoor Farmhouse Sink
- Painted Outdoor Furniture Makeover
- How to Paint Windsor Chairs Without Losing your Mind
- Removing Veneer with a Heat Gun
- Outdoor Bistro Chairs Makeover
- Tween Bed Makeover
- Painting Bamboo & Rattan Furniture with a Sprayer
- Nightstand with Faux Zinc Top Makeover
- Embossed Chalkboard Tags
- DIY Folding Camp Stool with Wood Burned Finish
- How to Paint a Ceiling Medallion
- Metallic Foiled Chinoiserie Christmas Ornaments
- Painted Christmas Tree Collar
Donna Bundrant
LOVE the coasters. … attempting To make today for a show this weekend hope they come out …..I don’t have the pearl alcohol ink it’s coming Tuesday but anyway going to try thank you so much for sharing this