

If you don’t have an embossing heat gun in your craft toolbox, you need one. You can use a heat gun to emboss all sorts of things, including paper, wood, chalkboards and metal, using rubber stamps, embossing inks and embossing markers. Once you try this easy and cool technique, you’ll be hooked!
This is a sponsored post, and it contains affiliate links for your shopping convenience. Read my full disclosure policy here.
I get downright giddy when I learn a new crafting technique or when I get to try out a new crafting tool. I had so much fun playing with the new Wagner HT400 heat gun that is perfect for all kinds of crafts and small household projects.

I used the HT400 to emboss some chalkboard clips — and lots of other things, too, using rubber stamps, embossing ink and embossing powder.
I kinda went crazy embossing all the things — paper, metal, glass, wood, chalkboards. So, expect to see some more posts from me about this fun technique as I finish up some of those projects. Seriously, I had so much fun with this heat gun. I got lost in the creative process and spent way more time “playing” than I intended.
And when you see the magic that is heat embossing, you’ll understand why!
Pretty cool, right?
What is embossing?
Embossing is a technique used to create a raised design on a surface, like paper, metal, leather or cloth. Traditionally, you would use special dies to create the raised design.
When you encounter fancy stationery, like wedding invitations or high-end business cards, many have embossed printing.
You can create the same effect using special embossing ink, embossing powder, rubber stamps and a heat gun. This process works on a variety of surfaces, including metal, paper, wood, cloth and glass.
What supplies do I need for embossing?
To begin embossing, you will need the following supplies
- An embossing heat gun, like the Wagner HT400
- embossing ink pad or embossing pens
- rubber stamps
- embossing powder
- surface for embossing
- funnel tray
- embossing buddy anti-static pad

How to Emboss with a Heat Gun
Since it is almost fall, I decided to emboss some wood chalkboard clips to use as part of fall tablescape. I found my chalkboard clips in the dollar section at Target, but you can purchase similar ones here.
Before applying the stamped image your surface, it’s helpful to go over the surface with an anti-static pad, also known as an embossing buddy. This prevents the embossing powder from sticking anywhere but to the ink. If you don’t want to buy an embossing buddy, you can make your own using baby powder and a sock.
Don’t worry about any residue left behind by the anti-static pad. Once the project has been embossed and completely cooled, you can use a lint-free cloth to remove any residue.
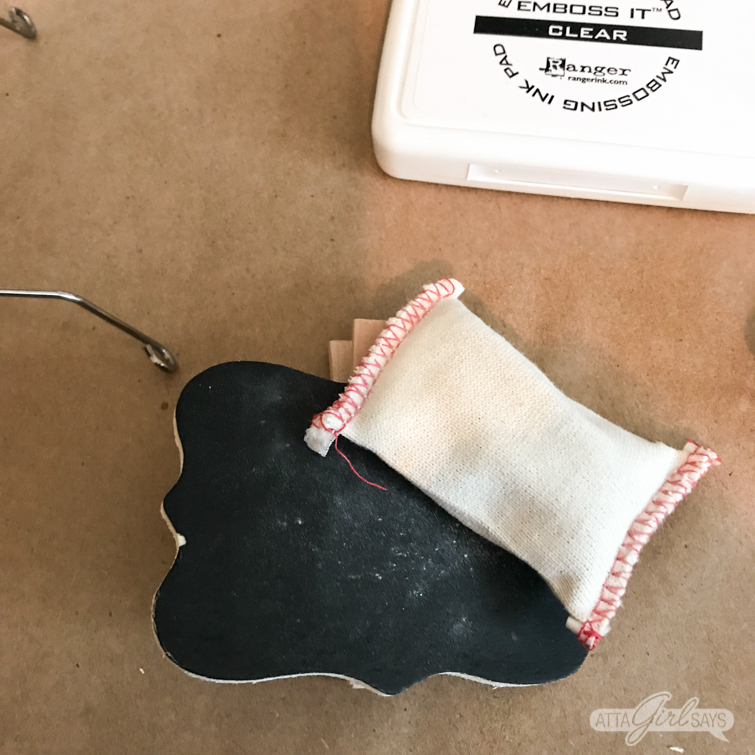
Once you’ve rubbed or patted the embossing buddy over the surface, you can apply the stamped image using an embossing ink pad.

Make sure you get ink on the entire raised surface of the stamp.

Press the inked stamp firmly onto the surface, being careful not to smudge the design as you’re stamping.

You’ll be able to see the outline of the design on the surface. On lighter surfaces, the embossing ink may appear pink while wet.
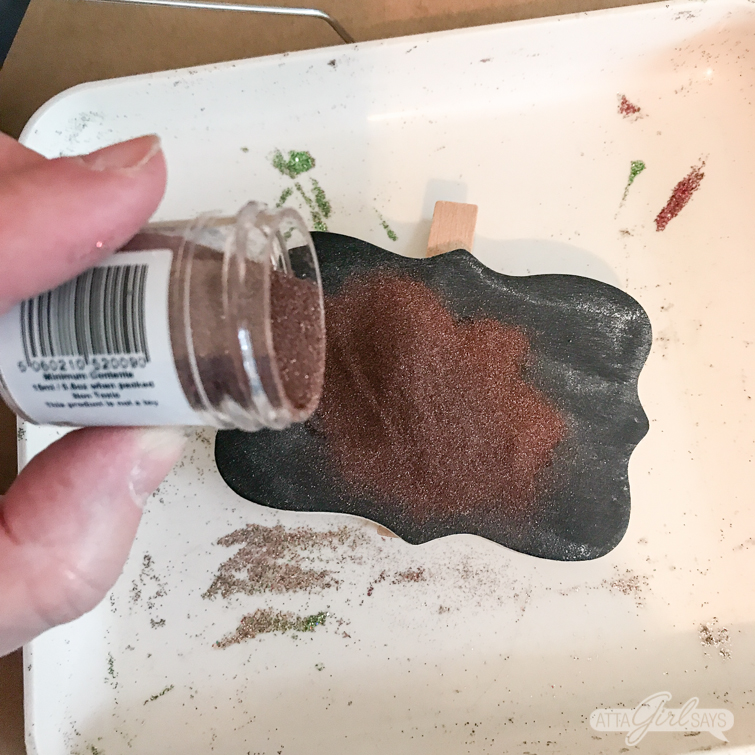
While the ink is still wet, sprinkle embossing powder over the stamped design. (I used a copper metallic embossing powder for this project.) Do this over a funnel tray or a clean sheet of paper so you can easily return any unused embossing powder to the container.
Shake off any excess embossing powder into the tray.

The embossing powder will stick to the stamped design.

Now, it’s time to apply heat to the stamped image to create the raised or embossed design.
While I love my Wagner Furno heat gun for DIY projects like wood burning, stripping paint and removing veneer, the HT400 is perfectly suited for small projects and crafts like heat embossing.
It’s compact and fits comfortably into your hand in multiple positions. You can grip it like a pencil or hold it in the palm of your hand, or you can stand it upright and use it hands free.
It also has two heat settings — LOW (450° F) or HIGH (680°F) — depending on the project. When you’re embossing, I suggest you start out on the low setting so as not to damage the surface.

As you apply the heat, the powder will begin to melt and transform right before your eyes. It is truly magical to see the raised design emerge. I particularly like working with fine metallic embossing powders.

As I mentioned earlier, you can use the embossing heat gun to add raised designs to a variety of surfaces. I had some metal cachepots in my craft stash, and I decided to try the technique on them, as well.

It’s easiest if the surface you’re embossing is flat instead of curved. You’ll get a sharper stamped image that way.

One word of caution when you’re doing heat embossing: the surface will get hot and could burn you. Allow it to cool before touching or moving, or wear heat-protective gloves.The metal tip of the heat gun also gets hot, so be careful not to touch it.

For this particular cachepot, I added a tree stamp and used silver embossing powder.
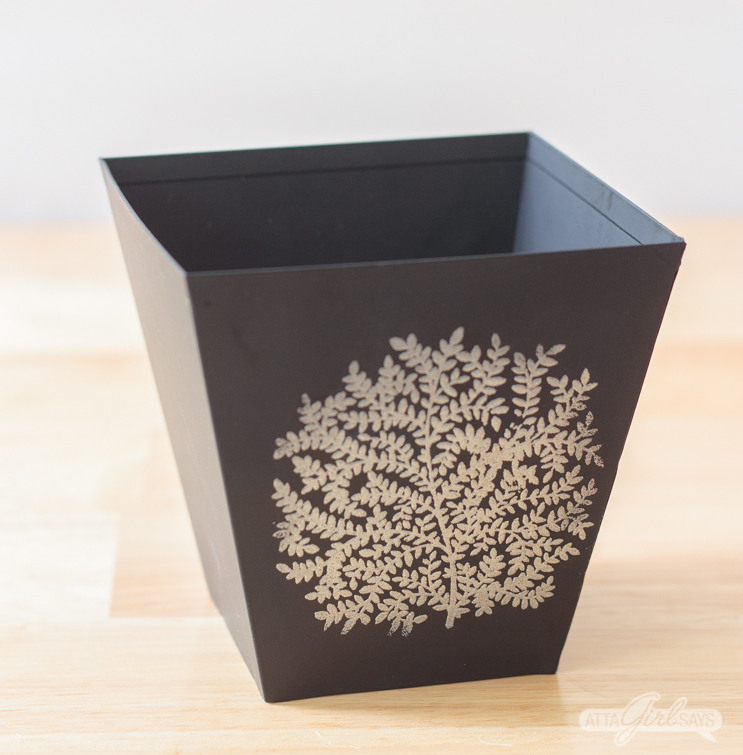
I love how the metallic embossed design pops against the black surface!
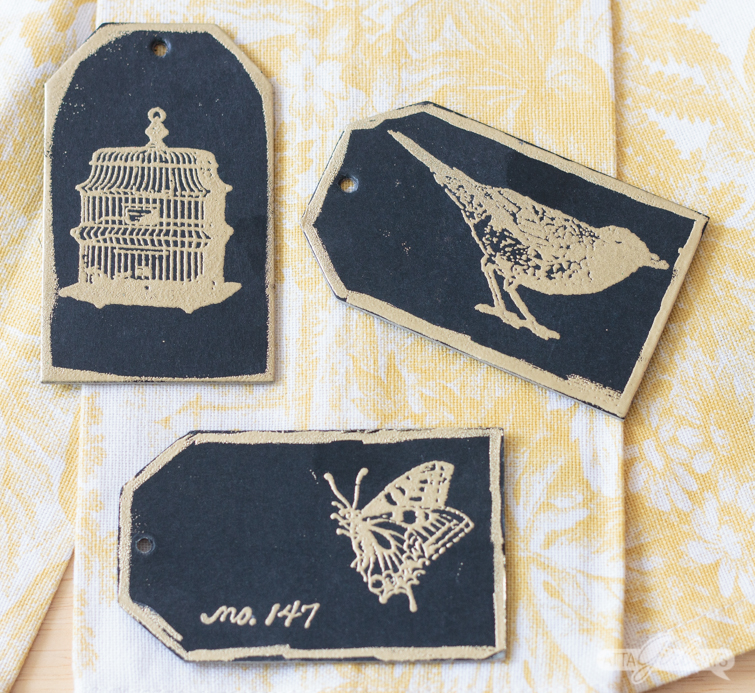
I also used gold embossing powder on some black chipboard tags. To create the intentionally messy gilded edge, I used a brush tip embossing marker.

I can’t wait to begin incorporate these embossed projects into my seasonal and holiday decor. And you can be assured that I’ll be embossing more things with my Wagner HT400 heat gun.
Pin This! How to Emboss with a Heat Gun

More Wagner Projects to Inspire You
Every month, I’m sharing a new DIY project in partnership with Wagner using their paint sprayers, heat guns, rollers and other tools to inspire you to try them out for your own DIY projects.
Don’t miss these other projects of mine using Wagner products:
Leave a Reply