
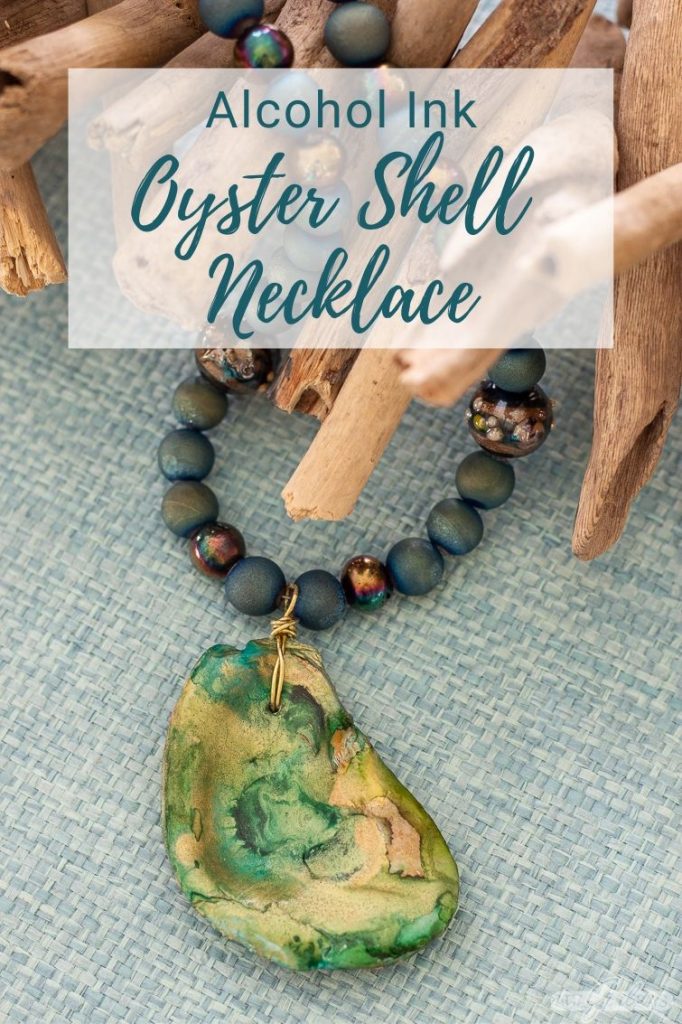
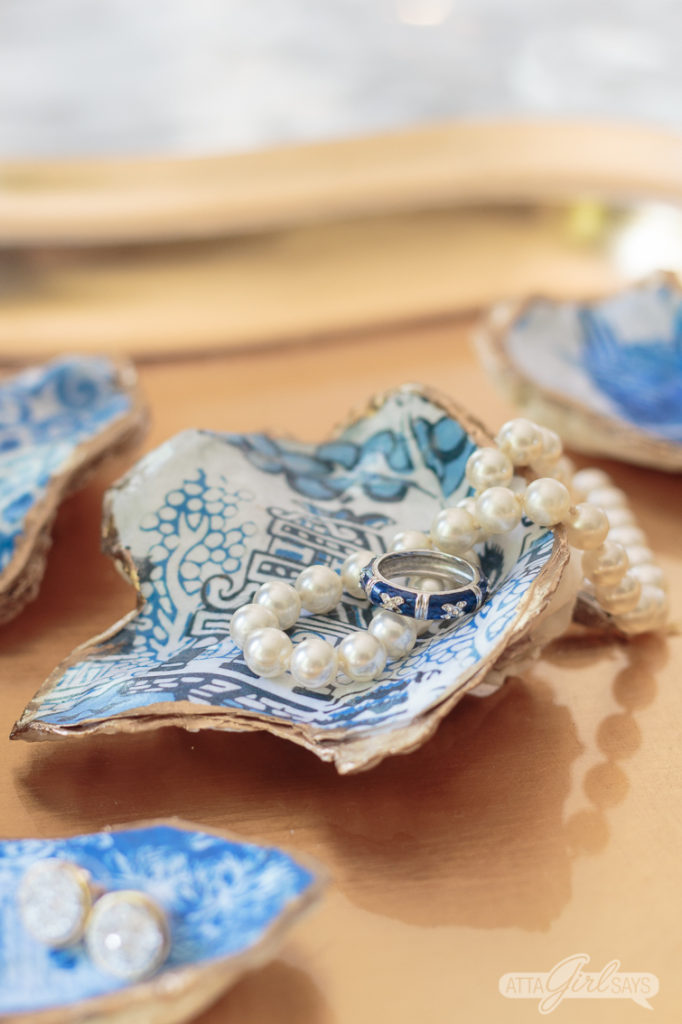
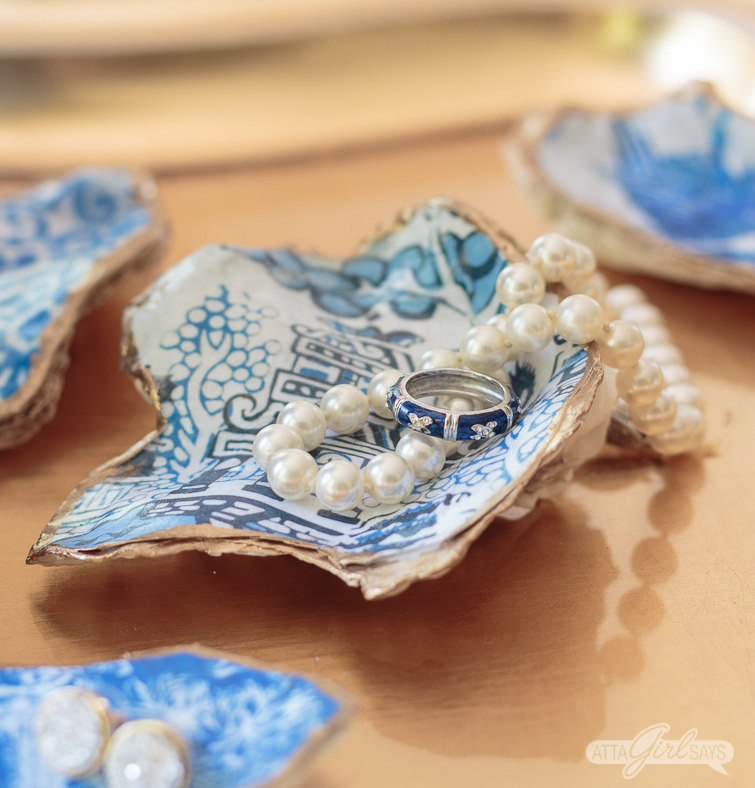
Learn how to make a one-of-a-kind oyster shell necklace using alcohol inks and pretty beads. You can use the same technique on other types of shells or to make an oyster shell jewelry dish.
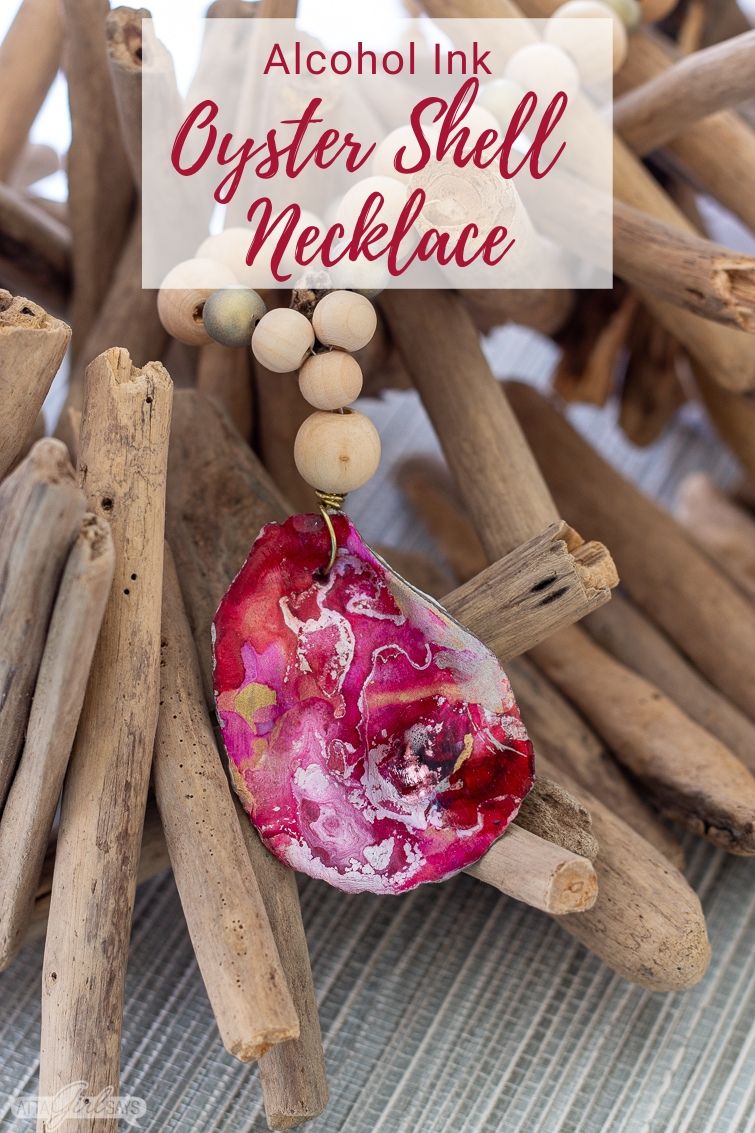
What’s more coastal chic than a beaded oyster shell necklace?

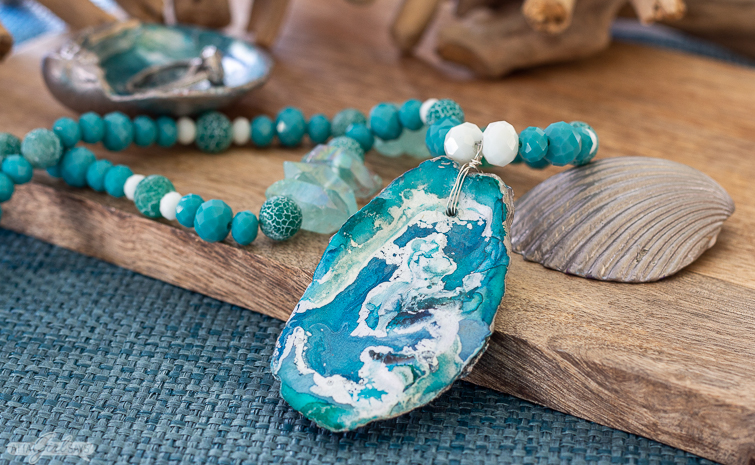
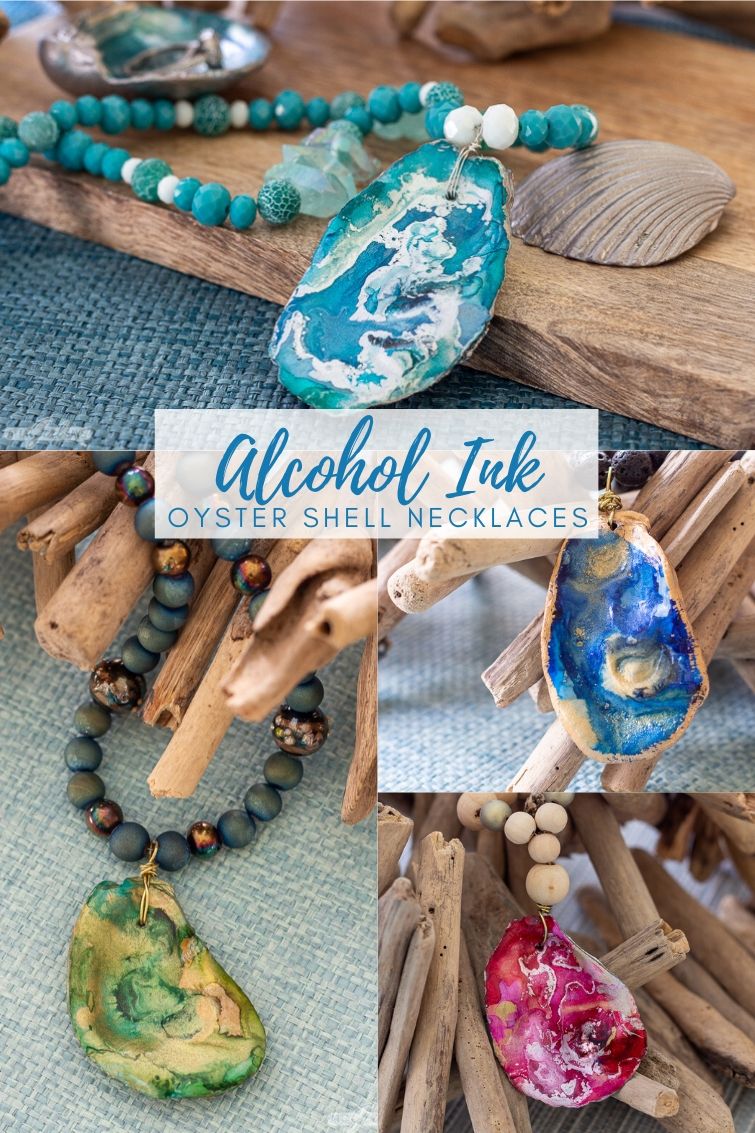
But these oyster shell pendants are unlike any you’ve seen before with stunning swirls of vibrant colors and metallics.
After your positive reaction to the oyster shell jewelry dishes and blue and white chinoiserie oyster shells I made, I started brainstorming other ways to craft with the shells.
I used the same process I used for these alcohol ink coasters to make these swirly, marbleized oyster shells. Large shells can be used as jewelry dishes or salt cellars, and smaller ones can be turned into pendants for beaded oyster shell necklaces.
This post may contain affiliate links. AttaGirlSays.com is a participant in the Amazon Services LLC Associates Program, an affiliate advertising program designed to provide a means for sites to earn advertising fees by advertising and linking to amazon.com. Read my full disclosure policy here.
Jump to:
Colorful Alcohol Ink Oyster Shells

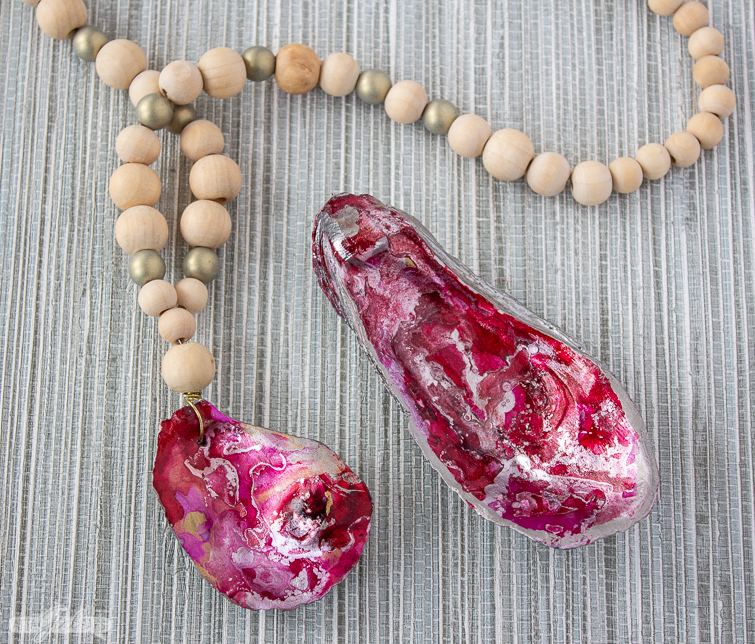
Look at those beautiful colors and patterns!

You can use this same technique on all types of shells, not just oyster shells!
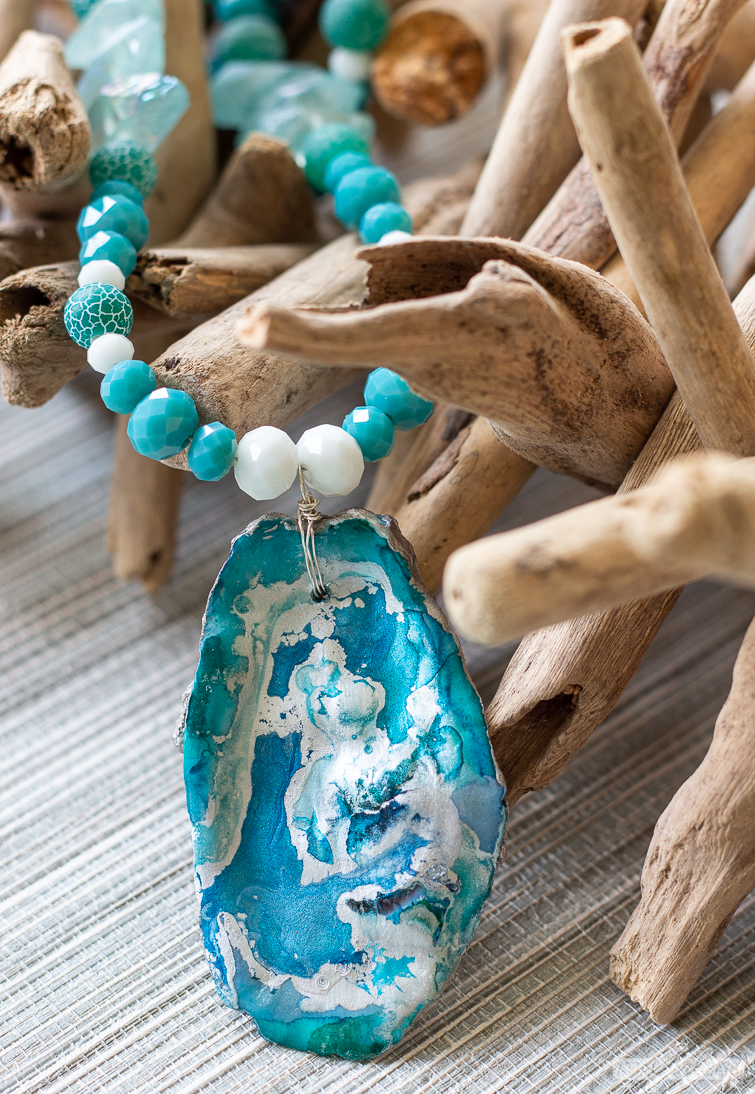
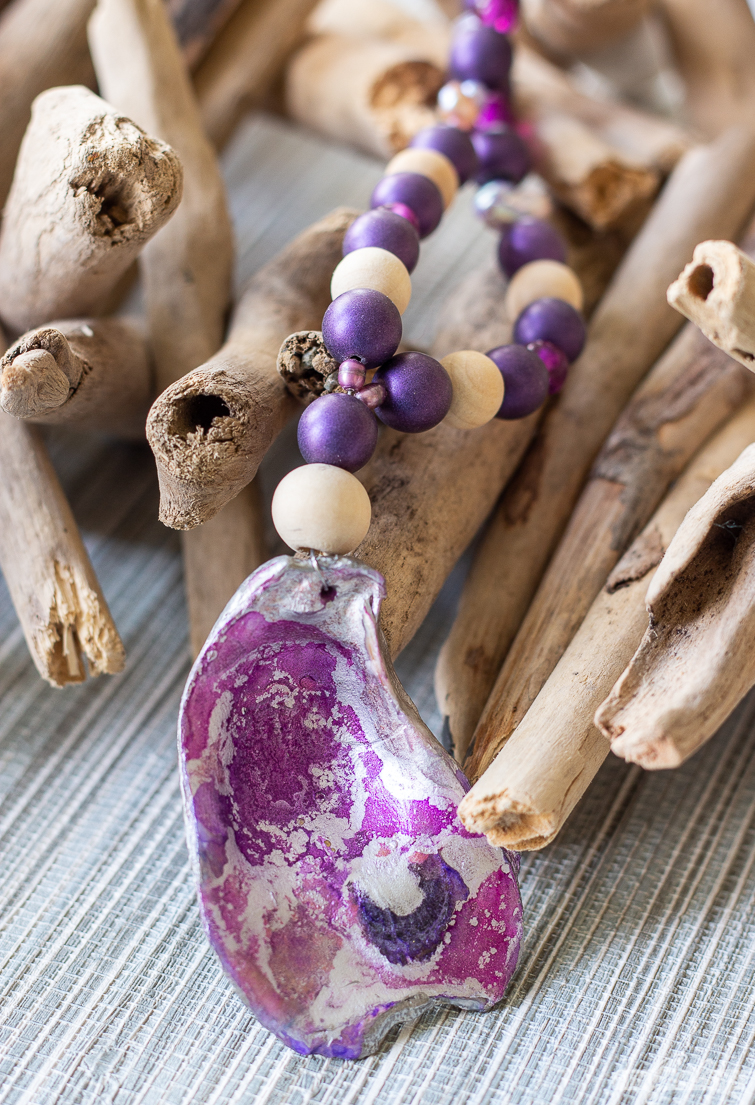
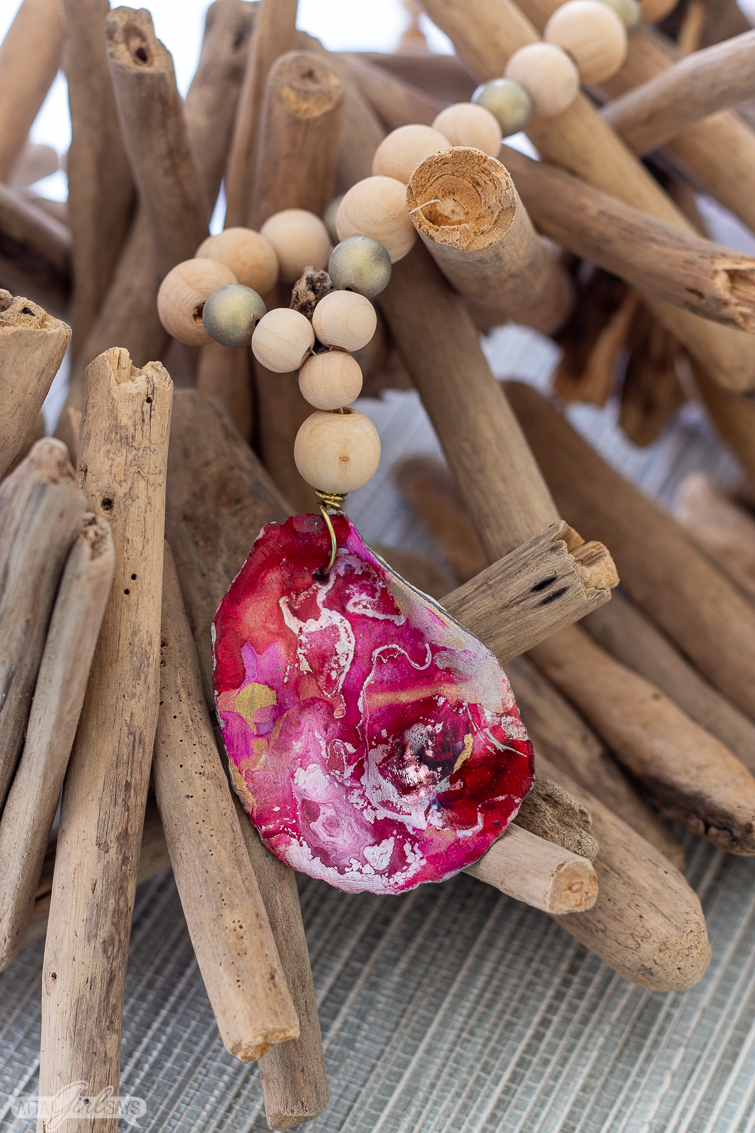
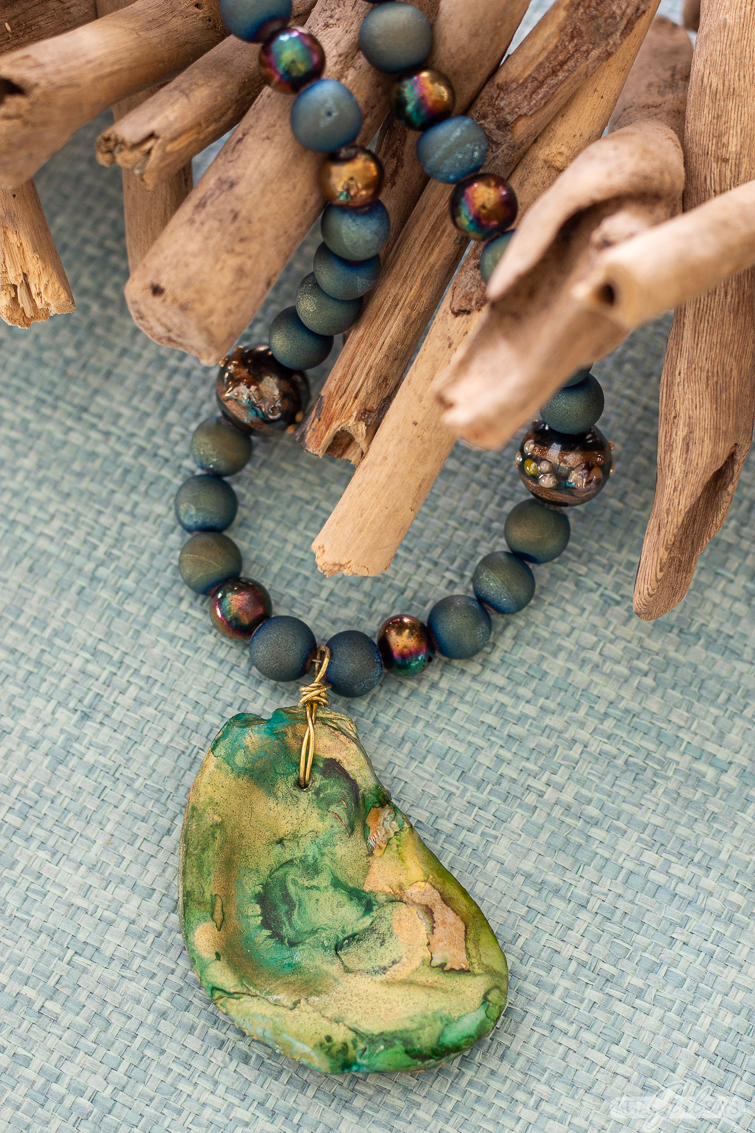
I love that each oyster shell necklace is unique, the pattern determined by the shape of the shell and the way the different alcohol inks flow together.
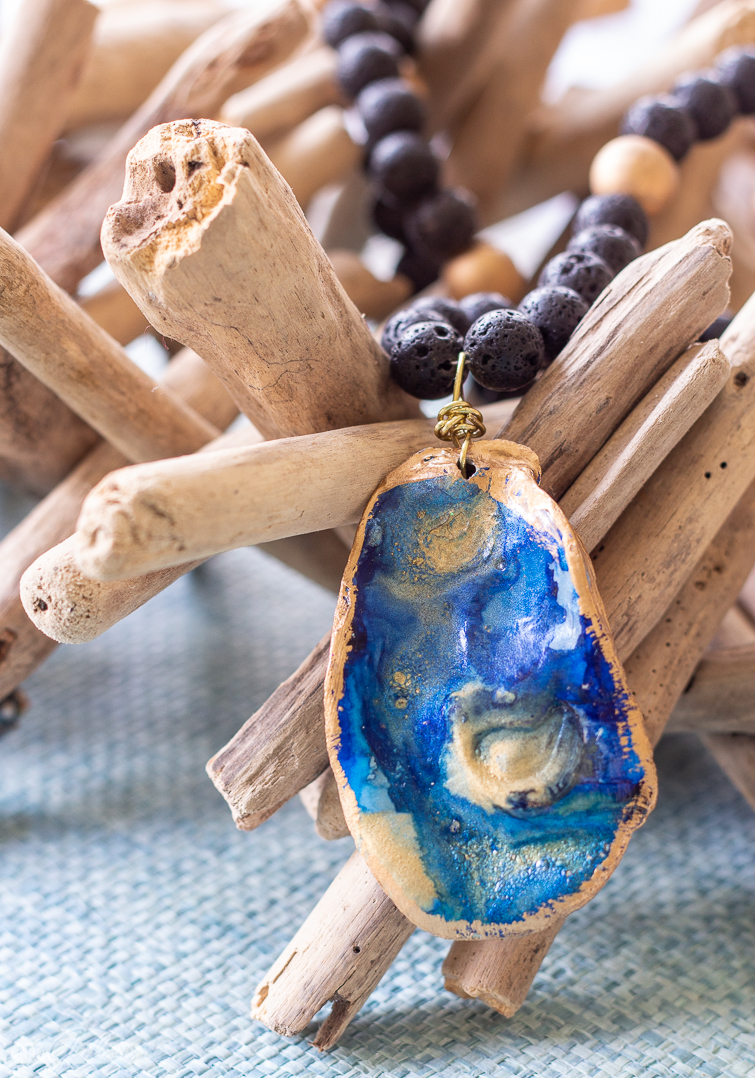
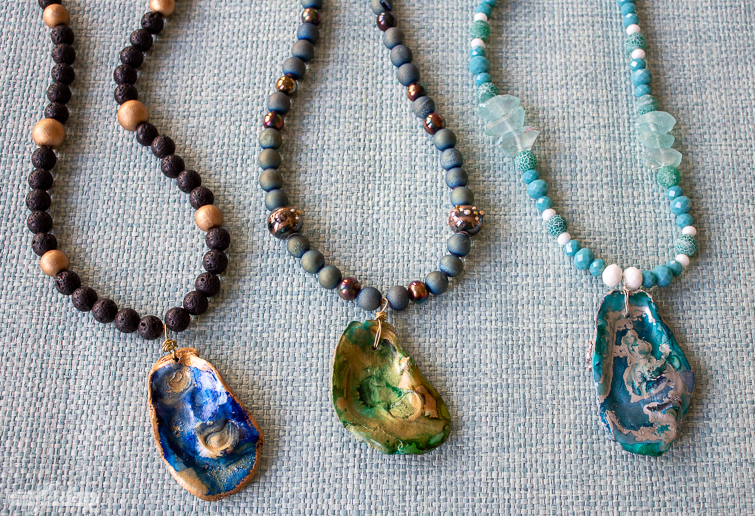
This oyster shell necklace kind of reminds me of Van Gogh’s “Starry Night” because of the gold swirls on the deep blue background.
But they’re all so pretty and unique; I can’t pick a favorite.
More Oyster Shell and Seashell Crafts


Before we get to today’s tutorial where I explain step-by-step how to decorate oyster shells with alcohol inks, you might want to check other these other crafts using oyster shell and sea shells.
- Blue & White Chinoiserie Oyster Shells
- Oyster Shell Jewelry Dishes
- Oyster Shell Candles
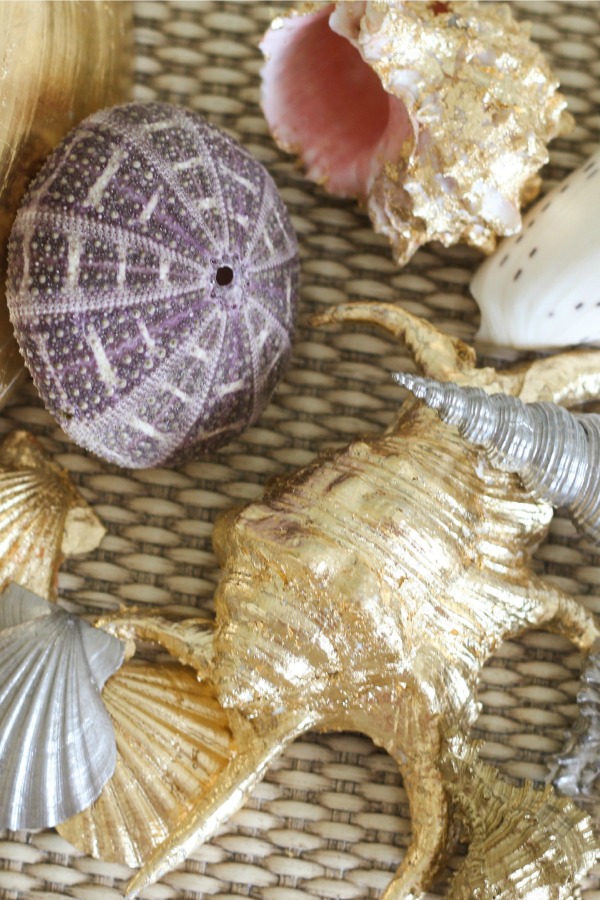
- Gilded Seashells
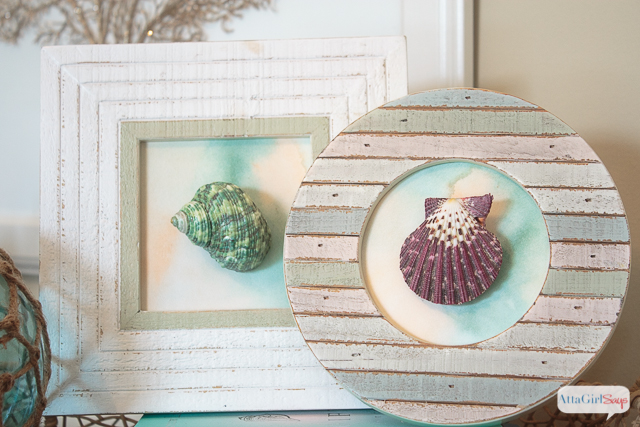
- DIY Seashell Artwork
- 25+ Gorgeous Seashell Crafts to Make
Supplies to Make Alcohol Ink Oyster Shells
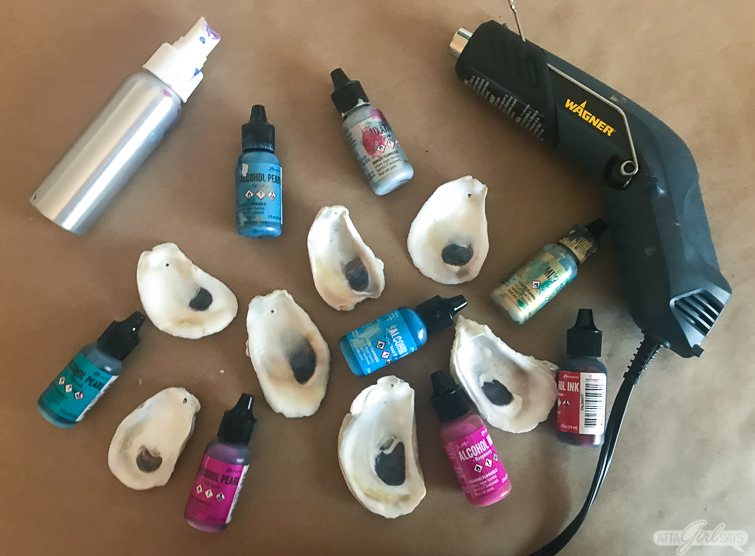
- drill with small bit
- work gloves
- craft heat gun
- White ceramic glazed tiles or coasters (I found my round glazed coasters at Michael’s, but you can also use glazed tiles from the hardware store)
- Alcohol Inks (I used an assortment of blue and aqua alcohol inks, pink and red alcohol inks, metallic mixatives and alcohol pearl inks)
- Rubber gloves
- Dropcloth or plastic
- Rubbing alcohol in a spray bottle (optional)
- Liquid leaf
- Inexpensive artist’s paint brush
- Glossy decoupage medium or clear spray sealer
- Foam brush

Additional Supplies for Beaded Necklaces
- Tiger Tail beading wire
- Beading wire
- Assorted beads
- Crimp tubes and crimp covers
- Crimping pliers or needle nose pliers
- Necklace clasps
How To Make An Alcohol Ink Oyster Shell
To make the pendants for the oyster shell necklaces, I used smaller shells than the ones I used for the jewelry dishes.
For pendants, look for oyster shells that are 2 to 3 inches in length. For jewelry or trinket dishes, go with larger oyster shells that are 4 to 5 inches long.
If you’re not able to find any oyster shells while beachcombing, you may be able to get them from seafood restaurants. Or you can purchase oyster shells online, which is what I did for this particular project. That saves you the hassle of having to clean them.
When choosing oyster shells for pendants, look for ones without any sharp edges that could snag clothing. You also want ones without a thick hinge since that’s the part you’ll be drilling through to make the pendant.
(You can buy pre-drilled oyster shells, but you may not like the hole placement.)
Use a small drill bit to drill a hole near the top of the oyster shell.
Oyster shells are relatively easy to drill through. But you’ll want to be careful, since you’re drilling through a small, uneven surface. You don’t want the drill to slip and hurt your hand. It’s a good idea to wear work glove and safety goggles.
Once you’ve drilled the holes in your oyster shells, clean them thoroughly of any dust or grit. I usually just wipe them down with a damp cloth and allow them to dry before applying the alcohol inks.
I have a full tutorial for working with alcohol inks here. It will walk you step-by-step through the process of creating pattern and texture with alcohol ink.
Always make sure you protect your work surface when using alcohol inks. Use a nonporous dropcloth or layer plastic under kraft paper to avoid staining your craft table.
Wear plastic gloves to avoid staining your hands.
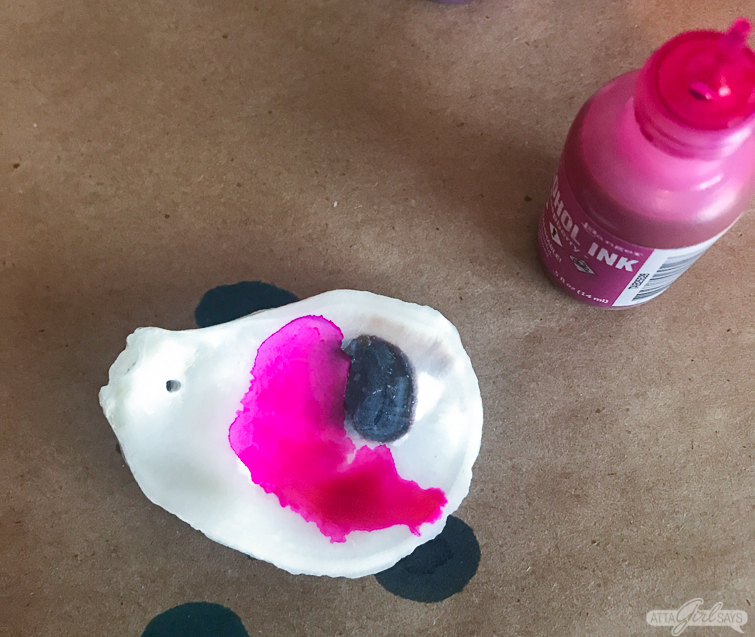
To create these oyster shell necklaces, I began by adding drops of ink on the oyster shells and letting them flow naturally.

I like layering different colors of alcohol inks, along with alcohol pearl inks and metallic mixatives. But you don’t have to buy a lot of colors to create beautiful pendants. A couple of regular alcohol inks, a pearl and a metallic or two will produce a nice effect.
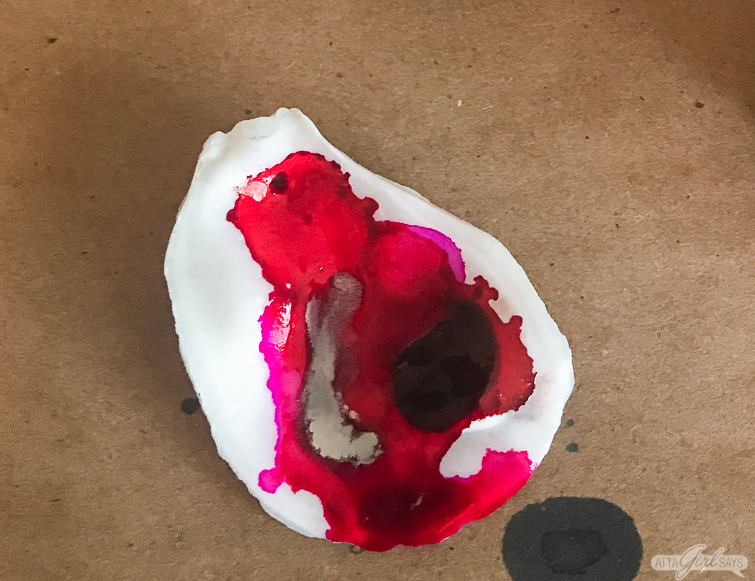
Once you’ve applied a few drops of the ink, slowly tilt the oyster shell to allow the colors to swirl and blend together.
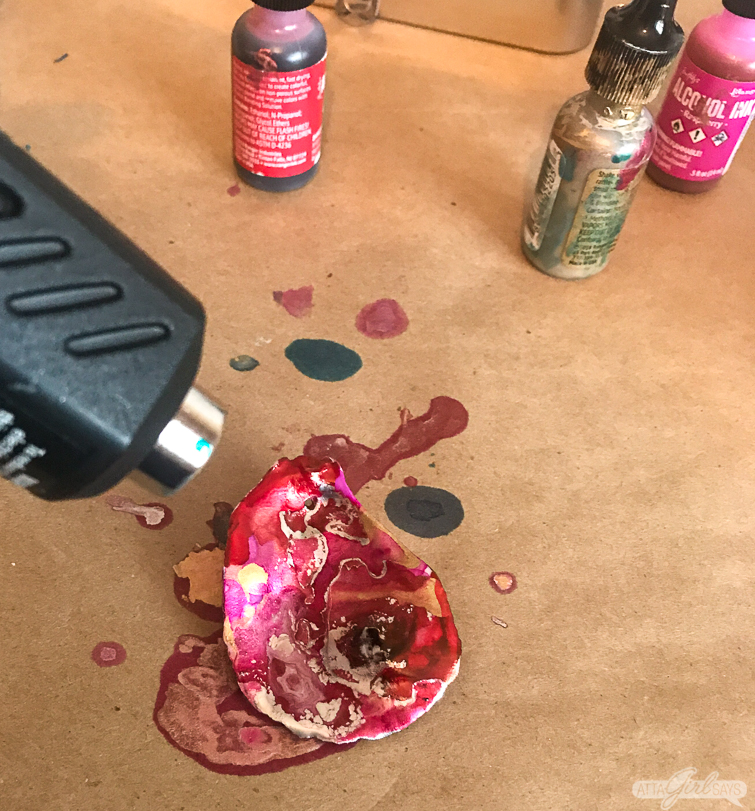
You can also use a craft heat gun (or even a hair dryer) set on low to move the ink around on the shell’s surface. Be careful when handling the oyster shells after using the heat gun.
For more movement, but less saturated color, spritz the shell lightly with alcohol to dilute the inks. Tilt the shell to swirl the color around, and use the a heat gun to quickly dry the inks.
My post on making alcohol ink coasters includes a full tutorial and lots of tips for getting different textures and effects. You can check that out here.
For best results, I recommend applying several layers of inks to fully coat each shell and get the desired effect.
Have fun and enjoy the artistic endeavor!
Once the shell is decorated to your liking, set aside and allow the ink to dry completely. (You can use a heat gun to speed up the process.)
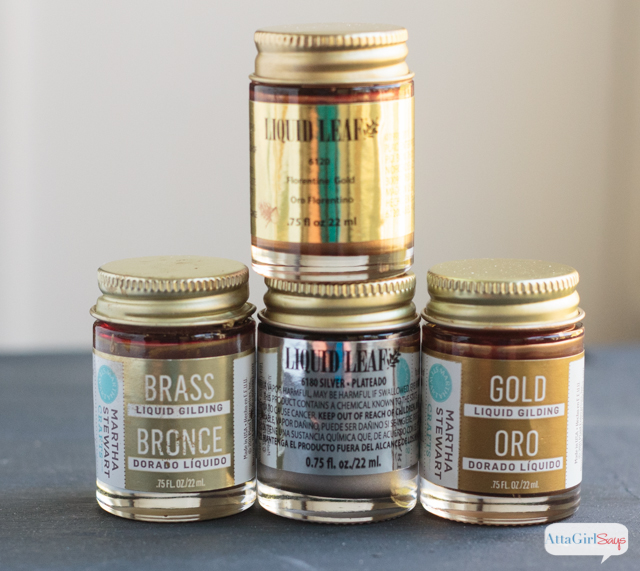
Using an inexpensive artist’s or student paintbrush, apply liquid leaf to the back of the oyster shell and around the edge, if desired. The liquid leaf comes in gold, brass, silver and other shades. You can find various options in the Favorite Craft Supplies section of my Amazon store.
For full instructions on how to use liquid leaf, check out this post I wrote on gilded seashells.

In making these pendants, I found that the alcohol inks did get on the backs of the oyster shells. So I added the liquid leaf to the backs to give them a finished look.
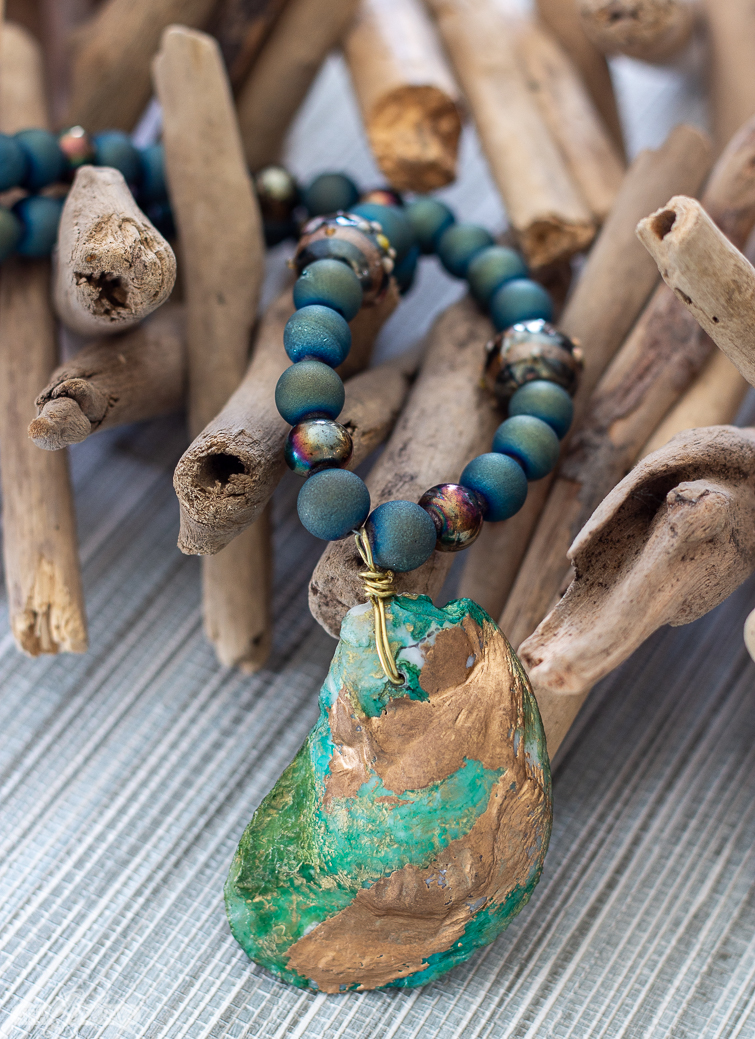
In some instances, though, I really liked how the alcohol ink looked on the back of the oyster shell pendant. So I only added the liquid leaf to the uncovered spots, as you can see in the example above.
After you’ve added the liquid leaf to the oyster shells, it’s time to seal them. I use several coats of glossy formula Mod Podge, applied with a foam brush. But you can also spray them with a gloss acrylic sealer.
How to Make An Oyster Shell Necklace
Once you’ve made the pendants, it’s time to turn them into oyster shell necklaces.
I used to make a lot of beaded bracelets and necklaces, so I already had a lot of the supplies I needed on hand. It was fun to break out my old jewelry-making tools and supplies.
While you could string these oyster shell necklaces on monofilament tied with a knot, I like using beading wire and adding a clasp.
Jewelry Making Supplies for Oyster Shell Necklaces
To make oyster shell necklaces with clasps, you’ll need the following supplies.
- Tiger Tail beading wire
- Beading wire
- Assorted beads
- Crimp tubes and crimp covers
- Crimping pliers or needle nose pliers
- Necklace clasps
- Bead board (optional)
For most of these necklaces, I looped beading wire through the hole in the oyster shell to create a hanger for the pendant.
There are different sizes or gauges of beading wire. You’ll want to pick one that fits the hole in your oyster shell while also remaining pliable. This guide to jewelry wire gauges is really helpful.
Once you’ve determined the proper gauge, thread a piece of beading wire through hole, twist to create a loop and use pliers to coil and wrap the excess wire. This video helps explain the technique.
I honestly think I used a different technique on each of these necklaces. So play around until you find a technique that works for you.
Types of Beads to Use On An Oyster Shell Necklace
I used an assortment of wooden, shell, glass and natural beads for these necklaces. Some I’ve had in my stash for years, but I also picked up some beads at Michaels.
Here are some pretty beads that would coordinate well with alcohol ink oyster shells:
- Black Lava Beads
- Aqua Shell Beads
- Bamboo Coral Beads
- Freshwater Pearl Potato Beads
- Black River Shell Lentil Beads
- Metallic Beads
- Crystal Pearl Beads
- Aqua Shell Chip Beads
- Amethyst Chip Beads
- Crackled Agate Beads
- Mixed Wooden Beads
String beads and oyster shell pendants on tiger tail wire. A bead board like this one helps you to plan out the design and ensure the necklace is long enough.
Add a decorative clasp and use crimp beads to secure.
The video below will teach you how to attach a clasp to a beaded necklace.
If you’re new to jewelry making, here’s a set of pliers and wire for coiling that will help you build your toolkit. You’ll still need to buy beading wire, aka tiger tail, clasps and crimp beads, separately if you plan to make necklaces.
Which oyster shell necklace is your favorite?
If you end up making your own, I’d love to see photos!
Pin This! Alcohol Ink Oyster Shell Necklace
Leave a Reply