
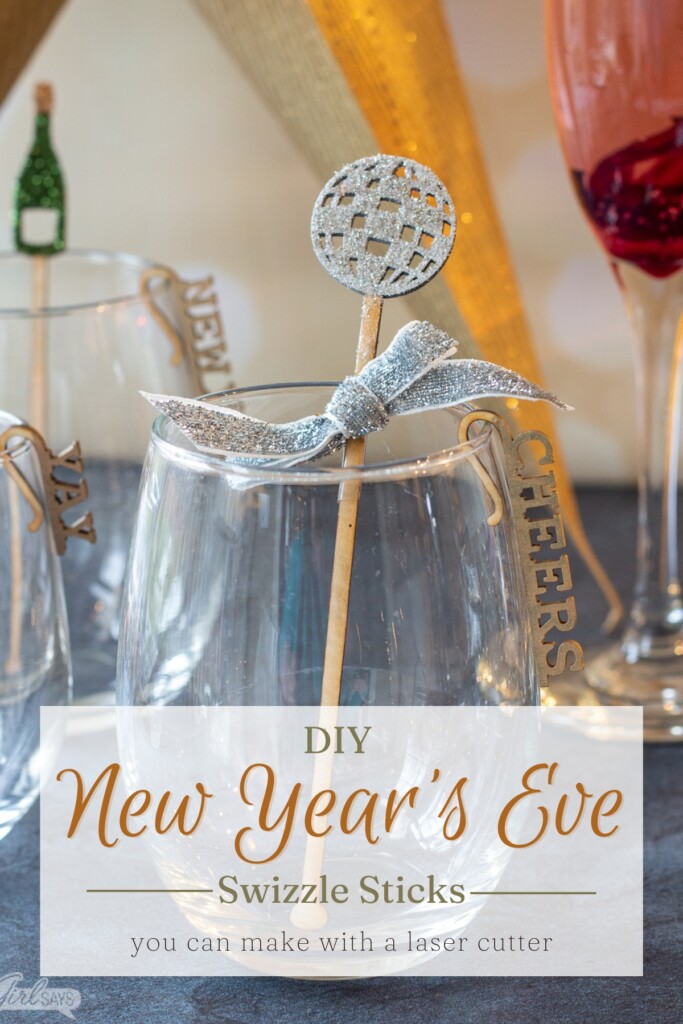
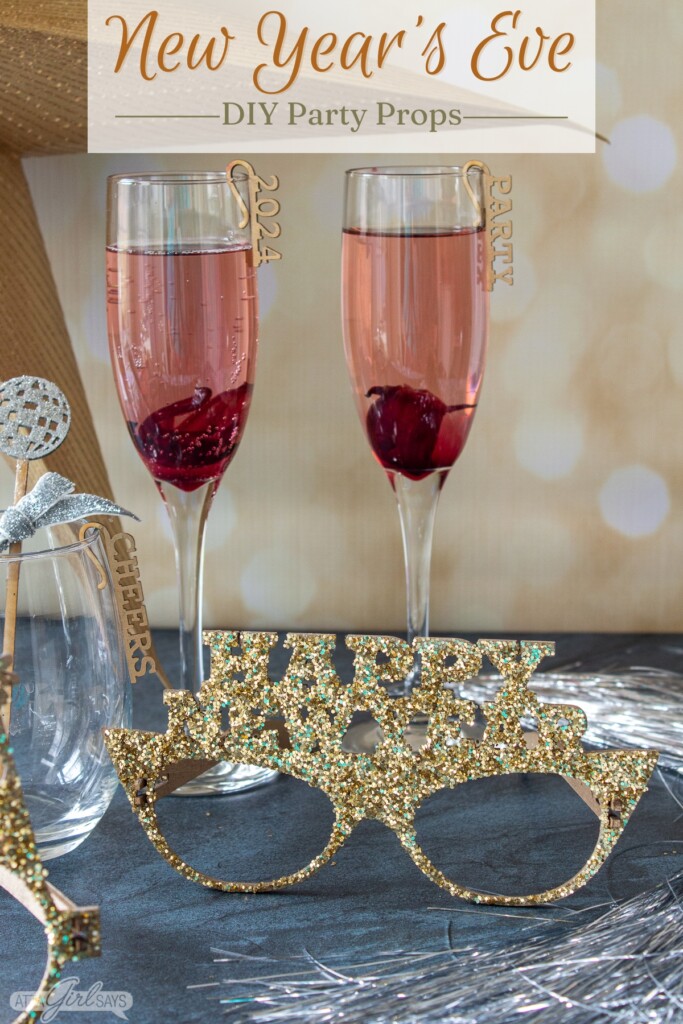
Learn how to make glittery New Year’s Eve party decorations using the xTool M1 Smart Laser Engraver and Vinyl Cutter. In this tutorial, you’ll learn how to make custom glass markers, swizzle sticks and New Year’s Eve photo booth props with the diode laser.
Whether you’re celebrating with a big party or on the couch in your pajamas, you need some festive decorations to ring in the New Year!
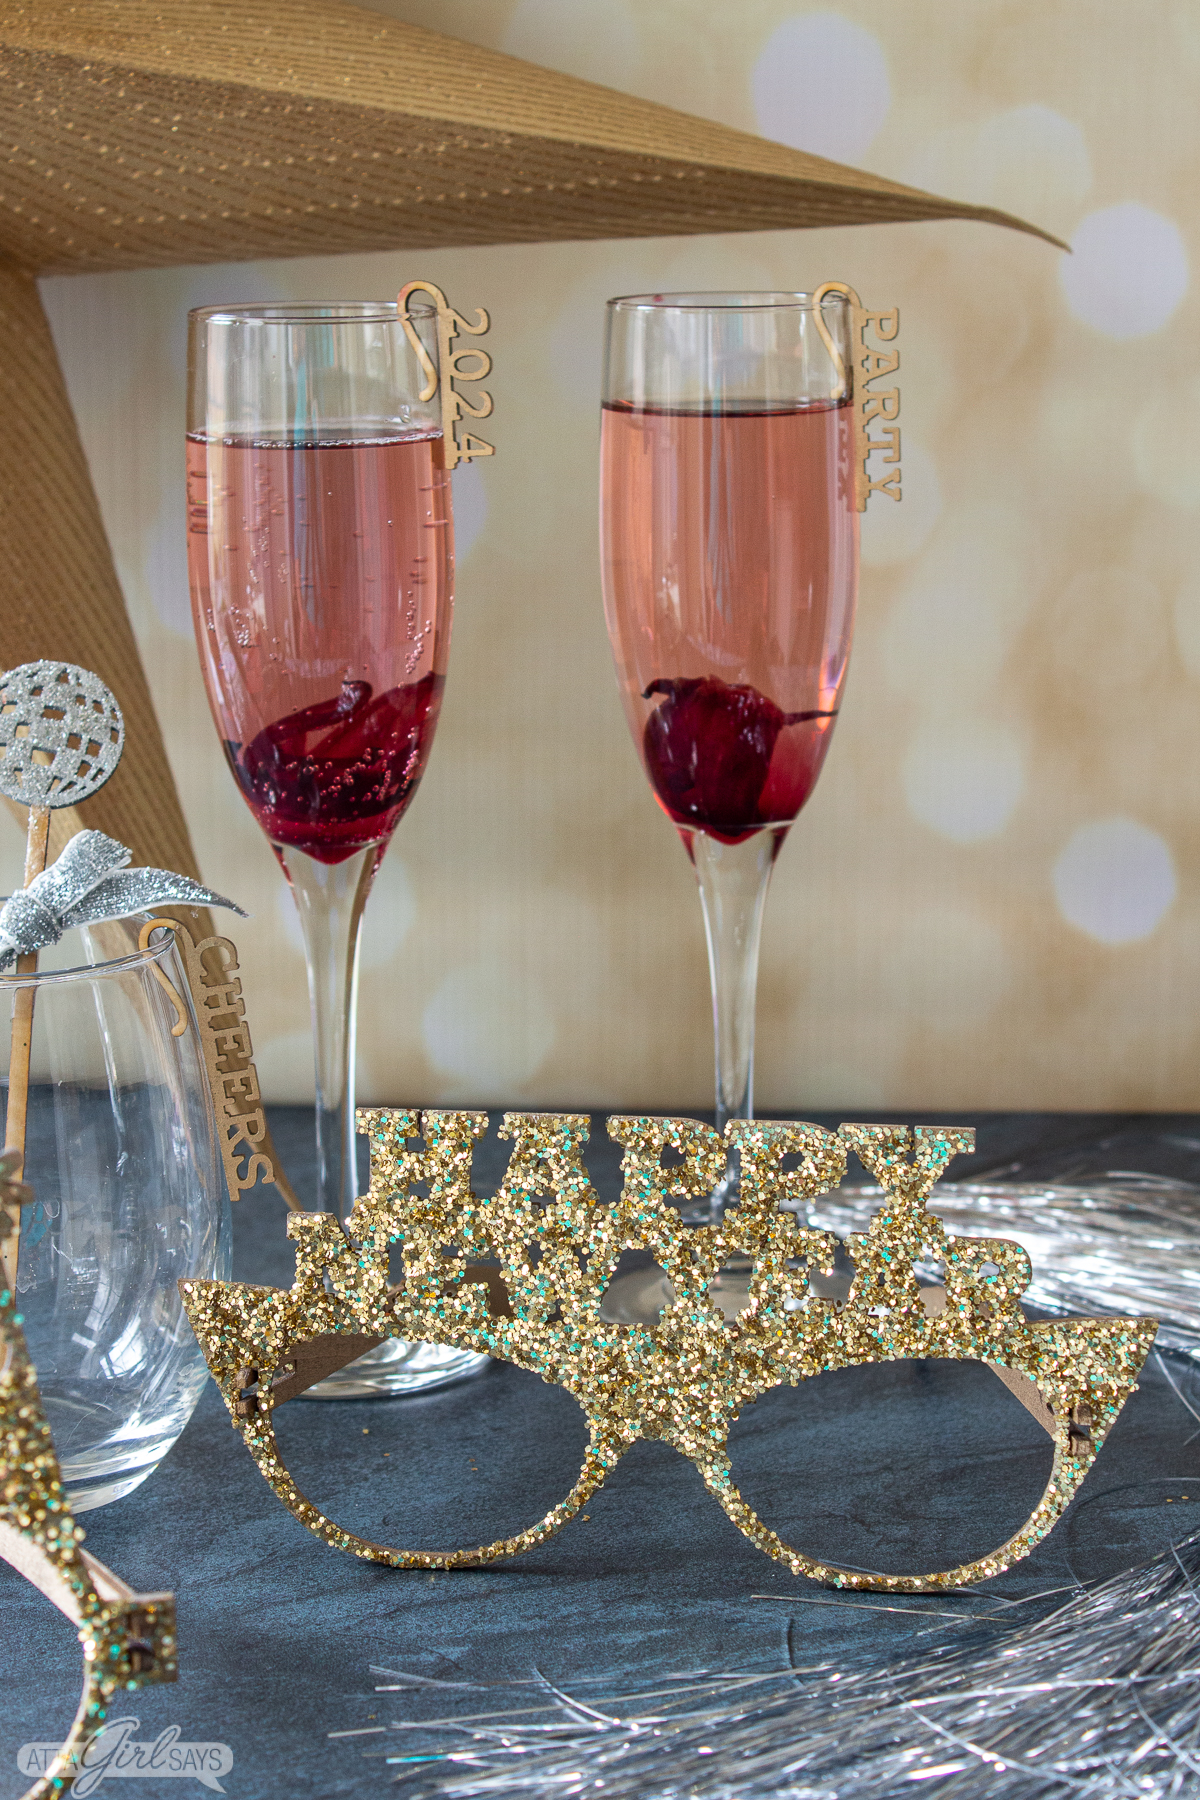
I made these golden New Year’s themed swizzle sticks, drink tags and photo booth glasses from basswood using my new xTool M1 diode laser.

This post is sponsored by xTool, but all opinions are my own. This post may contain affiliate links. AttaGirlSays.com is a participant in the Amazon Services LLC Associates Program, an affiliate advertising program designed to provide a means for sites to earn advertising fees by advertising and linking to amazon.com. Read my full disclosure policy here.
I’ve been playing around with the xTool M1 and learning all that it can do — laser cutting, engraving and vinyl cutting. I’ll be sharing a full review of the machine soon. But I just had to share this quick New Year’s Eve craft.
Supplies
To make these New Year’s Eve party decorations, you will need:
- xTool M1
- 2 3mm basswood sheets
- Gold and silver metallic spray paint
- Painter’s tape
- spray adhesive
- glitter
- cut files for the swizzle sticks, the drink markers and the eyeglasses
I purchased the laser cutting files for this project from three different etsy sellers. You can find the exact SVG files I used below:
Instructions
This was a super simple project to make with the xTool M1; it’s great for beginners.
I imported the purchased SVG files into xTool Creative Space and laid them out so they would fit on the 3mm basswood sheets I had. (You could also use acrylic sheets for the drink stirrers and markers.)

I was able to fit three pair of the New Year’s Eve novelty eyeglasses on a single basswood sheet. I cut the glass markers and drink stirrers on a scrap sheet of plywood leftover from another project.
I used the traingular prism to raise the basswood off the laser bed and used the recommended cut settings within Creative Space.
The eyeglasses took about 20 minutes to laser cut. The drink stirrers and markers were ready in just a few minutes.

Since I haven’t used the xTool M1 a lot, I wasn’t sure about placing the eyeglasses so close together. But the laser had no issues cutting them.
I didn’t use Air Assist for this project, but I did have the M1 hooked up to the xTool Smoke Purifier since it was cold outside and I was working in my garage. This meant I didn’t have to vent the laser out a door or window.

Because I didn’t use Air Assist, there was some minor scorching to the wood, but I wasn’t concerned about it since I planned to paint and glitter the novelty glasses.

There was also some scorching on the swizzle sticks and glass markers, but it didn’t really bother me.

Because I didn’t want to paint any part of the swizzle sticks or glass markers that might come into contact with drinks, I masked off those portions before spraying them.

Be careful when removing the tape, as there are some thin wooden pieces that can break.
I also spray painted the novelty glasses. You could just paint them and call the project done. But I always have to add a little extra sparkle.

I didn’t glitter the glass markers because they’re so small. But the eyeglasses and drink stirrers got the glitter treatment.

I used spray adhesive and various colors of glitter to decorate the New Year’s Eve party props.

I did use tape to mask off the part of the temple that attaches to the eyeglasses frame to make them easier to assemble. I only glittered the outside of the frames and temples, but they are painted on both sides.

These turned out so festive!
More New Year’s Eve Ideas
You might enjoy these other New Year’s Eve party ideas.
- Glittered Champagne Glasses
- Glittered Stars Party Streamers
- Printable Designated Driver Sign
- New Year’s Eve Holiday Punch
More xTool Projects
Interested in more laser cutting, etching and scoring projects for the xTool M1? Check out these fun projects:

Pin This! DIY New Year’s Eve Party Supplies

Leave a Reply