
This post is sponsored by BabbleBoxx.com on behalf of Erie Insurance. It also contains affiliate links for your shopping convenience. Read my full disclosure policy here.
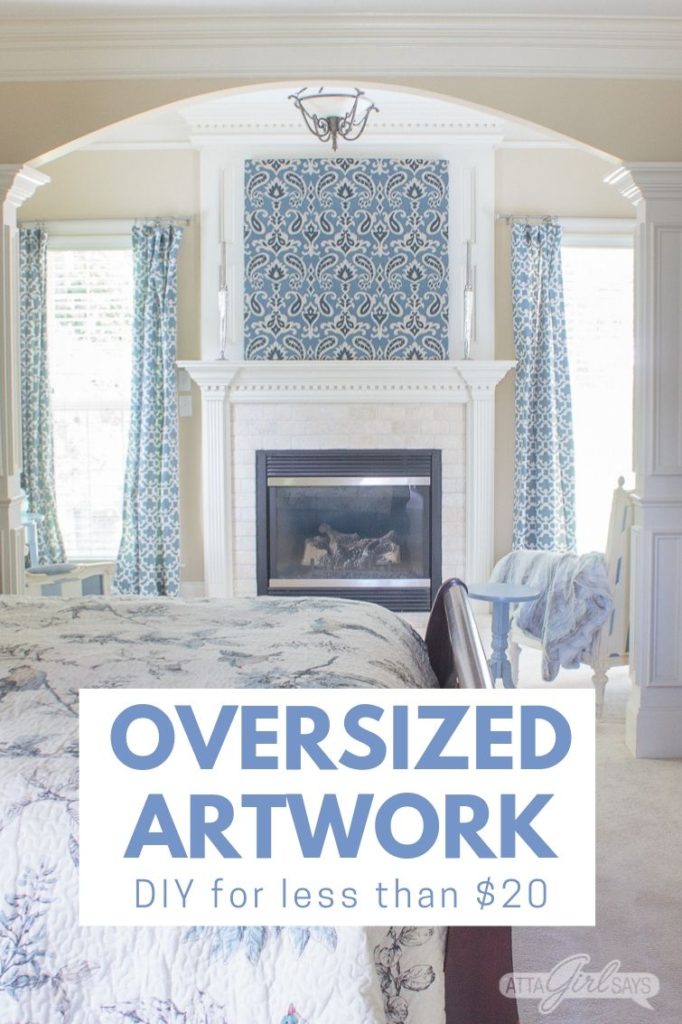
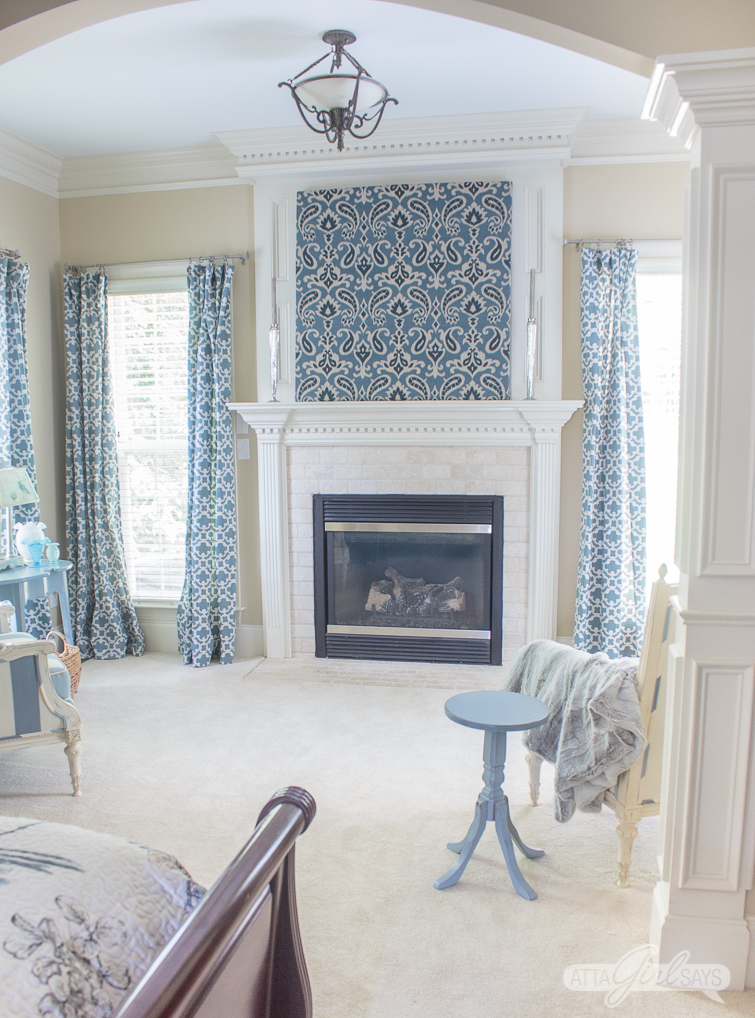
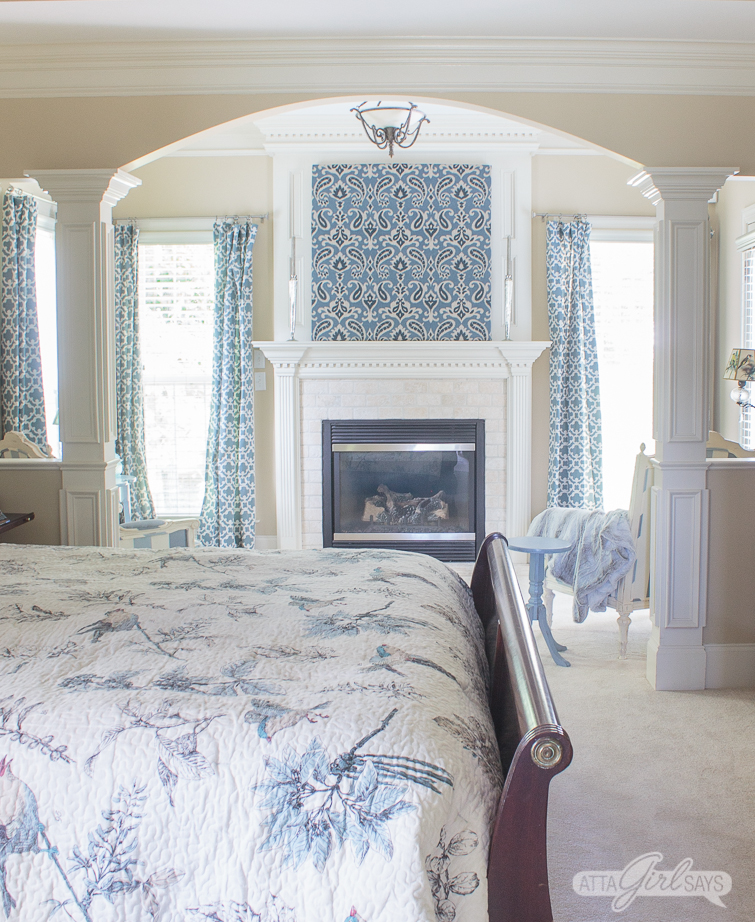
Do you have one of those awkward TV nooks over your fireplace that were so popular in construction in the late 1990s and early 2000s? I’m going to show you how you can create designer oversized canvas artwork to hide a TV over a fireplace for less than $20. This technique will also work anywhere you need inexpensive oversized artwork.
Eight years later, and we still love our dream home. But that doesn’t mean there aren’t things we would change about it or do differently if we were house hunting again — something I have in common with many homeowners, according to a new survey by Erie Insurance. For instance, I love having a cozy sitting room in our bedroom. But for 8 years, I’ve been trying to figure out a stylish, functional and inexpensive way to hide a TV over a fireplace.
I think I’ve finally done it, and for less than $20!

Gorgeous, if I do say so myself. Including shopping for the fabric and other supplies, I’m pretty sure this project took me less than an hour. It’s the best kind of DIY in my book — cheap, easy, beautiful and impactful!
I’ll show you how easy it is to create your own oversized artwork at the end of this post.
But let’s talk about house hunting, homeownership and dream home wishlists first. I’ve often uttered the phrase, “be careful what you wish for” in reference to our home, usually in the middle of some maintenance project or chore, like scrubbing fingerprints off stainless steel appliances.
Erie Insurance recently surveyed 500 U.S. homeowners about what features they looked for and got when purchasing their homes, as well as those they wished they had gotten. The survey also asked homeowners which features they would not choose again. Most homeowners were happy with the features they chose., but 47 percent admitted to some regrets. The regrets had to do with features they didn’t get in their homes, as well as things they would not choose again.
Hardwood floors, granite countertops, stainless steel appliances, fireplaces and decks topped the homeowners’ wish lists. But some people surveyed said they would not choose those coveted features again in their next home.
Like I said, be careful what you wish for when you’re house hunting.
While I wouldn’t trade our hardwood floors, granite countertops, stainless steel appliances or gas fireplaces in the bedroom and keeping room, I don’t always love the work or expense that comes with maintaining them. Chalk that up to things you don’t know until you’ve had experience with them.
The Erie Insurance survey also found that many homeowners are not fully aware of the type of insurance they need to best protect their homes. One of the most important types of coverage you can have is “guaranteed replacement coverage,” which would pay to rebuild a home in today’s dollars.
Do you know if your homeowners insurance policy includes this important coverage? Erie Insurance’s homeowners policies include guaranteed replacement cost, and every policy comes with a local agent who’s there to help you understand and feel confident about your policy. It’s always a good idea to check in with your local insurance agent to make sure you have the coverages that are right for them, especially if you’ve made any improvements to your home.
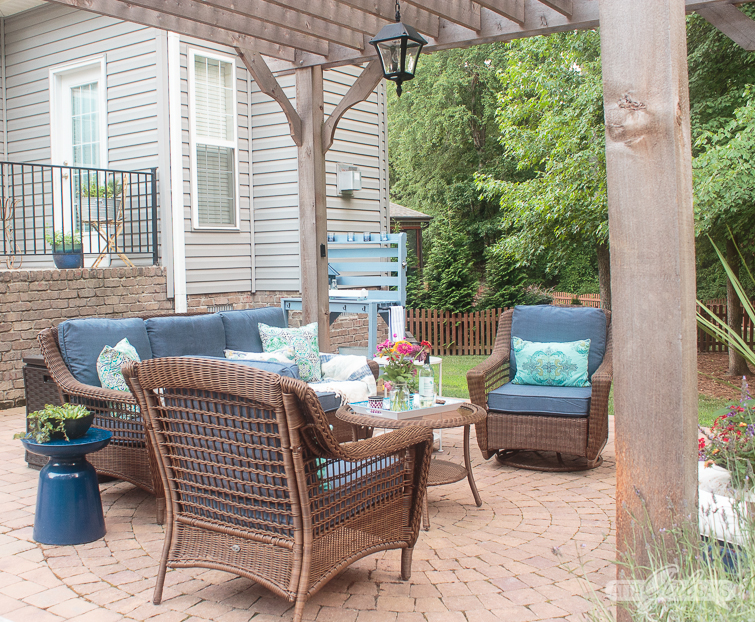
We did that after we added our outdoor entertaining area with paver patio and wooden pergola.
Now, let’s get back to that simple DIY solution to hide a TV over a fireplace.

I’ve tried other temporary solutions in the past and also looked into building cabinet doors to hide the TV. But the fabric artwork was the simplest, easies and cheapest solution so far. I spent less than $5 on wood and about $15 on fabric. And I finished it up the project while my hubby was deep cleaning our master bathroom.
I love how it makes the fabric panel makes our bedroom look. (Now lengthen those curtains and hang them higher for a true designer look!)
Supplies for Oversized Fabric Art
- furring strips
- safety glasses
- work gloves
- Circular saw
- Brad nailer
- Wood glue
- staple gun
- scissors
- fabric
Instructions for Making DIY Fabric Canvas
Use a circular saw to cut furring strips to the desired length. To cover the space and hide the TV over our fireplace, I needed artwork measuring 43 inches square. Your exact measurements will depend on the size of finished artwork you are creating. I recommend drawing things out, Remember, measure twice and cut once.
If you don’t have a circular saw, you can have the wood cut for you at the hardware store.
I purchased three, 8-foot long 1X2 furring strips at the hardware store for my project. Furring strips are inexpensive boards used for leveling a surface. They’re great for making frames and other DIY projects like my faux ceiling tin clock and artwork.
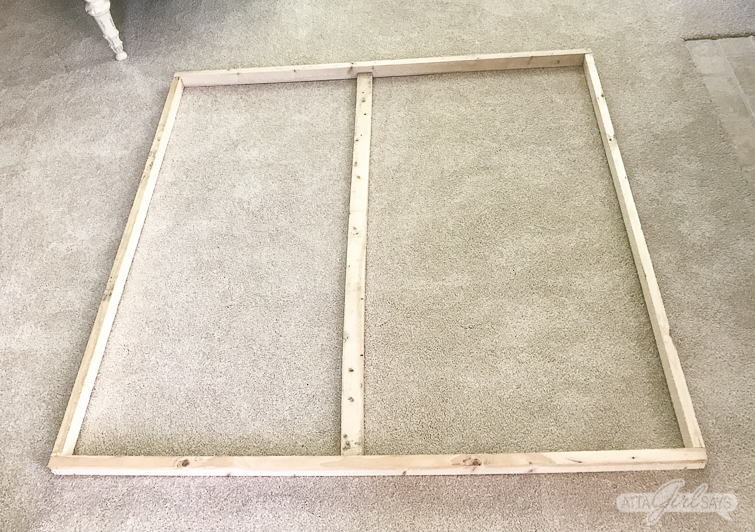
To create my oversized fabric canvas for this DIY project, I cut two furring strips 43 inches long and two more 41 inches long.
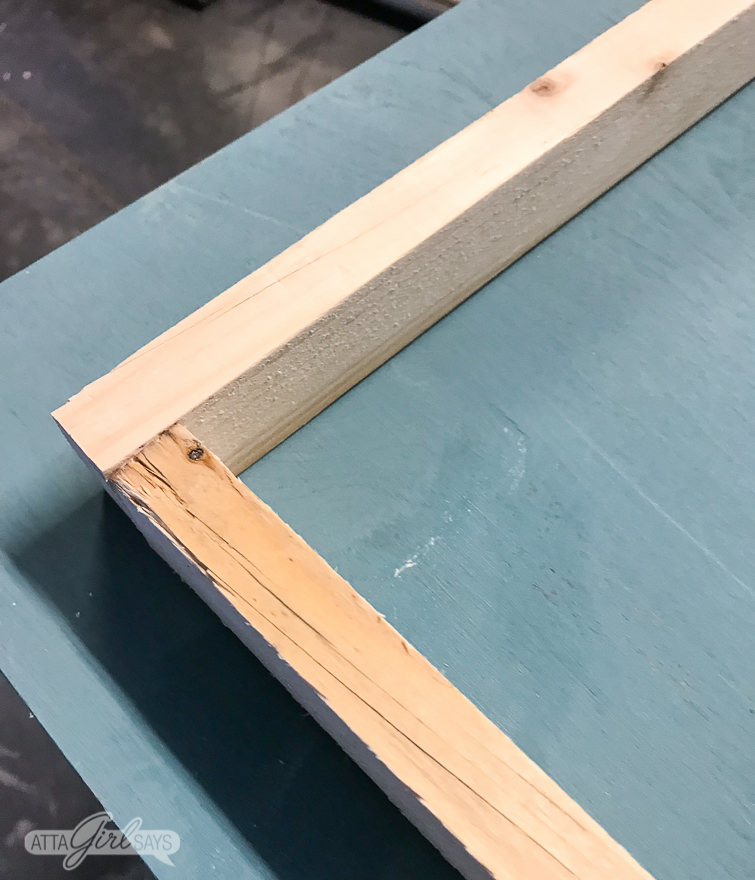
I used wood glue and my brad nailer to join the furring strips. (You could also use screws or hammer in the finish nails by hand, if you don’t have a nail gun.)
When constructing the frame, remember that the longer pieces of wood go on the outside with the shorter pieces on the inside. This ensured that my frame measured 43 inches X 43 inches.
Once I had constructed the square frame, I added a fourth piece of wood in the center for added stability. I cut that at 41 inches. Math!
Next, lay out your fabric, pattern size down, on a flat surface. You may need to iron it first.
Place the wooden frame on top of the fabric. If the fabric has a pattern you want to center, be sure you mark the center point of the frame and the back of the fabric, so you can line it up.
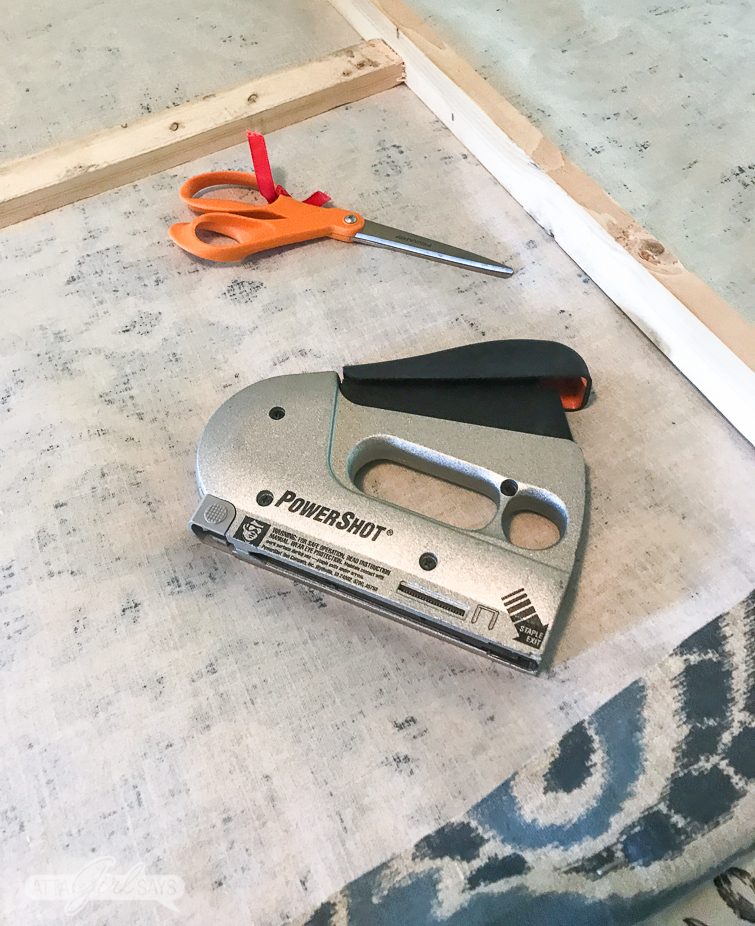
Starting in the center on one side of the frame, staple the fabric to the wood, pulling taut. Continue stapling the fabric to the frame, working from the center. Make sure you keep the frame and fabric square as you work.
I don’t recommend stapling one side completely before moving on to the next side. Instead, I find it helpful to add a few staples on each side, then move to the opposite, parallel side of the frame. Always start in the center and pull the fabric taut when stapling.
Repeat this process on the two perpendicular two sides of the frame, then you can finish stapling all around, doing the corners last.
Trim any excess fabric with your scissors, and now you’re ready to hang the artwork.

We have ours propped on the mantel. It’s very lightweight, but for added security, we may add a hanger at the top of the mantel opening. When we want to watch TV, it’s easy to remove the oversized artwork from the mantel.
If you’re planning to create DIY oversized artwork for your home, be mindful of the width of the fabric you choose. Fabric comes in a variety of widths — 43 inches, 45 inches, 54 inches and 60 inches are common fabric widths. If you don’t want to sew two pieces of fabric together, you’ll need to choose a material that is wide enough for your canvas, with additional allowance for wrapping around the wooden frame.
For my project, I choose a 54-inch upholstery fabric because I wanted to have plenty of material to work with. I purchased 1.5 yards of fabric for this project.
If you need wider fabric, consider using a decorative shower curtain. You can choose a pretty patterned fabric shower curtain or one with a mural image that looks like artwork. If you’re a talented artist, you can use a large drop cloth to create a large canvas for painting.
Pin This! DIY Oversized Artwork to Hide a TV Over a Fireplace
You may also enjoy these posts
Inexpensive Oversized Botanical Artwork

How to Make a Fabric Bulletin Board

Susie | Chelsea Project
Great job with the faux wall.. Who knows? The next owner might prefer the opening for a TV…So your solution is oh so perfect. Way to be all brilliant.. 🙂
Kim
Great idea Amy and such good info, thanks