
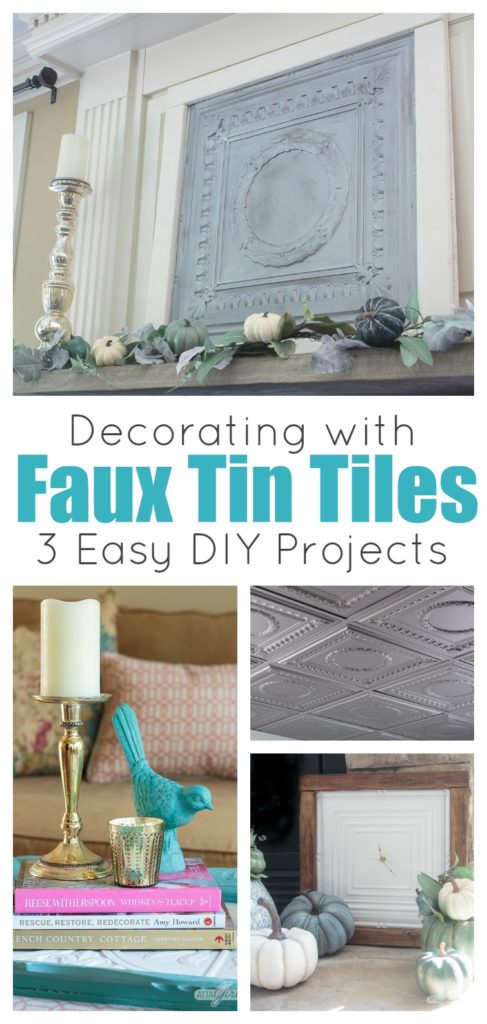
Add architectural interest and vintage style to your home with one of these easy DIY decor projects using faux tin ceiling tiles.
I have always had a thing for pressed tin ceilings, the kind you find in old buildings. I always look for the old panels at antique stores and flea markets, but the real ones can be very expensive.

Luckily, you can get the vintage tin ceiling tile look, without the expense or the worries about lead paint, by using faux tin ceiling tiles. I’m really excited to be partnering with DIY Decor Store today to showcase three easy DIY projects using faux tin ceiling tiles.
This is a sponsored post, and it may contain affiliate links, for your shopping convenience. Read my full disclosure policy here.
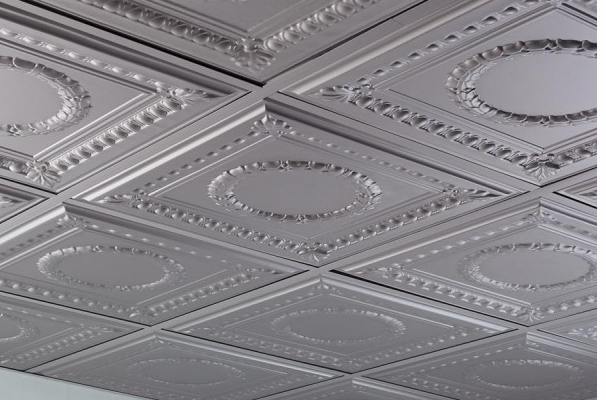
DIY Decor Store carries a huge selection of tile, ceiling, backsplash and wall panels in an array of styles, finishes and colors. My blogger friends and I partnered with them on a variety of DIY projects for our homes. Here’s a look at a few more decorating hacks using supplies from the DIY Decor Store:

For my decorating hack, I ordered an assortment of faux tin ceiling tiles to create three different easy DIY projects: oversized artwork for my mantel, a serving tray and clock.

I love how they all turned out.
To make this pretty serving tray. I repurposed an wooden frame I’ve had in my garage forever.
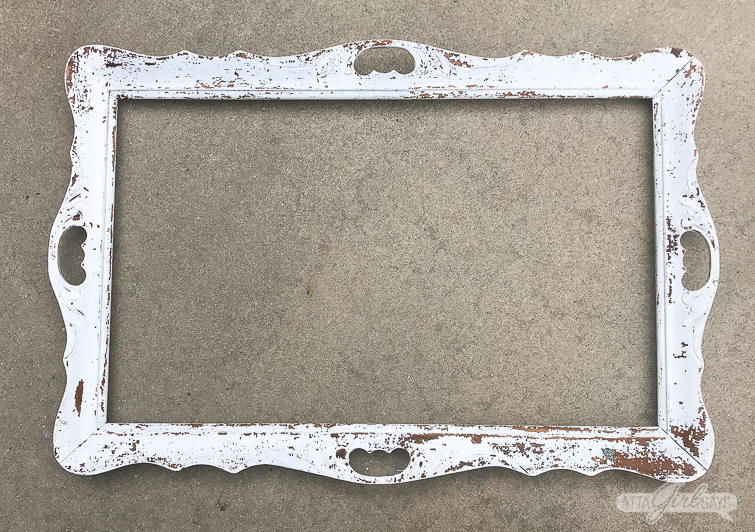
I had originally painted the frame with white milk paint. And it did what milk paint often does and chipped off. I sanded away the loose bits and painted over it with Annie Sloan Chalk paint in Duck Egg Blue. I was going for that textured, layered paint look, so I didn’t bother stripping the frame.
For the tray, I cut a matte white Fasade ceiling tile in the Traditional pattern to fit in the frame.

You can use a utility knife or scissors to cut the Fasade tile. Much easier than working with real tin.

Per the manufacturer’s instructions, I used Loctite PL Premium adhesive to attach the faux tin ceiling tile to a piece of plywood, cut to size.
To finish the tray, I used my brad nailer to attach the plywood piece to the tray. (To protect surfaces that your tray will be sitting on, you may want to add felt or fabric to the bottom.)

It’s such a pretty serving piece, the perfect spot to rest my teacup while reading a favorite book, like Reese Witherspoon’s “Whiskey in a Teacup.” That’s tea in my cup, by the way, though I do love a good bourbon cocktail!
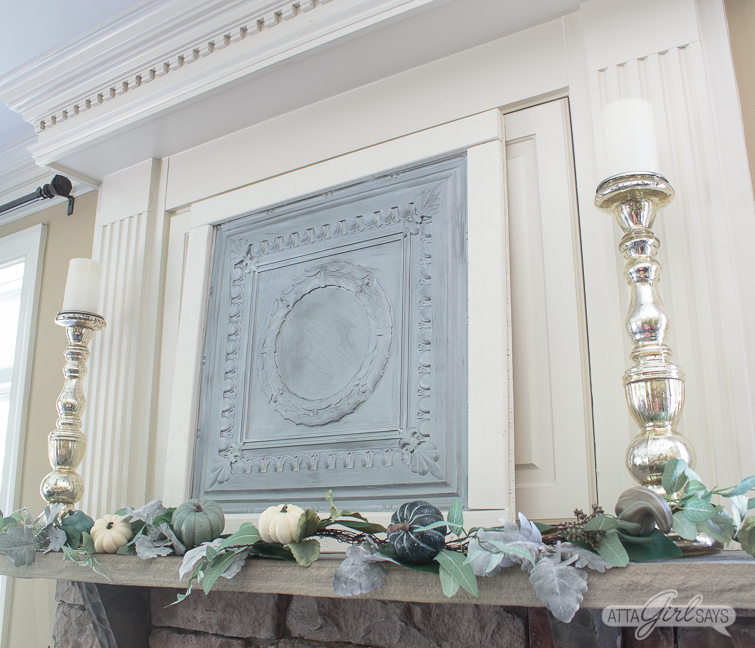
I always struggle when decorating the fireplace in our keeping room because there’s a TV cabinet above the mantel. To camouflage the doors and add some architectural interest, I used a panel from another faux tin ceiling tile to create oversized mantel artwork. I chose a Fasade panel in the Rosette pattern in the Argent silver finish.
I’m in love with the wreath design on the faux tin ceiling panel and can’t wait to use this artwork as part of my Christmas decor.
As I did with the tray, I cut the faux tile with scissors and then had the hardware store cut me a piece of plywood to mount it on using the Loctite adhesive. Once I cut it down, the panel measured 24.5 inches square. I had the plywood cut to 29.5 inches to accommodate the frame I built for it.
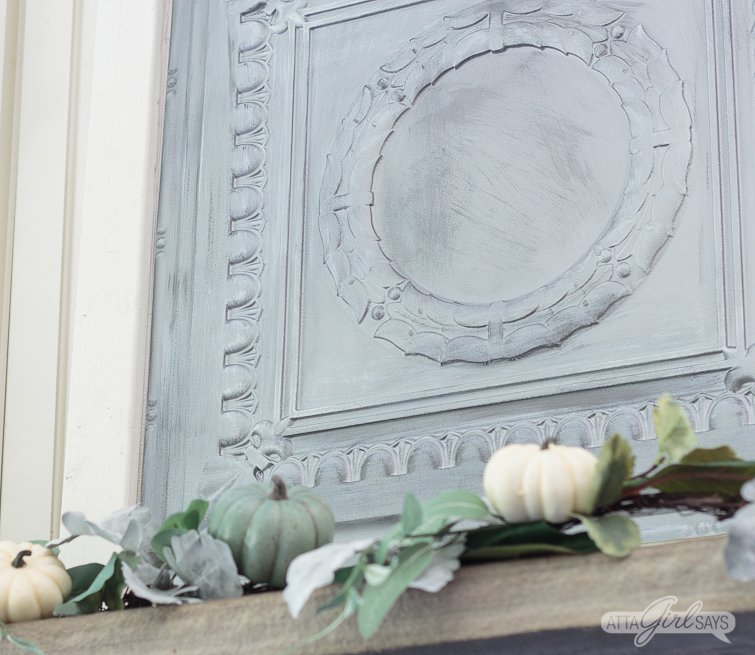
I used inexpensive furring strips, painted white, to make the frame. Two strips were cut to 24.5 inches and two to 29.5 inches. If you don’t have a circular saw, you can have the boards cut at the hardware store. You could also miter the edges if you want a less rustic look.
Since I had it handy, I used the Loctite adhesive to attach the frame to the plywood panel. You could also use finishing nails.

To give my faux ceiling tin a little age, I dry brushed on some Antique White paint and some charcoal matte metallic paint. I love the effect.
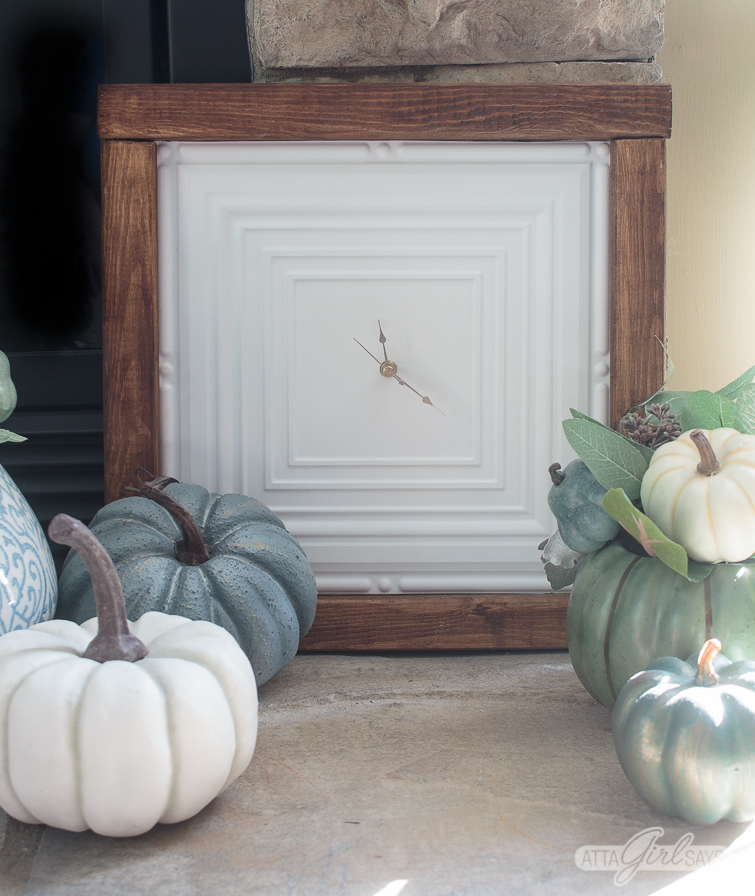
For my final project, I used a matte white Portrait pattern Fasade ceiling tile from DIY Decor Store to make an architectural salvage clock.
I used the same technique I did with the mantel art to make the clock, gluing the square panel to a piece of plywood. I used smaller furring strips to make the frame and stained it with gel stain. To create the clock, I drilled a hole in the center of the panel, through the plywood. Then I just added a clock movement and hands. (Be sure to measure the thickness of your plywood so you get the correct sized clock movement. I used a 3/4″ movement for this clock.)
As you can see, there are lots of different ways you can use faux tin ceiling tiles, beyond the typical uses, to add architectural details to your decor. I’m working on another crafty project using some other ceiling tiles, so be sure to come back soon to check it out.
And I should also mention that I love using these faux tin ceiling panels as photography backdrops. I need to find a space in the house to build a photo wall tiled with different faux ceiling tin panels.

I used one of the panels as a backdrop when I shared my recipe for loaded Italian sausage and peppers subs.

And that’s a Monaco backsplash panel from DIY Decor Store behind that yummy spiked cinnamon apple cider slushie.
Sara
I just love this so much! So many great ideas. I can’t believe how much $$$ they wanted for vintage tiles at the last antique show I went to, I’ll be sure to grab these and make them match my decor!
Kristy
I think the tray is my favorite! But I really love seeing all of the different ideas… and the tiles make the best photo backdrops, don’t they?! 🙂
Deb Foglia
These are all seriously so cute Amy! So many great ideas, got my brain thinkin’!
kim jones
such fun projects and great ideas to steal! I love that wreath one too!!!