
I know one super fan who is going to completely geek out over this Boba Fett Star Wars sign.

In my son’s mind, no character is cooler than Boba Fett, the bounty hunter who captured Han Solo in The Empire Strikes Back.
Come on — he has a jet pack! And he’s so tough Darth Vader warned him to lighten up.
“I want them alive,” Darth Vader told the bounty hunter. “No disintegration.”
This is a sponsored post, and it may contain affiliate links. Read my full disclosure policy here.
When DecoArt asked me to create a Star Wars themed gift for the 2015 Handmade Holidays hop to tie in with the excitement over The Force Awakens, I knew Boba Fett had to feature prominently.

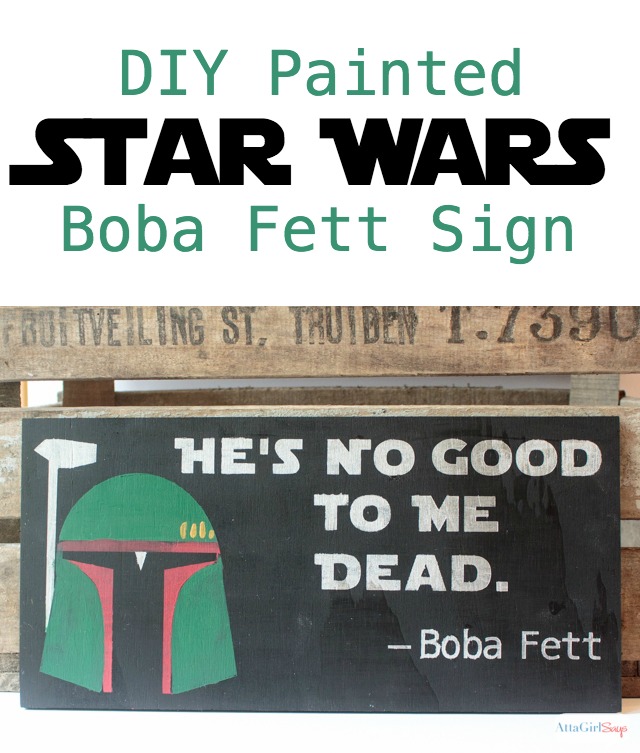
This Star Wars sign, featuring the bounty hunter’s iconic helmet and one of his famous quotes, is made from a scrap of plywood and a stencil I cut using my Silhouette.
Supplies
16 X 8 piece of plywood
DecoArt Americana Multi-Surface paint in Black Tie
DecoArt Americana Multi-Surface paint in Red Barn
DecoArt Americana Multi-Surface paint in Green Beret
DecoArt Americana Multi-Surface metallic paint in Silver
DecoArt Americana Multi-Surface metallic paint in Gold
Vinyl Boba Fett stencil
transfer tape
foam brush
artist’s paint brush
sawtooth hanger
Instructions
I began by painting the plywood with Black Tie paint. Use one to two coats for complete coverage.

Next, I cut the Boba Fett stencil from adhesive vinyl with my Silhouette Cameo cutting machine. (You can get the free Silhouette cut file here.)
If you don’t have a Silhouette, you can print out these templates for the helmet and quote. You can either trace it onto your sign or use a craft knife to cut a stencil from freezer paper. I recommend using stencil adhesive to hold the paper in place.

I used transfer tape to apply the stencil to the sign. You’ll notice I didn’t peel away all the pieces of the helmet because I wanted to paint it in stages.

Be sure your stencil is adhered well to the sign, especially around the edges of the letters and cutouts to prevent any paint from seeping under and bleeding.

Next, I painted the various parts of the stencil, using two coats of paint in most places.


After you paint the second coat, but before it is completely dry, carefully peel off the vinyl stencil. Make any necessary touchups with an artist’s brush and allow to dry completely.

When the paint has dried completely, attach a sawtooth picture hanger to the back.
If you love Star Wars as much as we do, you may want to check out these other projects:


Be sure to check out all the other blogger projects at the end of this post for more handmade gift ideas.

Plus, there’s a great prize pack of more than $600 in craft supplies to help you make this holiday handmade.

Enter to win using the widget below. The more steps you complete, the more entries you earn.
TracyM #6773
SUPER COOL sign Amy!!!
WOW – this could be applied to any theme … we have so many nieces & nephews with animated and action addictions, so I’m thinking anything from minions to frozen 🙂
THANK YOU for sharing your CREATIVE INSPIRATION!!!
Karly Mauldin
This great project brings together to great things… Crafting and a loveof movies!
barbara macaskill
My Dad is a huge Star Wars fan and I know he would love one of these!! Definitely going to have to make one for him! TFS!
Laura
Thanks for the templates. While I am not Star Wars crazed, who doesn’t know someone (or more) that are!
Atta Girl Amy
That’s definitely a safe bet. My son is the Star Wars crazy in this house, but his excitement is contagious.
Katie Smith
Awesome project, Amy! Personally, I’m more of a Star Trek fan, but I know plenty of people who would LOVE this.
Atta Girl Amy
I bet you’re excited about the new Star Trek series planned.
Janelle Rourke
Cute sign. No electronic cutter here, but using all the products of the various sponsors of this Blog Hop the sky is the limit in what you can make! Thanks for sharing.
Atta Girl Amy
Good luck on the giveaway. I think we’d all love to win that prize package.
Maggie M
I’m not a Star Wars fan, but your sign came out really cute:)