
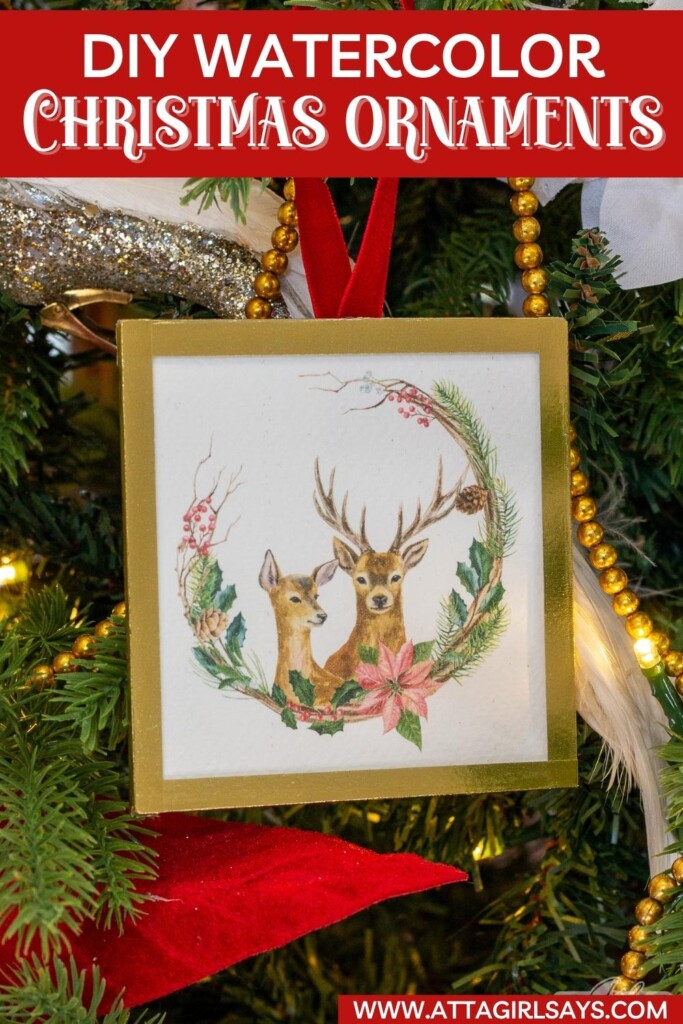


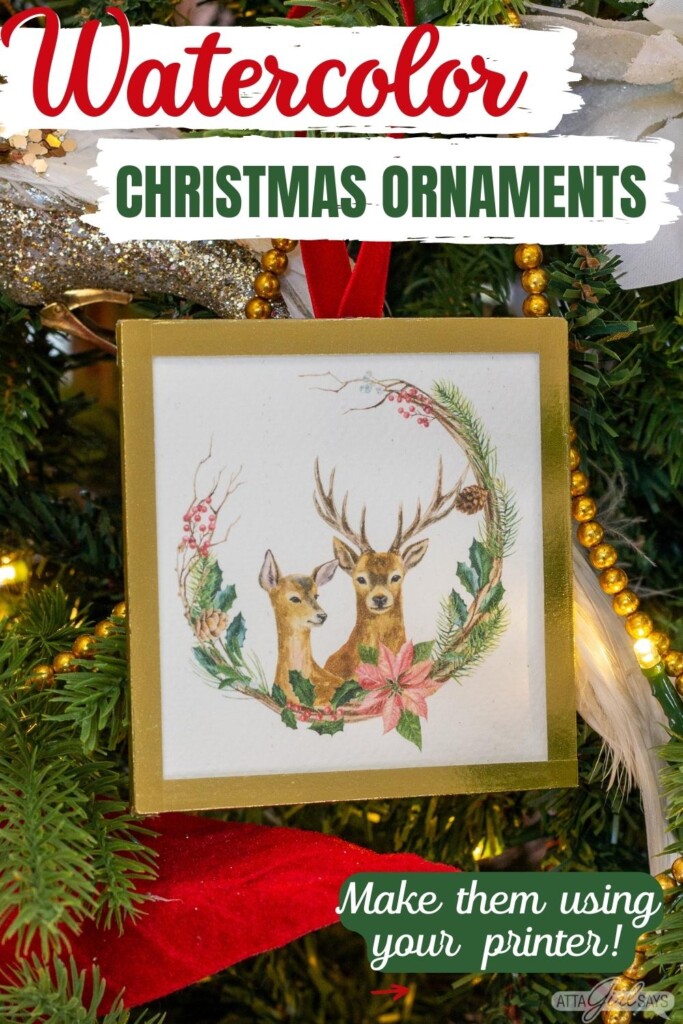

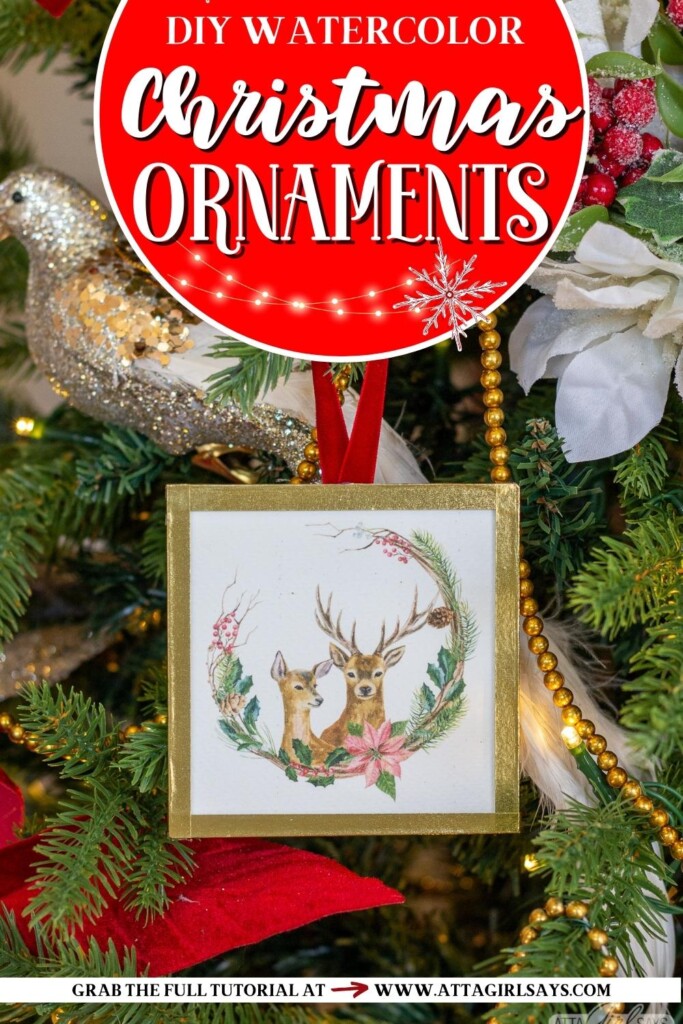
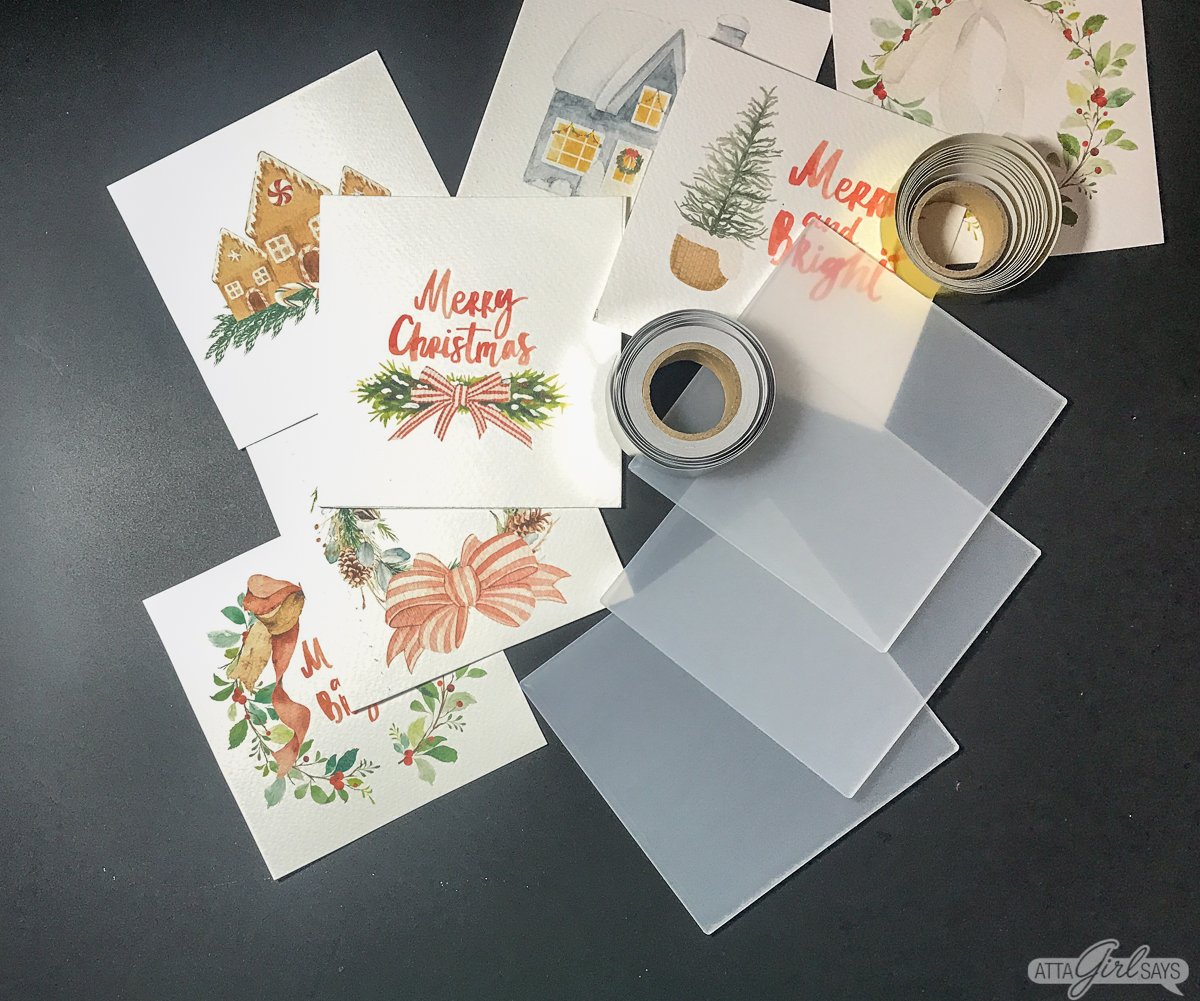
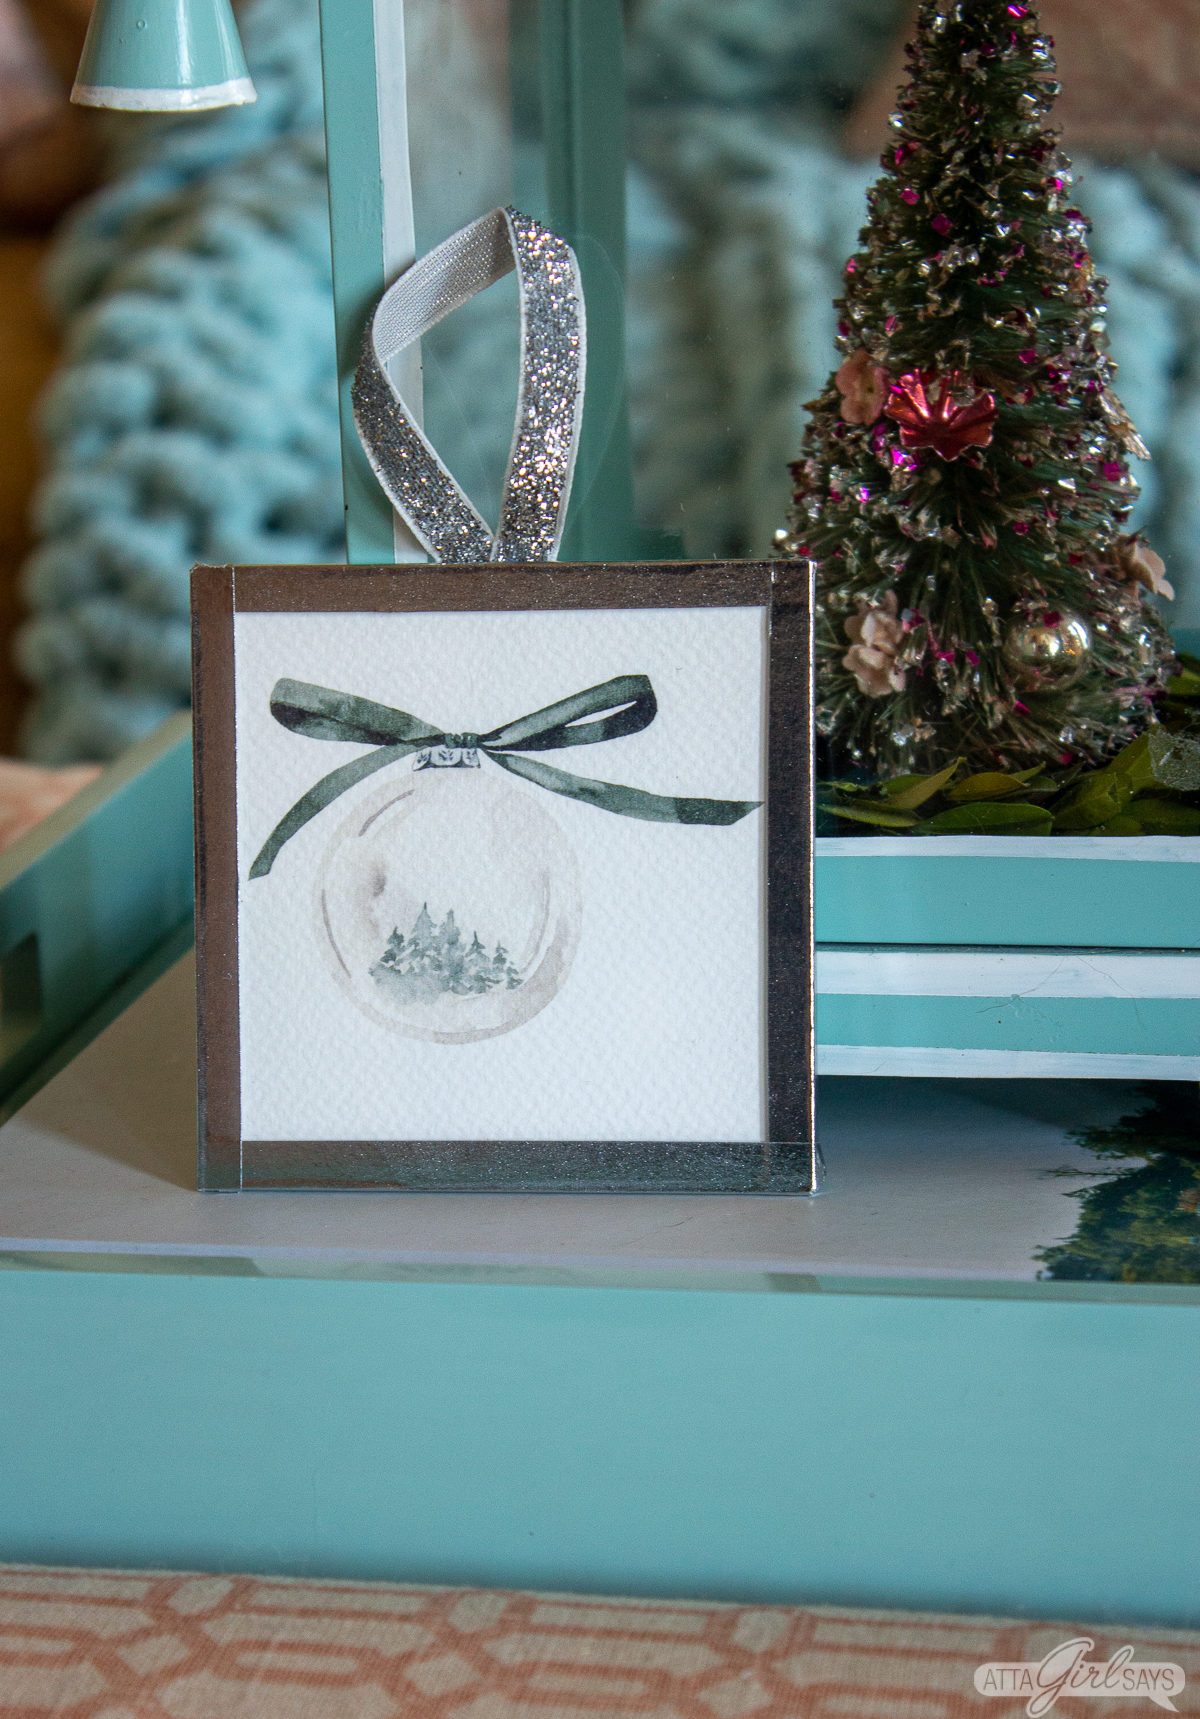
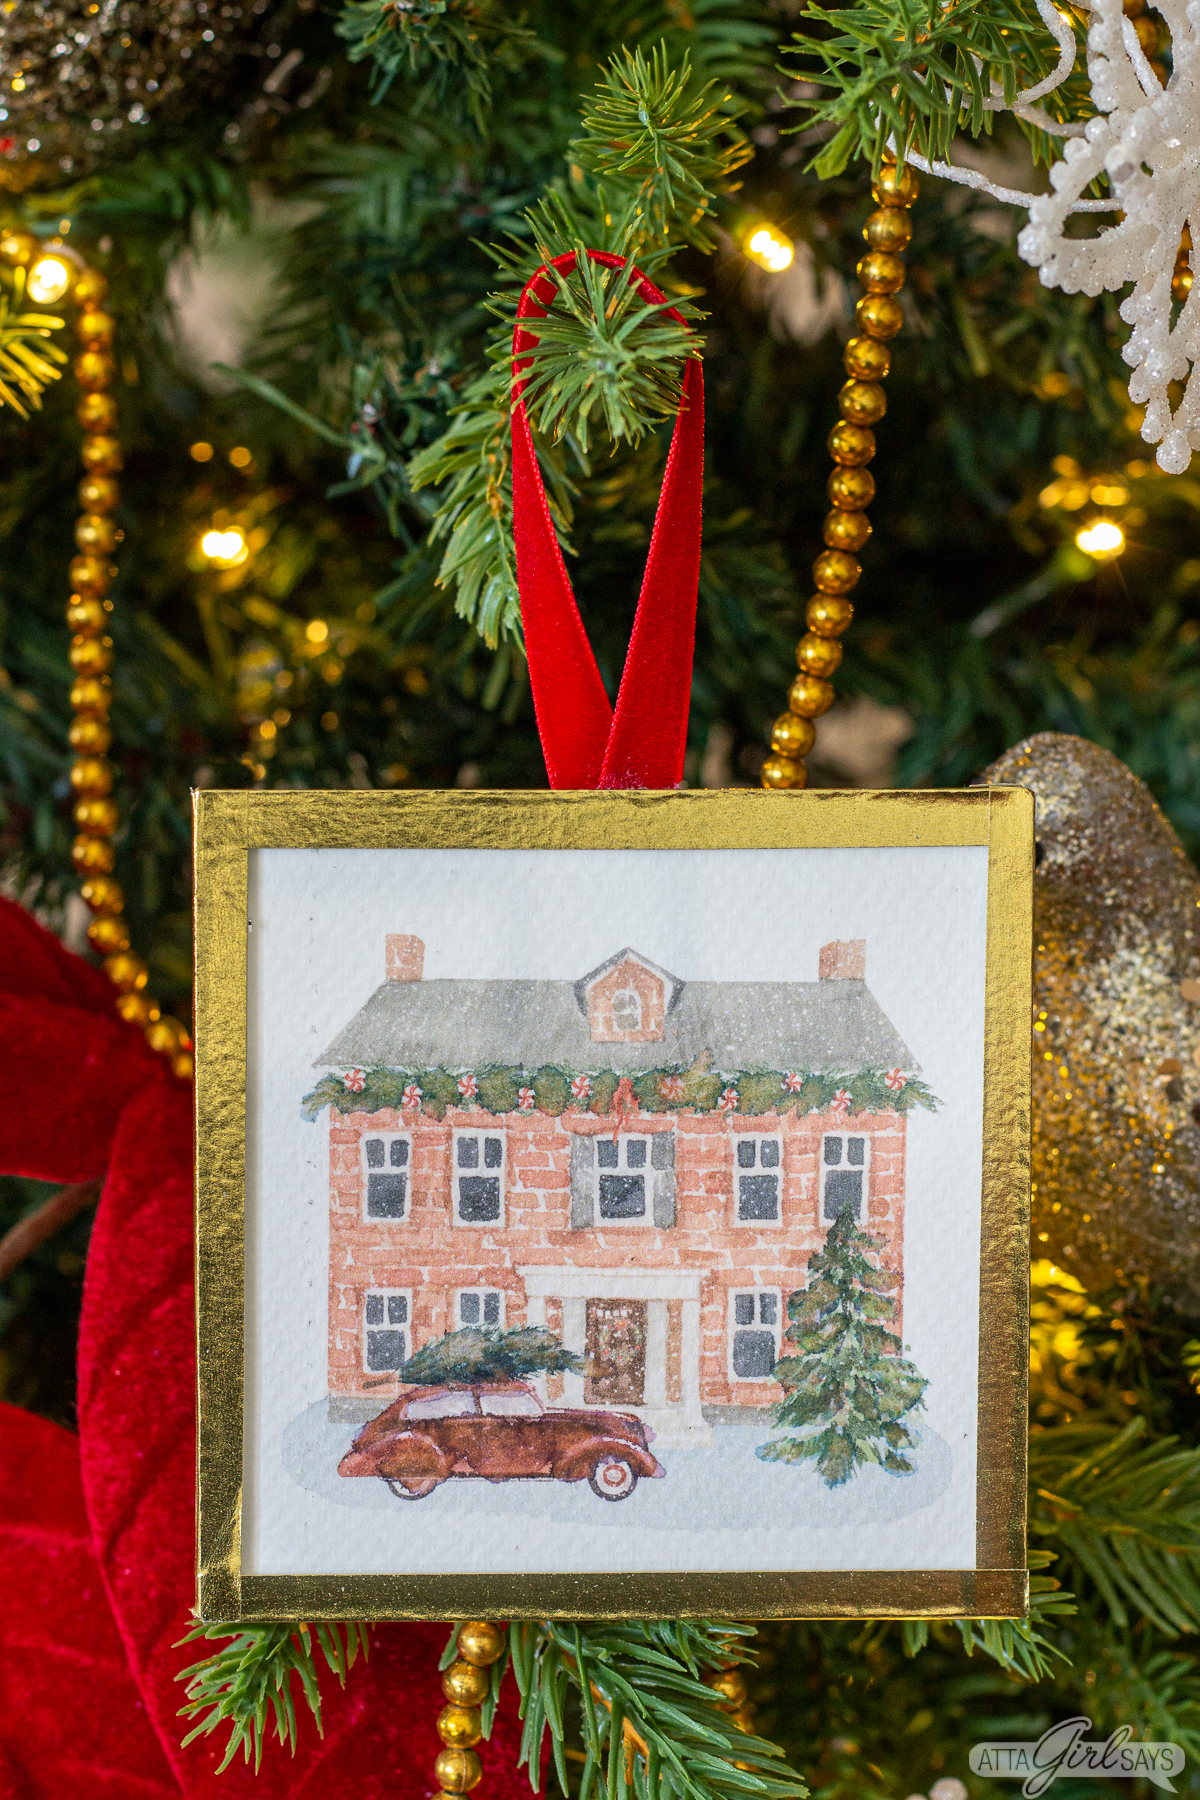
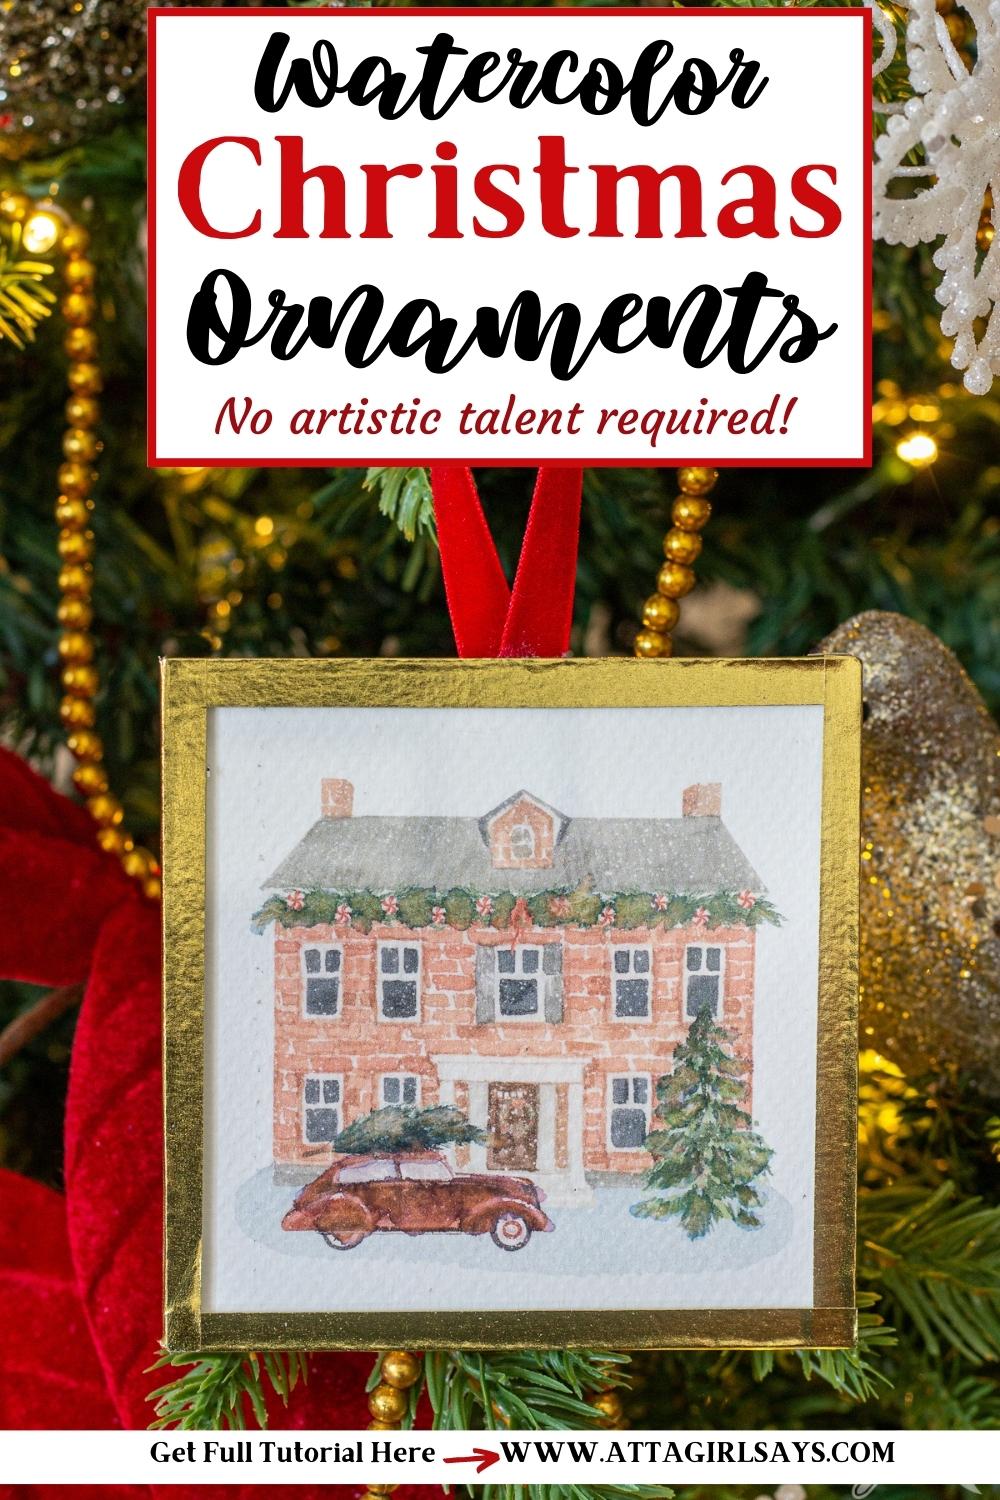
You don’t have to be an artist to make these pretty Christmas watercolor ornaments. These use stock artwork printed on watercolor paper. The artwork is mounted on acrylic and framed in foil tape to create a keepsake ornament.
I love Christmas watercolor artwork, but don’t have the artistic talent to paint my own.
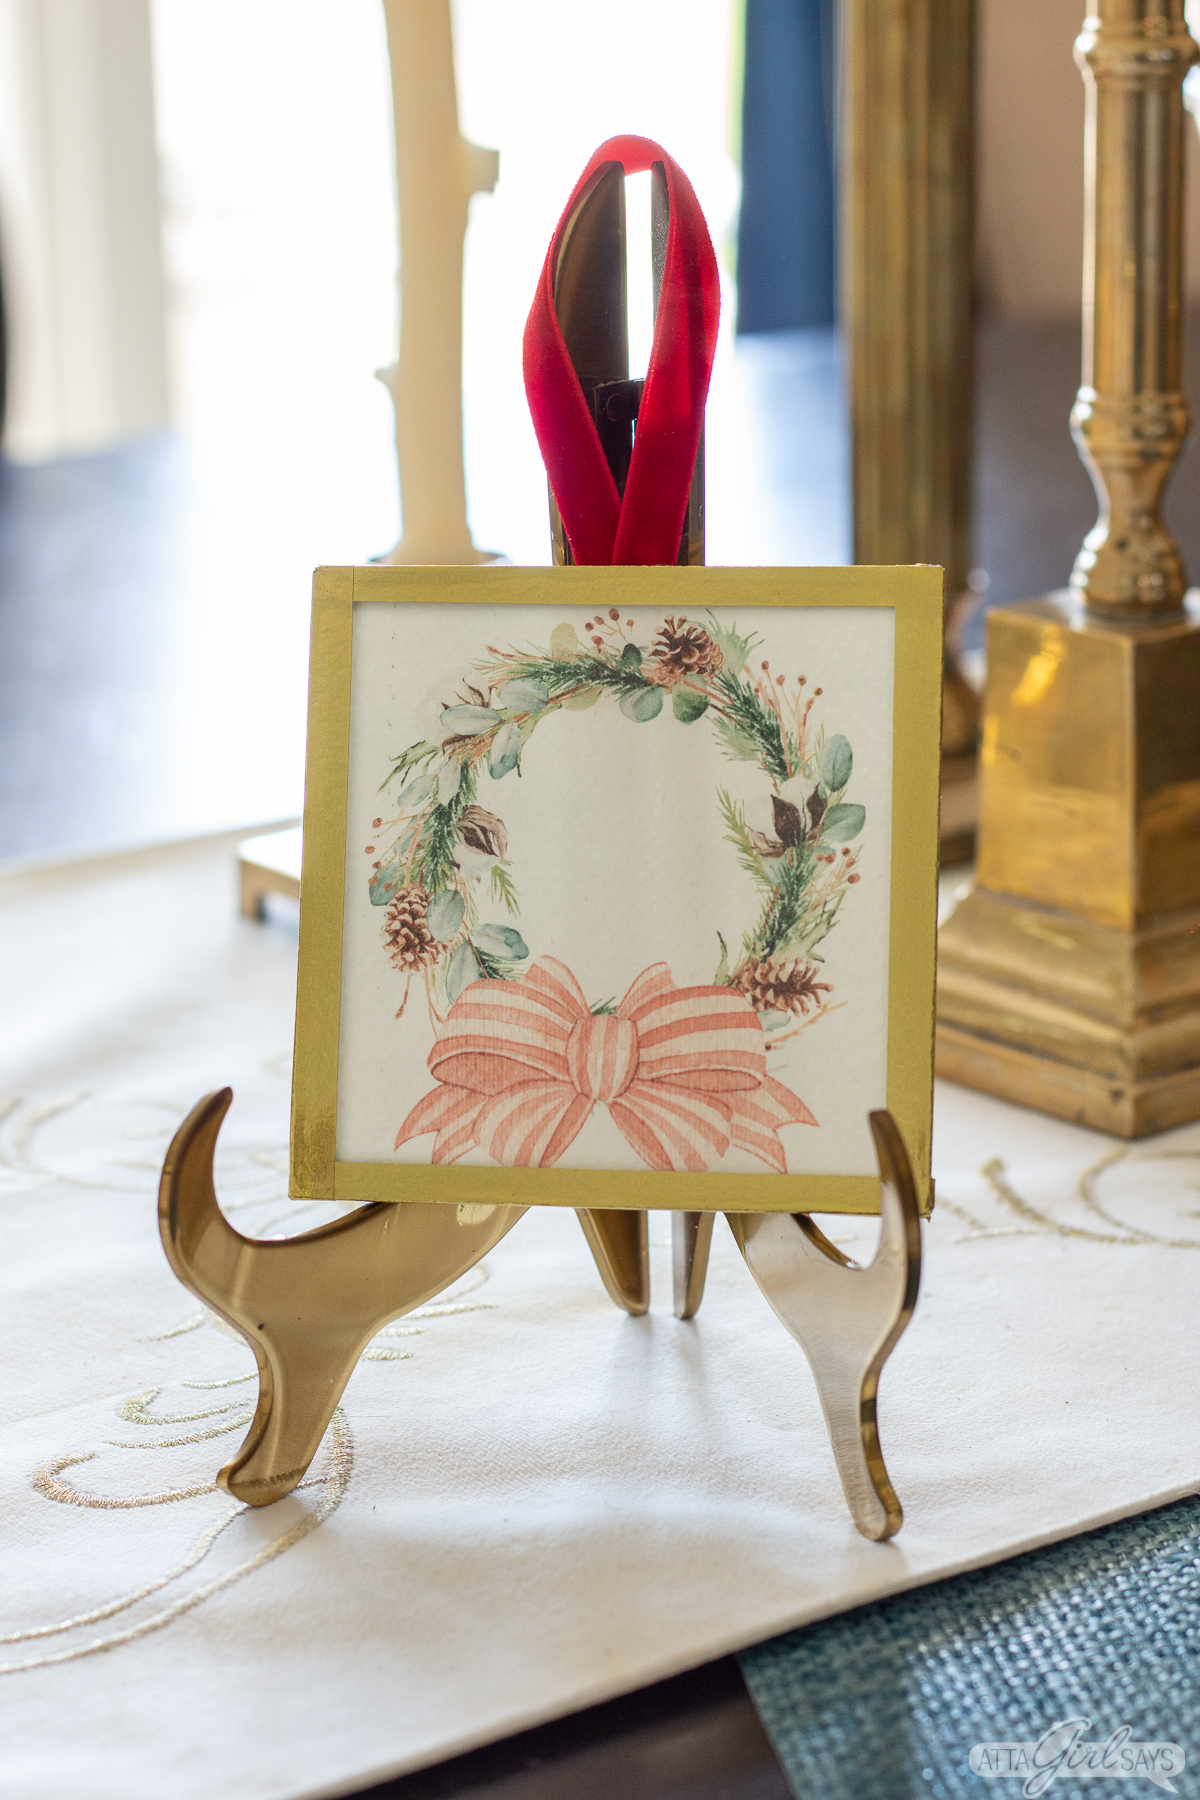
So I found some festive watercolor images on Canva and used them to create these pretty ornaments for our tree. If you’re a better artist than me, you could definitely use real paintings to make these.

This post may contain affiliate links. AttaGirlSays.com is a participant in the Amazon Services LLC Associates Program, an affiliate advertising program designed to provide a means for sites to earn advertising fees by advertising and linking to amazon.com. Read my full disclosure policy here.
Adding foil tape to frame the Christmas watercolors really elevates this craft, making each ornament look like a piece of framed art for the tree. These watercolor prints coordinate nicely with the gilded paper Cricut ornaments I made for our dining room Christmas tree.
These are so simple to make, and they’re pretty enough to give away as gifts. I’ve included a step-by-step tutorial and a how-to video.
Supplies:
To make these Christmas watercolor ornaments, you will need these supplies:
- printable watercolor artwork or small watercolor paintings
- watercolor paper
- printer
- 4-inch acrylic squares
- foil tape (I used gold and silver)
- velvet ribbon
- hot glue and glue gun
- scissors
- craft knife
- paintbrush (optional)
How to Make Christmas Watercolor Ornaments
I used Canva to find watercolor images to use on the ornaments. I’ve included a link below to some of the ones I used.
Watercolor Ornament DesignsWatercolor Ornament Designs on Canva
Since I did’t create these watercolor images, I cannot provide a free download of them on my site.
To be able to print and use them, you will need a Canva account. I have a Canva Pro account, so some of the images I used are premium. If you don’t have a Pro account, you may have to pay $1 each for the images.
You can also find watercolor images and clipart on sites like Shutterstock.
To give these ornaments the look of authentic paintings, I printed the art on watercolor paper. I used my Canon Crafting Printer.
To give them an even more handpainted look, you can go over the artwork with a fine paintbrush and water. Just be careful to not add too much water or the ink will bleed too much and distort the image’s details.
You just want a little bit of water to soften image, like a real Christmas watercolor. Results my vary, depending on your printer and ink.
Step-By-Step Instructions
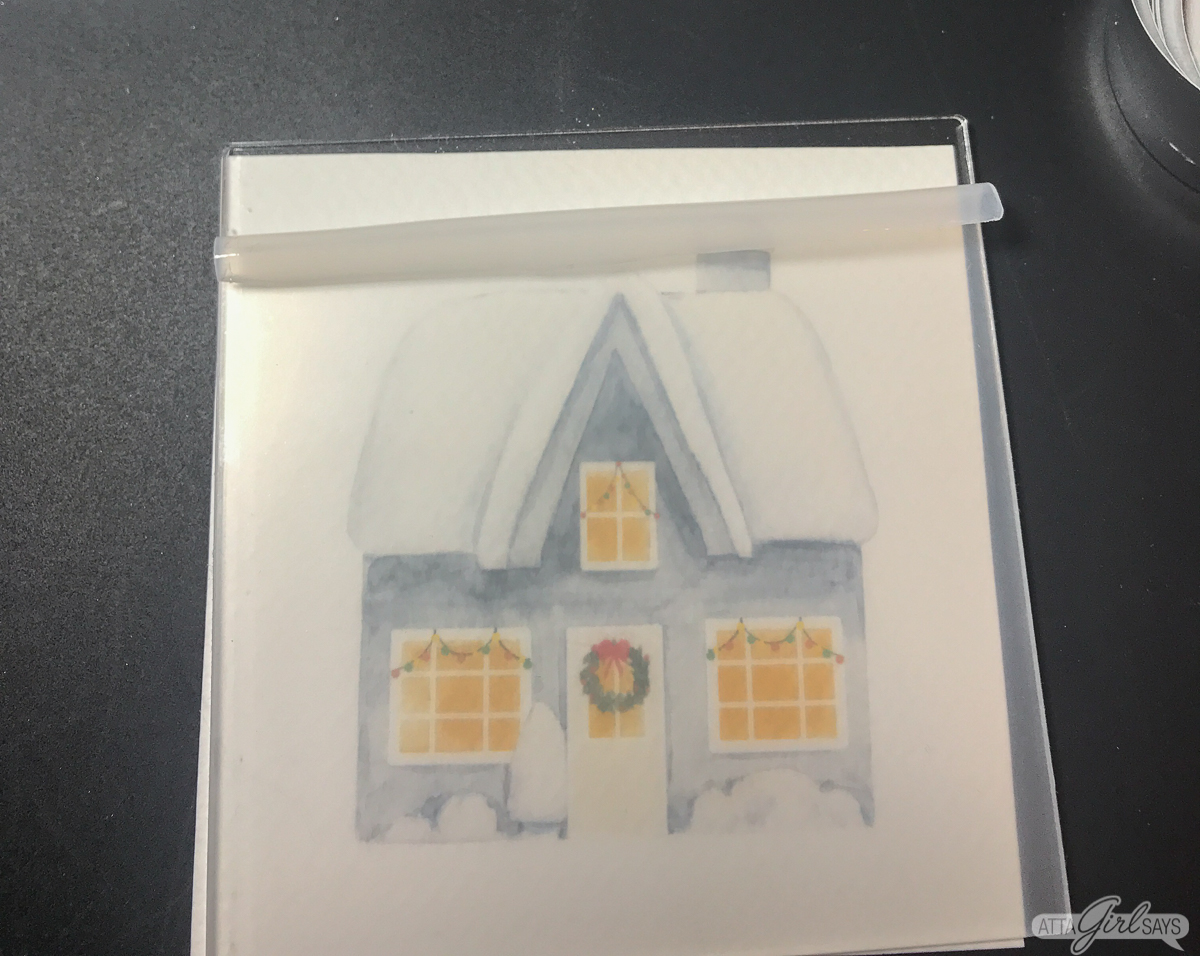
Use the acrylic blank to trace around each image in pencil, then use scissors to cut them out.
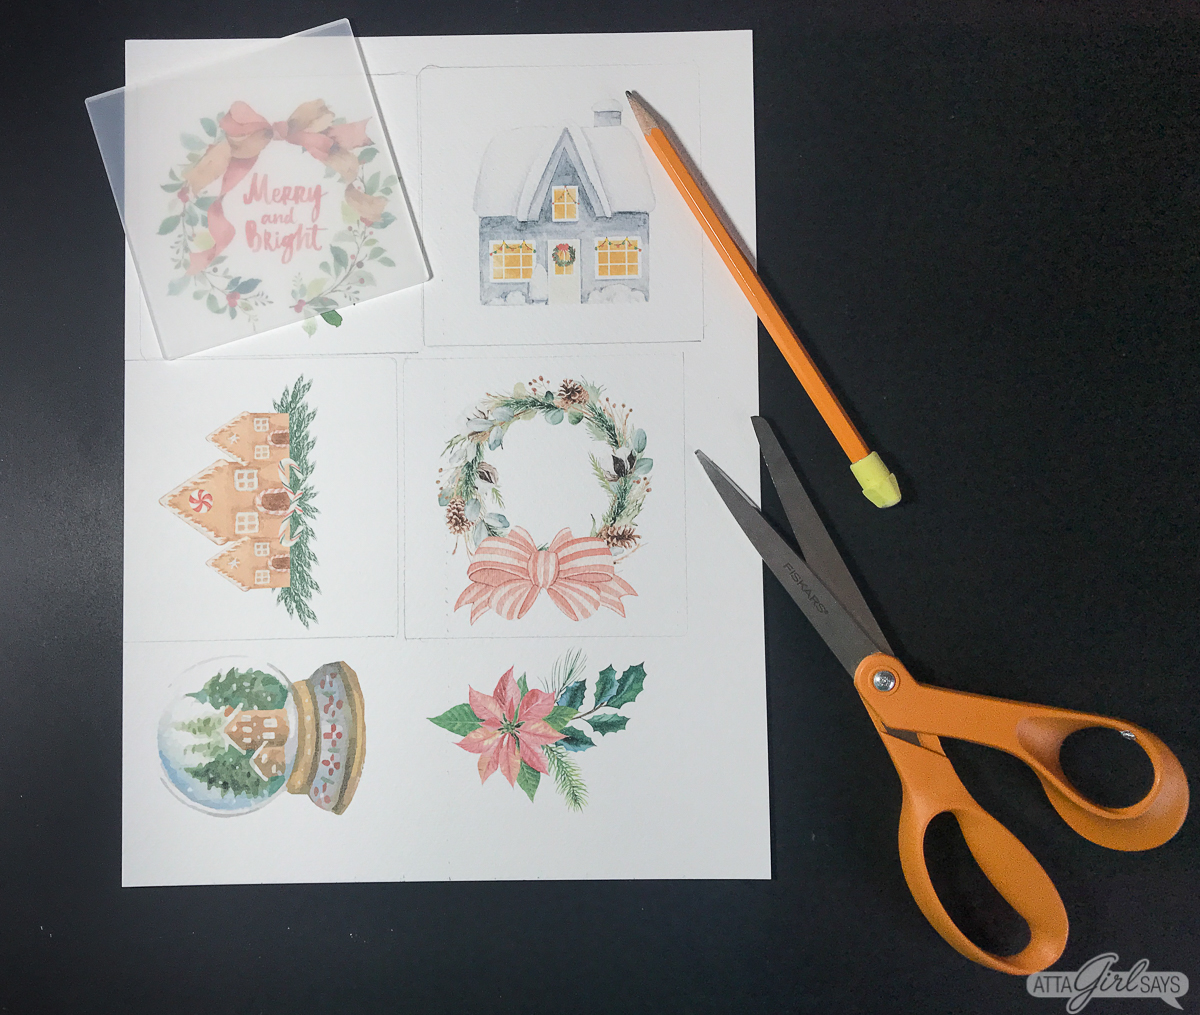
Trim so the watercolor fits under the acrylic square with no overlap. You may need to trim with scissors or a craft knife.
Next, cut four pieces of foil tape that are slightly longer than 4 inches.

Before peeliing off the backing to reveal the adhesive, fold each piece of tape over the edge of the acrylic square. This will make it easier to position the tape on the ornament.
Acrylic blanks come with protecitve film over them so they don’t get scratched and damaged.

Peel off one side of the film, being careful not to touch it. Place the clear side down on top of the artwork.
Tip: If you have trouble peeling back the film, use a craft knife along the edge to get things started.
Gently peel back the top edge of the protective film on the other side.
Next, place one piece of foil tape on the front upper edge of the acrylic blank, folding over to secure the artwork on the back.
Use a craft knife to trim any excess tape at each end. (See the video for a demonstration.)
Continue adding tape to each edge of the ornament. I like to peel back the protective film, one edge at a time, so I don’t get fingerprints on the acrylic sheet while I’m working.

Make sure the tape is straight and even on both sides of the ornament. The tape should overlap the paper on the back to hold it in place.
Continue until all four edges of the ornament are taped. Peel alway the protective film and flip the ornament over, face down on your workspace.
Use hot glue to attach a loop of velvet ribbon to the back of the ornament for hanging. When the glue has set, use a hair dryer to blow away any hot glue threads.
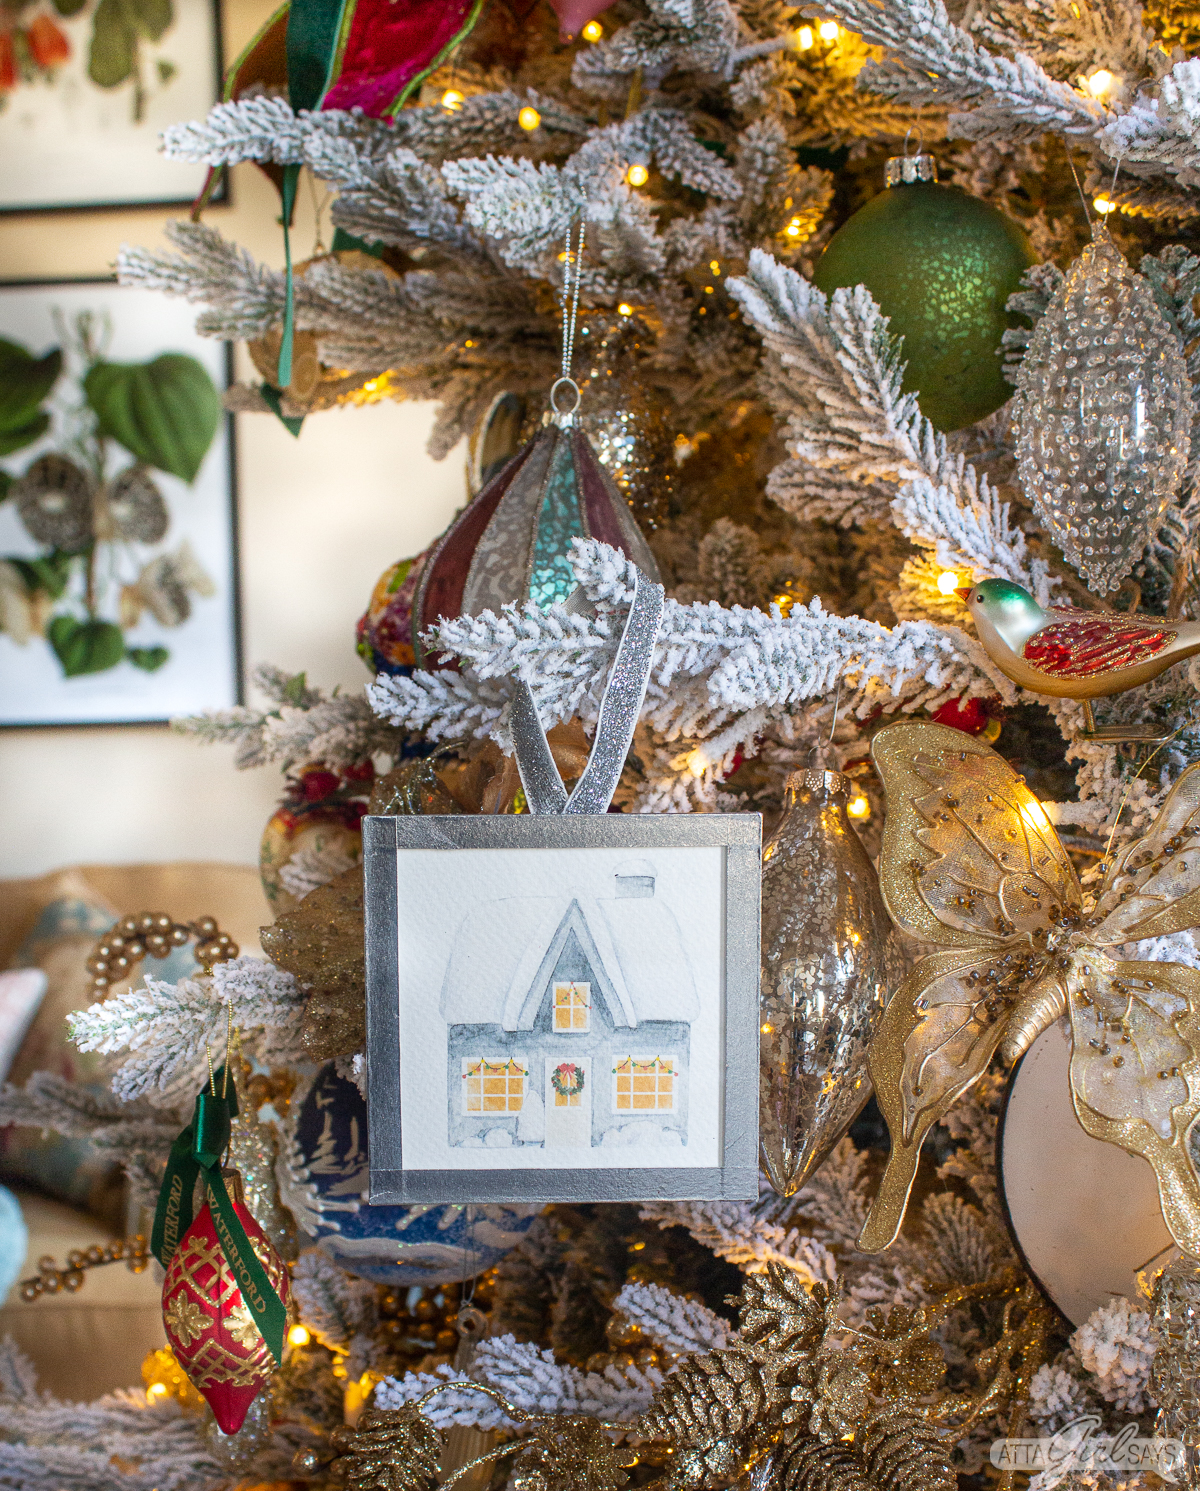
These ornaments look so pretty hanging on a tree. They also make beautiful gift tags for packages.
Watch the how-to video below to see the step-by-step process for making these Christmas watercolor ornaments.
How To Video
More Christmas Crafts
You might enjoy making these other handmade Christmas ornaments:


- DIY Paper Cricut Christmas Ornaments
- Christmas Shrinky Dink Ornaments
- Red Front Door Christmas Ornament
- Vintage-Inspired Snow Globe Ornament
- Bingo Card Christmas Ornaments
- Twine Candy Cane Ornaments
Pin This! Christmas Watercolor Ornaments
Leave a Reply