
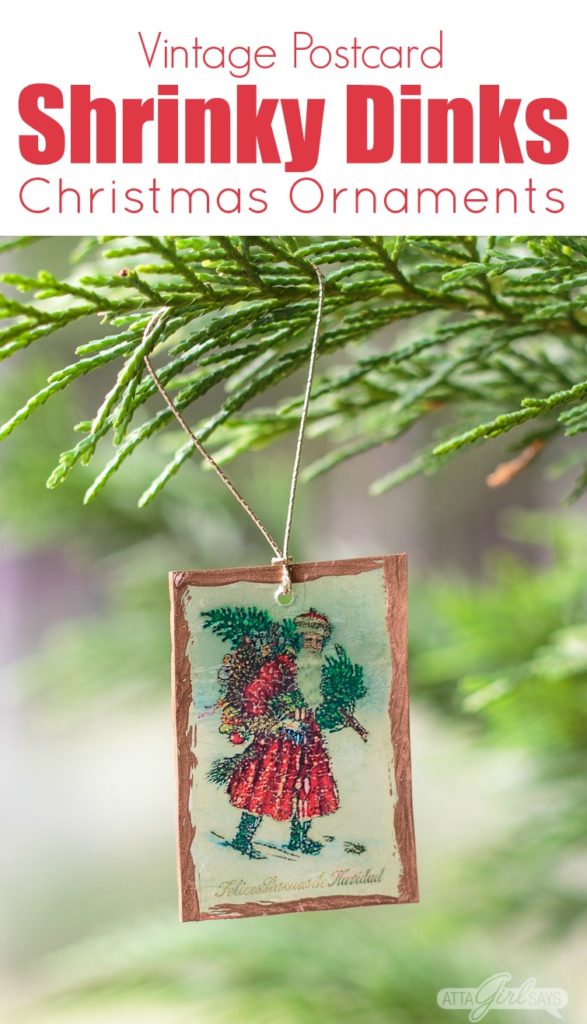
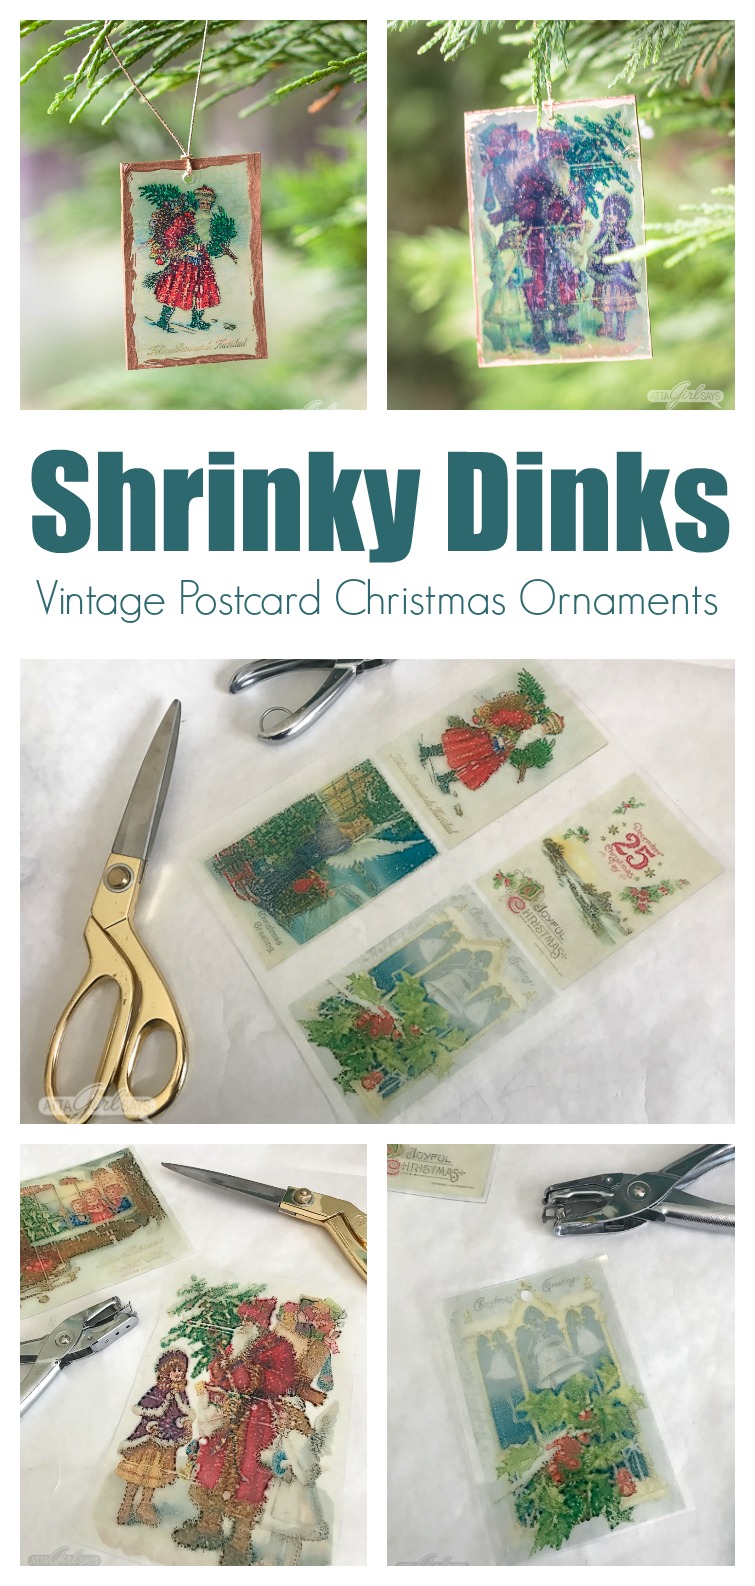
Create stunning Shrinky Dinks Christmas ornaments using artwork from vintage postcards. Learn how to make them and get the free printable Shrinky Dinks here.
It’s never too early to get a jumpstart on your Christmas crafting.
I’m taking a break from all things fall to share a some pretty vintage postcard Shrinky Dinks Christmas ornaments as part of the fourth annual Handmade Christmas Ornaments Blog Hop.

That’s right, it’s a vintage craft and a throwback craft. Shrinky Dinks were a big thing when I was growing up in the 1970s and 1980s. I just loved watching the paper curl up and shrink in the oven.
When I spotted Shrinky Dinks paper at the craft store, I had to buy it! It’s still as cool as ever watching the designs shrink in the oven. (When I was making these Shrinky Dinks Christmas ornaments, I sat in front of the oven and watched the whole process through the glass. The kid in me couldn’t resist.)
I’m excited to be sharing these ornaments as part of this fun blog hop, hosted by Diane of An Extraordinary Day, Jennifer of Celebrating Everyday Life and MaryBeth of The How-To Home. You may remember the Christmas Bingo card ornaments I made for last year’s event.
For 12 days this month, my blogging friends are sharing lovely handmade Christmas ornaments to inspire you. This is Day 4, and you can find links to all the participants and their projects at the end of this post.
If you’re a regular reader, then you know that I love all things vintage. Most of my crafts, decorating and DIY projects have a vintage twist.

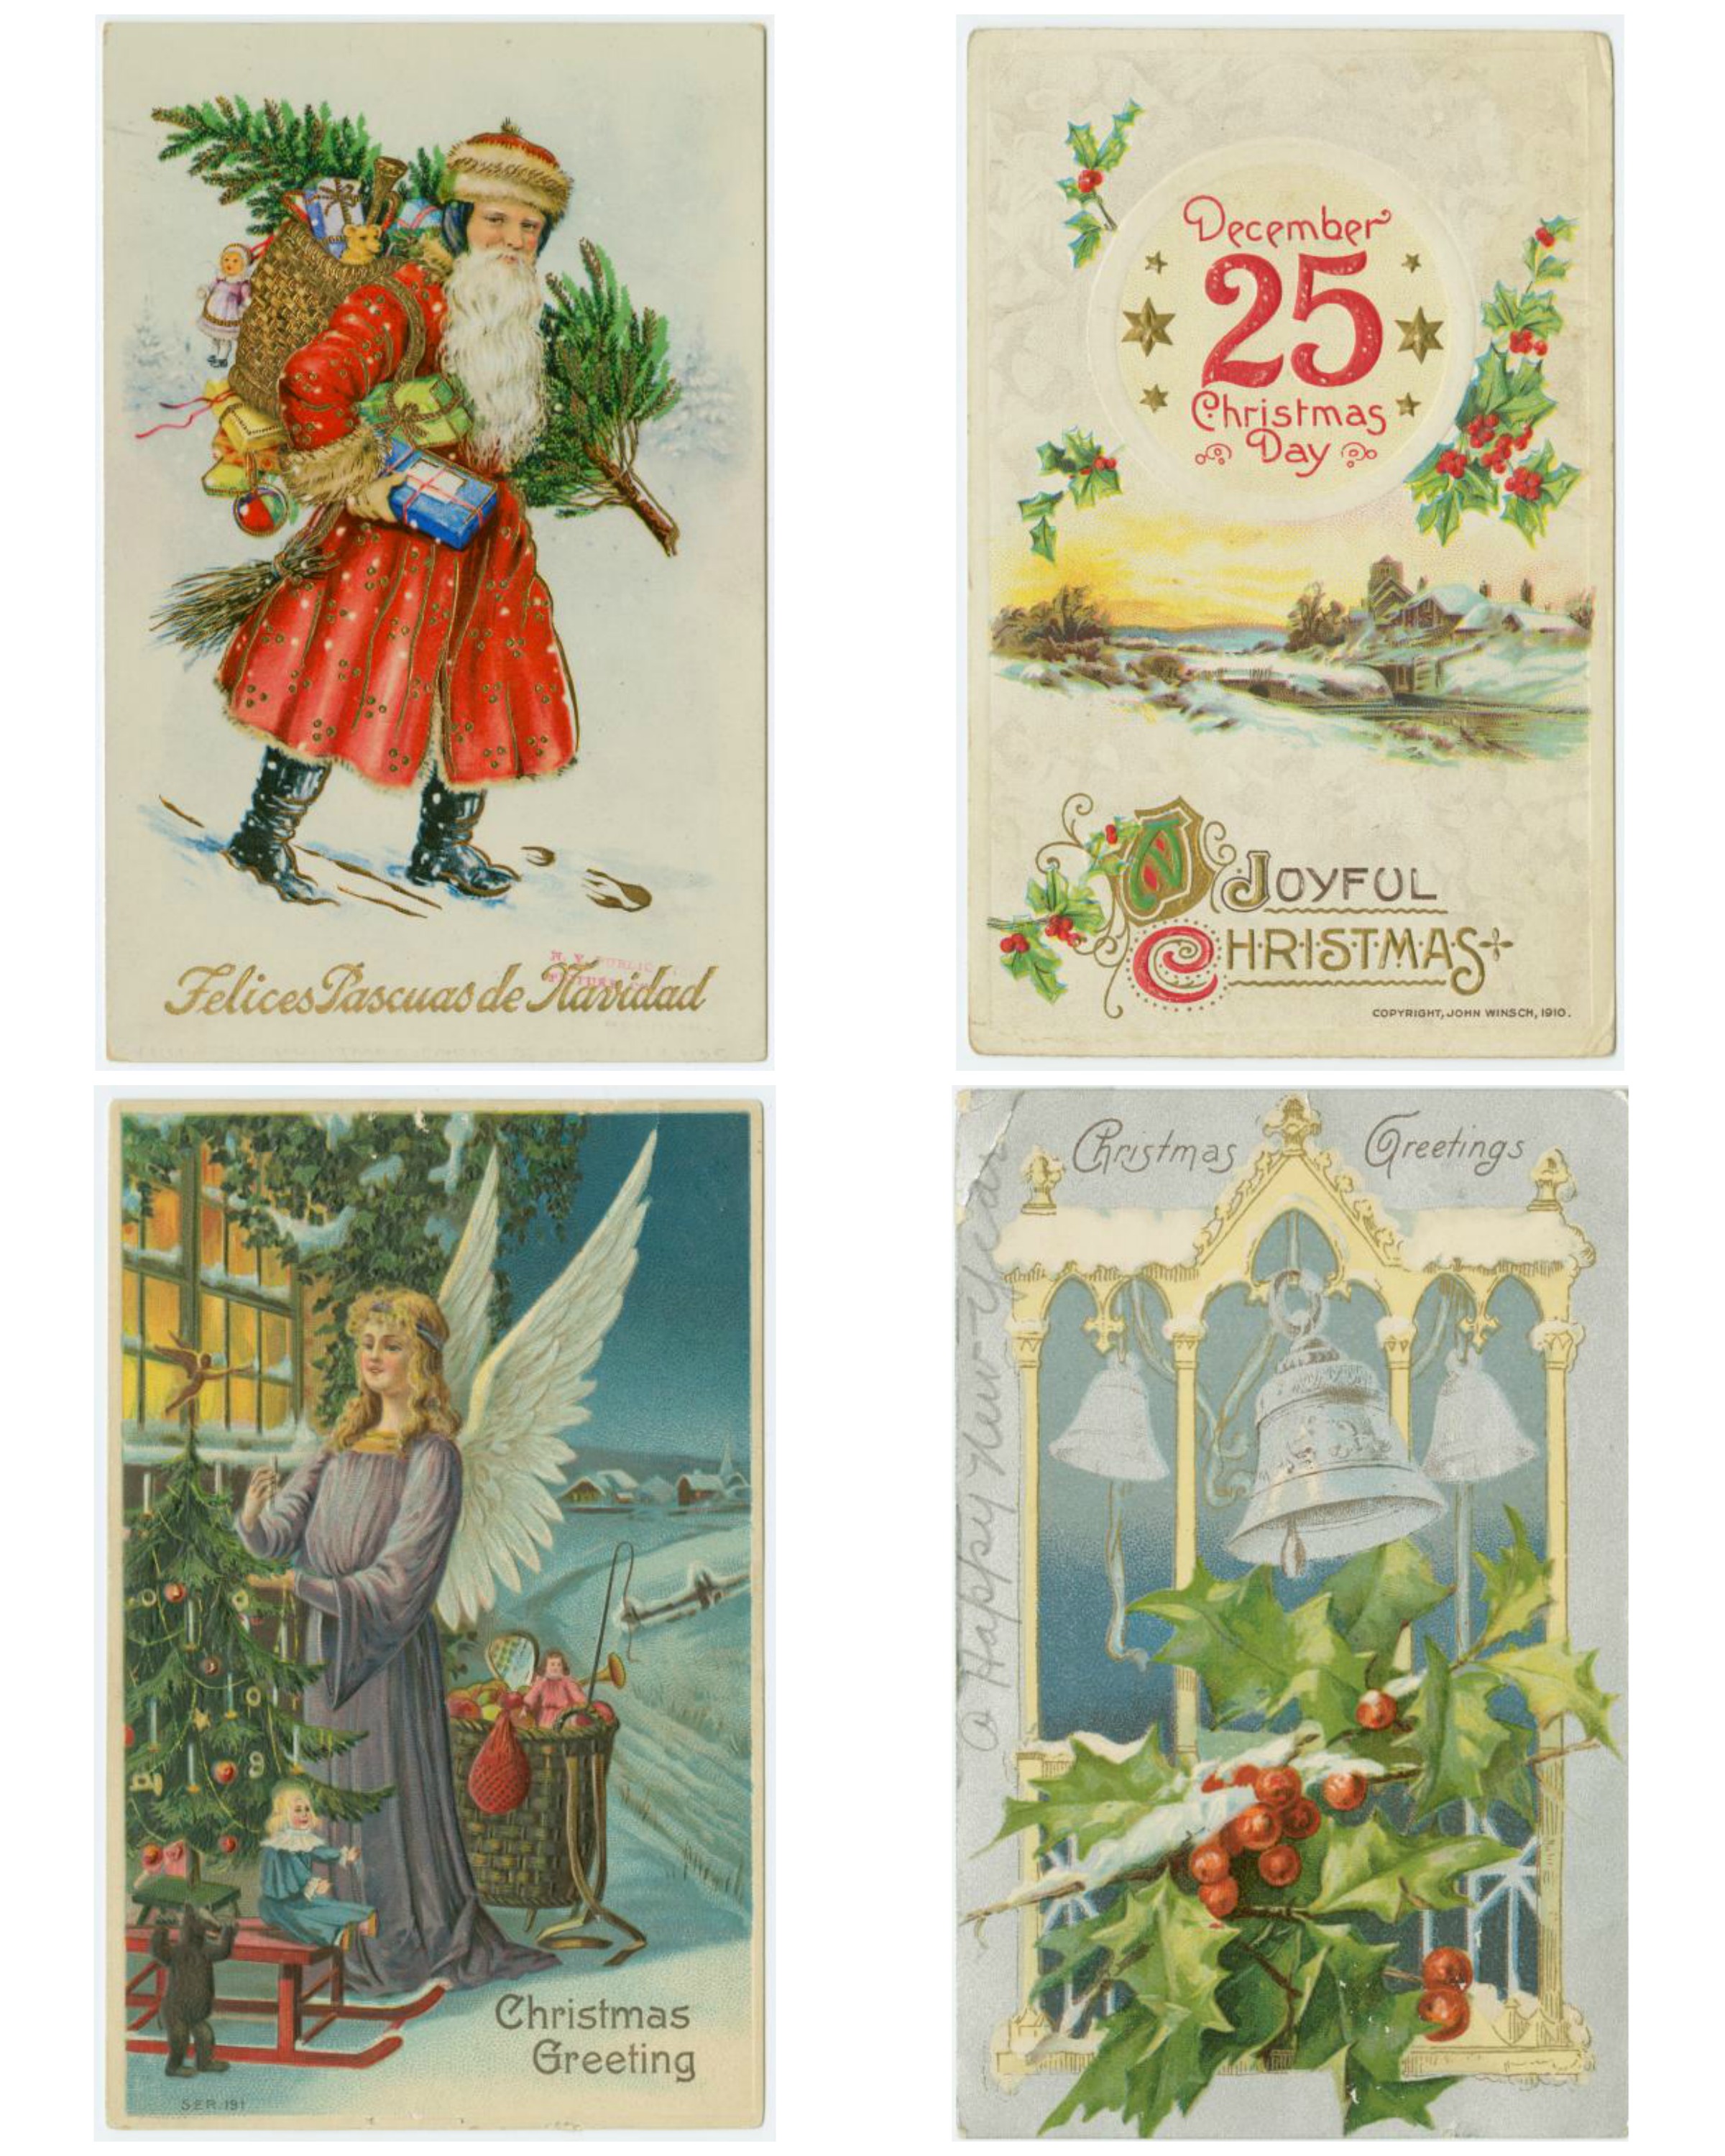
I just love old holiday postcards, especially Christmas ones. The artwork is so pretty and the sentiments so sweet.
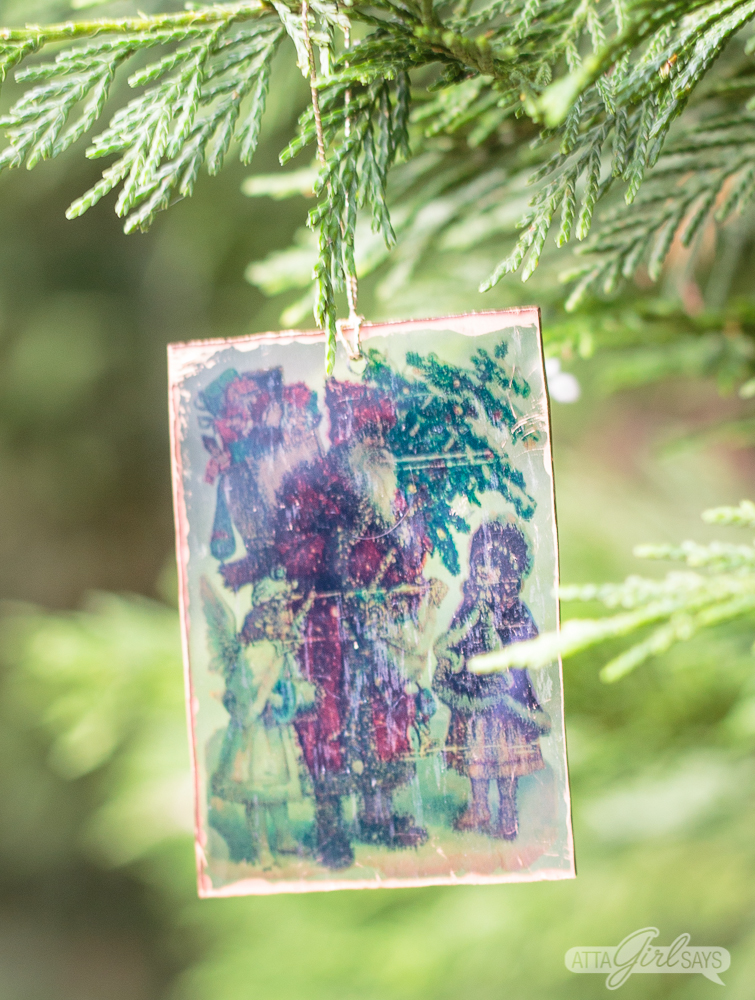
I decided to use some of vintage postcard imagery from the New York Public Library’s digital collection to make my Shrinky Dinks Christmas ornaments.
This post contains affiliate links for your shopping convenience. If you make a purchase base on my referral, I earn a small commission, at no additional cost to you. Read my full disclosure policy here.
Supplies
Shrinky Dinks paper (I used Crystal Clear, but you can also get Shrinky Dinks Inkjet paper for your printer)
Shrinky Dinks printables (Grab the free printable templates of the designs I used at the links below)
Scissors
Hole punch
Parchment paper
Baking sheet
Gold liquid leaf
Gold cording
How to Make Shrinky Dinks Christmas Ornaments
These Shrinky Dink Christmas ornaments couldn’t be simpler to make.
Just print out your chosen design on the shrink paper.

You can download the designs I used by clicking on the photos below. Then right click to save the Shrinky dinks printables to your computer.
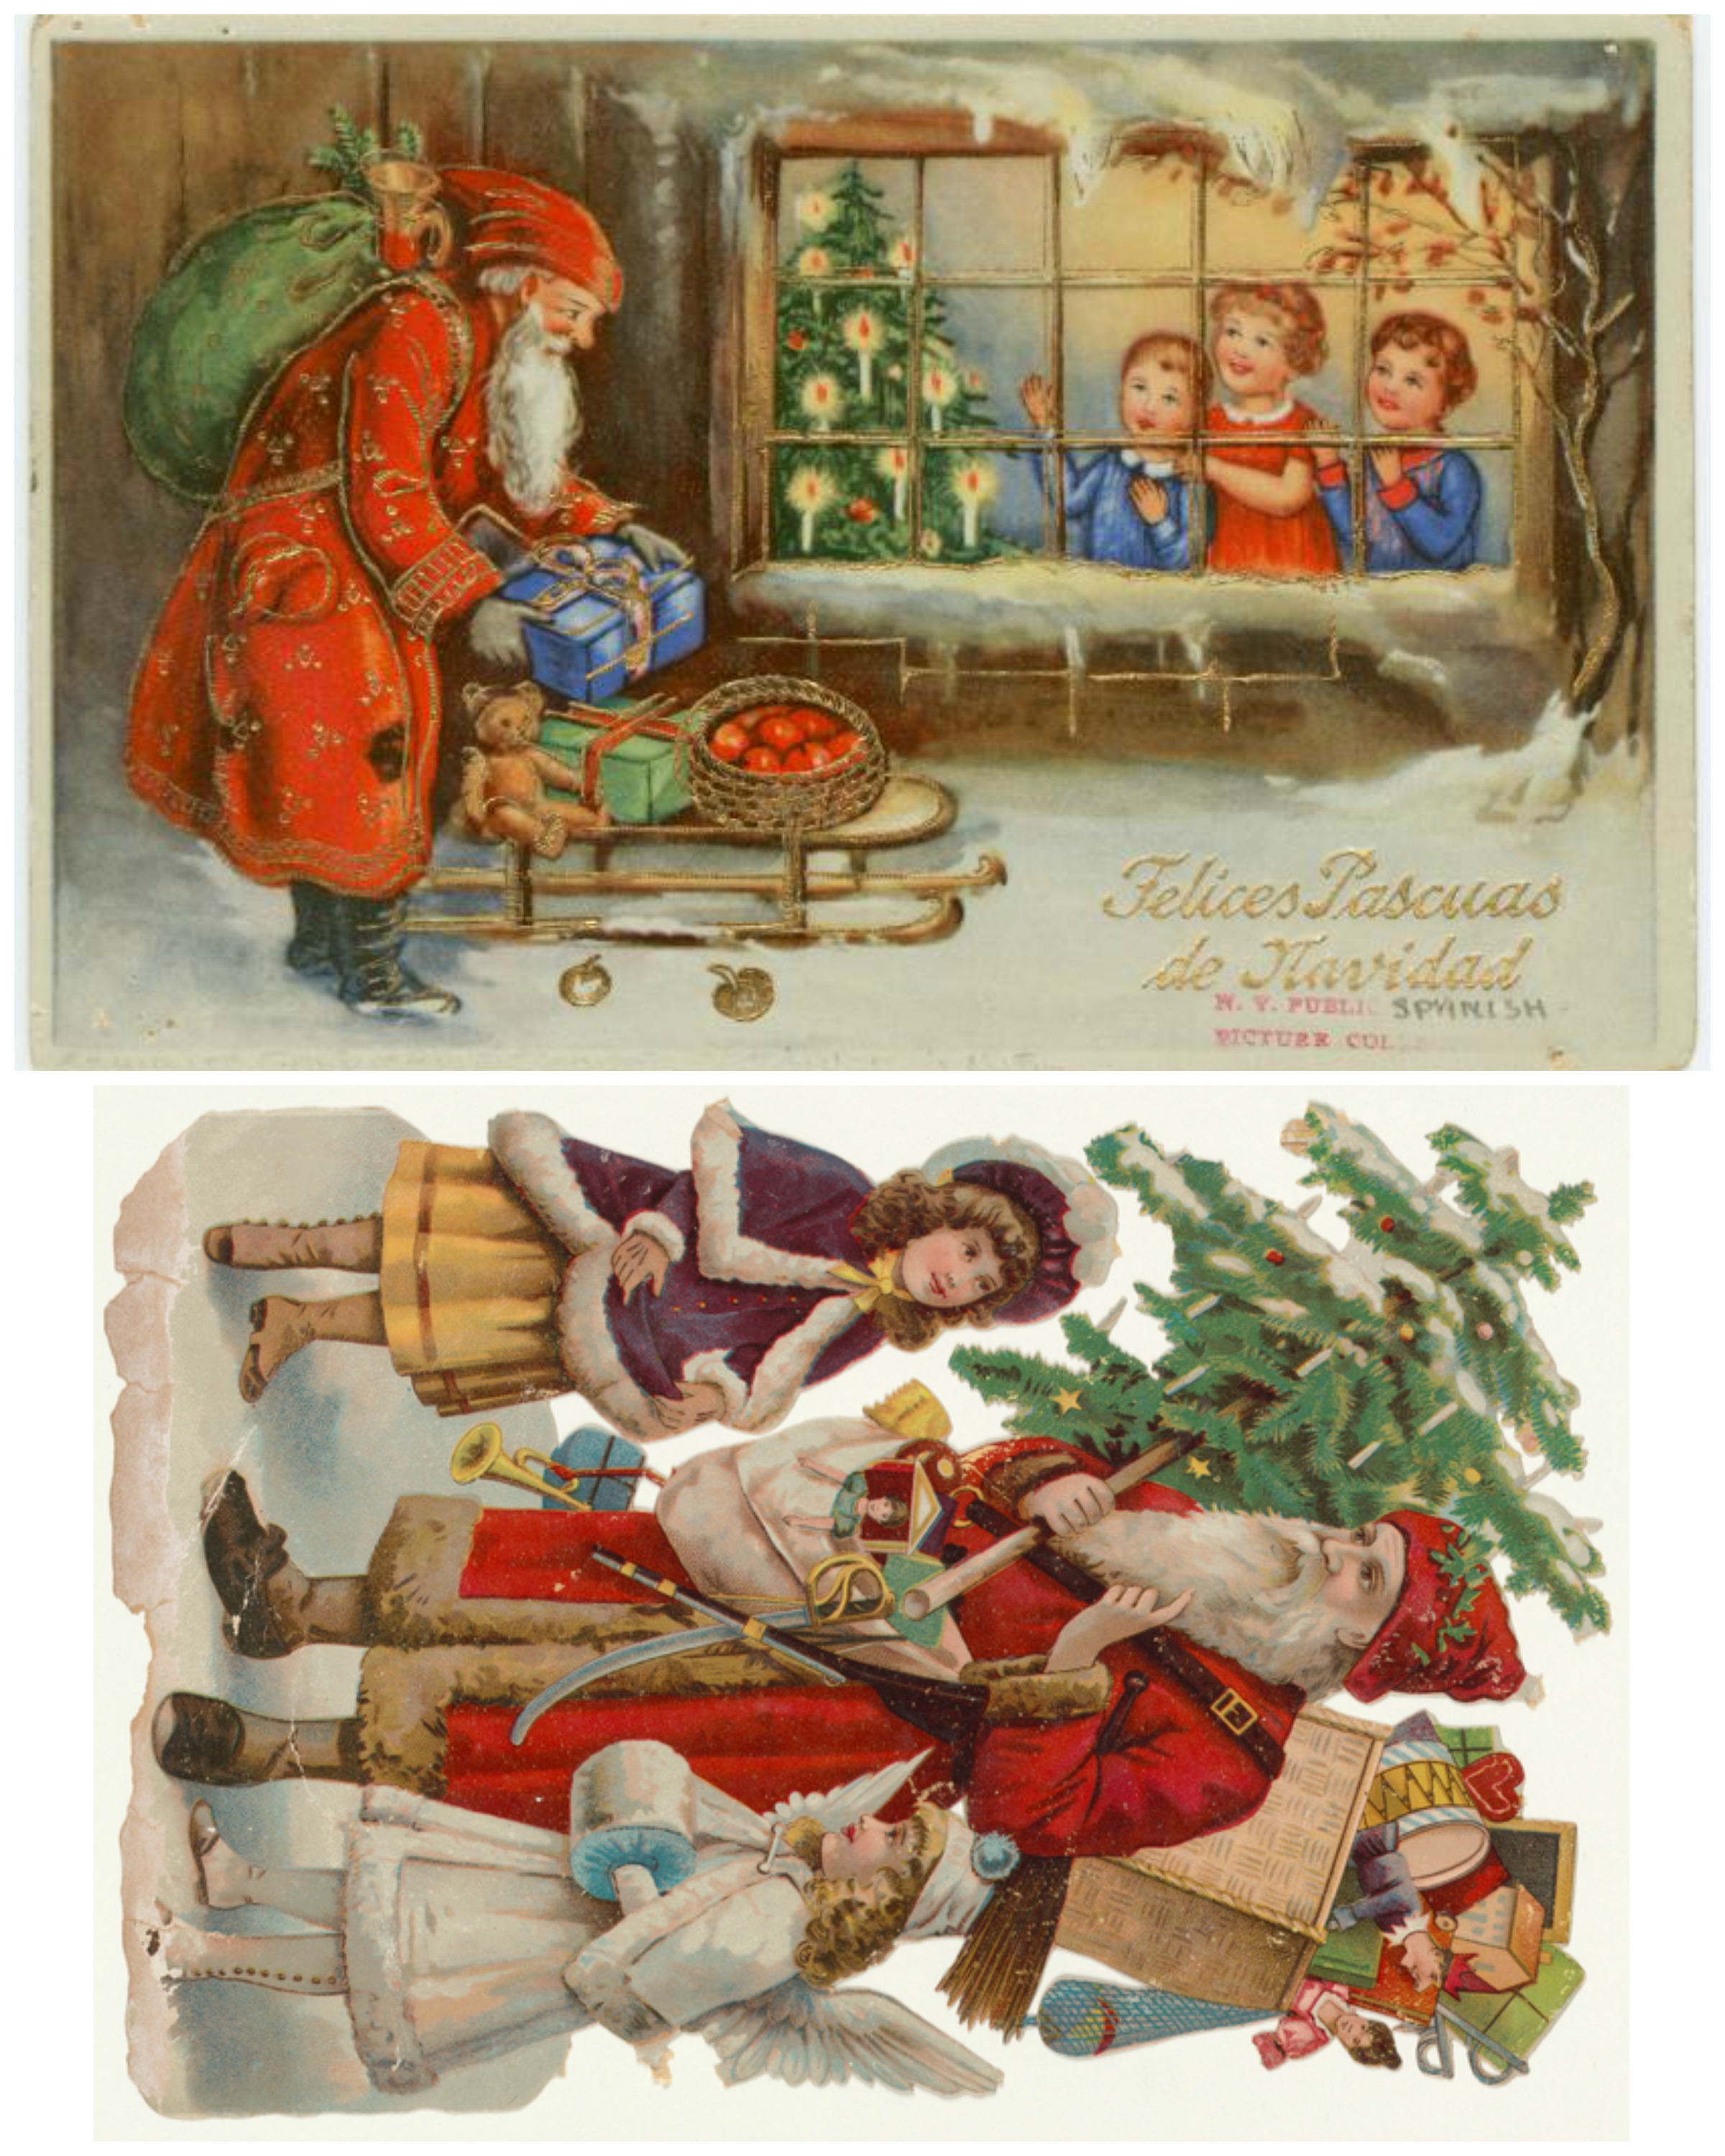
Vintage Christmas Postcard Printable
Vintage Christmas Postcard Printable #2
After you’ve printed the design, be careful handling the paper, as the ink may still be wet and can easily smudge. I actually recommend letting them sit overnight before handling and baking the Shrinky Dinks sheets to give the ink ample time to dry.
I have a dry toner inkjet printer, and I used Crystal Clear Shrinky Dinks paper for these ornaments. If you have an inkjet printer, I recommend purchasing Shrinky Dinks inkjet paper.
When using the inkjet paper, you may want to lighten the design 50 percent before printing and use the “transparency” mode if your printer has one.
When choosing designs for your Shrinky Dinks Christmas ornaments, avoid images that have lots of dark colors. Colors intensify as they shrink, so you may want to lower the opacity by 15 to 30 percent so they appear washed out when printed.

The vintage postcards were perfect for Shrink Dinks, as they have a faded, vintage look. I didn’t adjust the transparency or opacity for these ornaments, but I might experiment with that when I make my next batch.
DO NOT use shrink paper in a laser printer, as they use heat while printing.
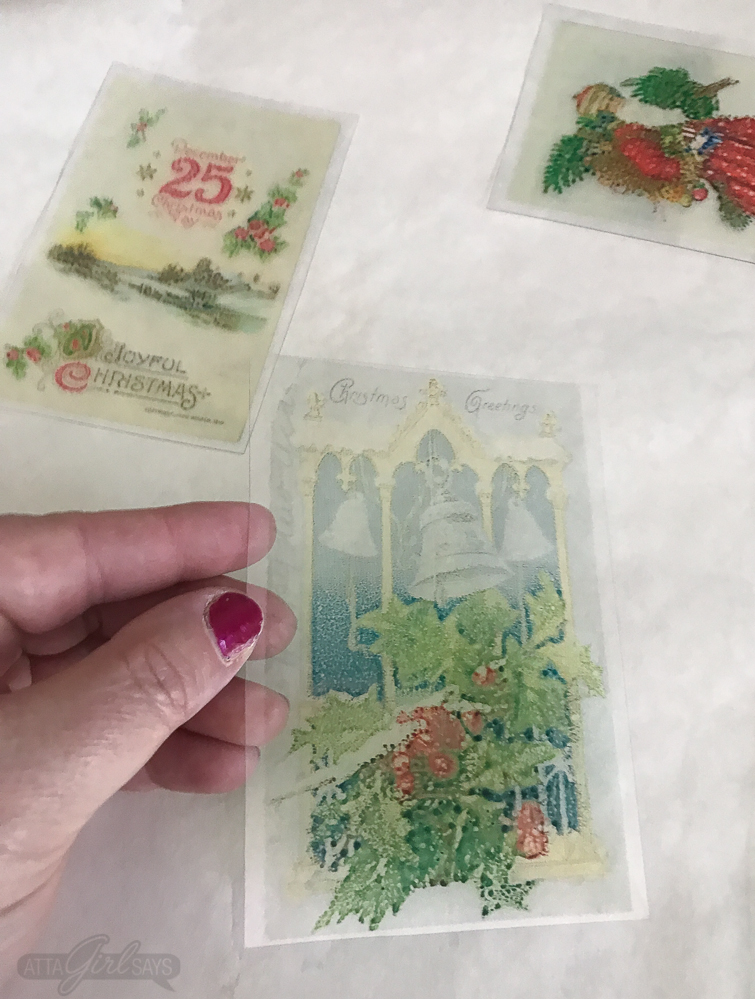
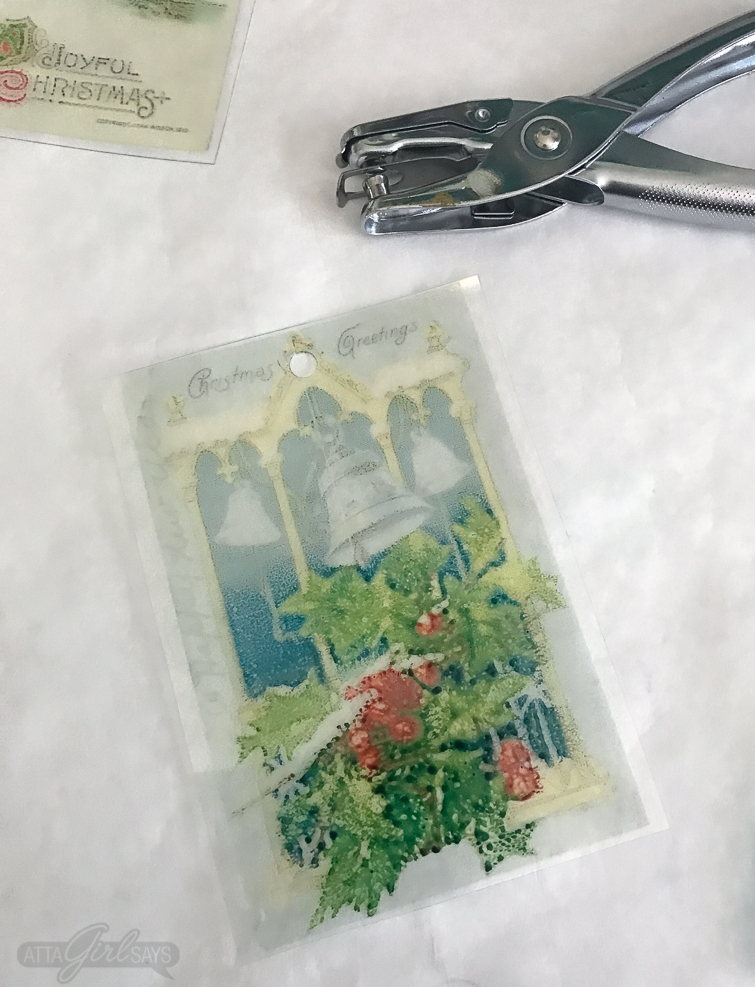
Once the Shrinky Dinks printables have dried, carefully cut out the postcards. Hold the paper by the edges to avoid smudging the ink or leaving fingerprints.
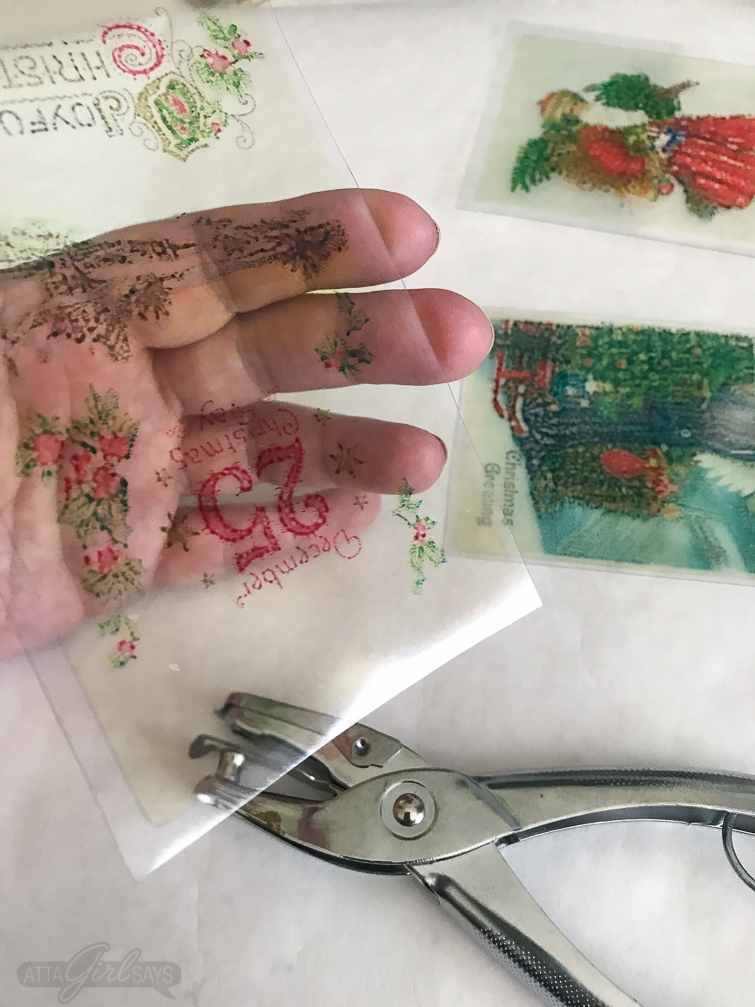
Before baking, make sure to punch a hole in the top of each ornament. Use a standard sized hole punch or larger. The holes made by mini punches will shrink too much.
How Do You Bake Shrinky Dinks?
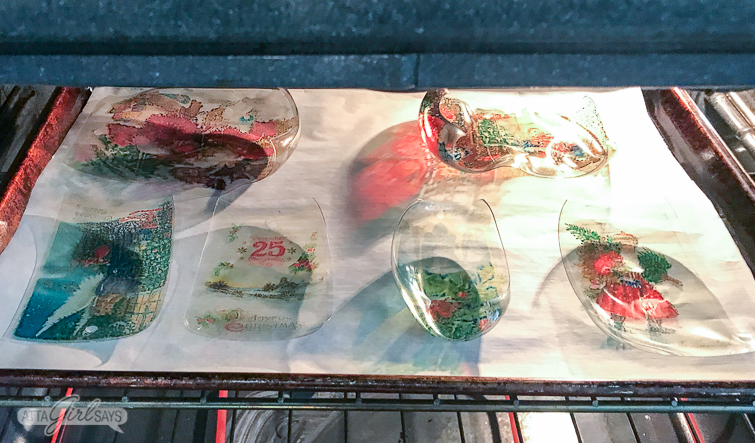
To bake Shrinky Dinks, preheat the oven to 325 degree. Line a baking sheet with parchment paper and place the Shrinky Dinks, ink side up, on the pan.
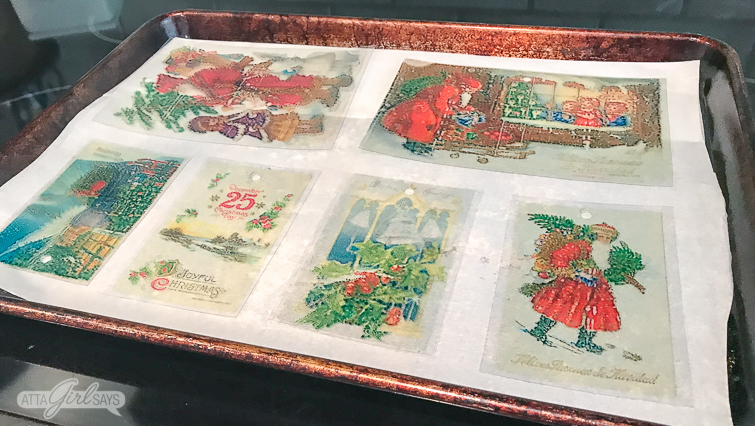
When the oven is preheated, bake the Shrinky Dinks for 3 minutes, though it may take less time.

Watch the oven closely. The Shrinky Dinks will curl up as they shrink, then they’ll flatten back out.
So cool, right?
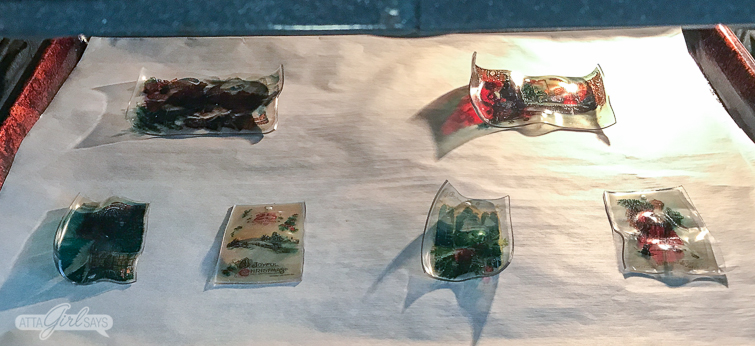
Once they’ve flattened out, bake for an additional 30 seconds. Remove for the oven and allow to cool before handling.
If you like, you can spray the Shrinky Dinks with an acrylic sealer to make sure the images don’t smudge.
(Be sure the read the baking instructions that come with your paper. The process and times may differ depending on the type of shrink paper you are using.
How Much Do Shrinky Dinks Shrink?
The finished ornaments will be a third the original size of your image, and 9 times thicker.

Keep those ratios in mind when choosing images for your ornaments. For these Christmas ornaments, I don’t recommend printing more than four images per page. You can see from my photos how much the finished ornaments shrunk in size.
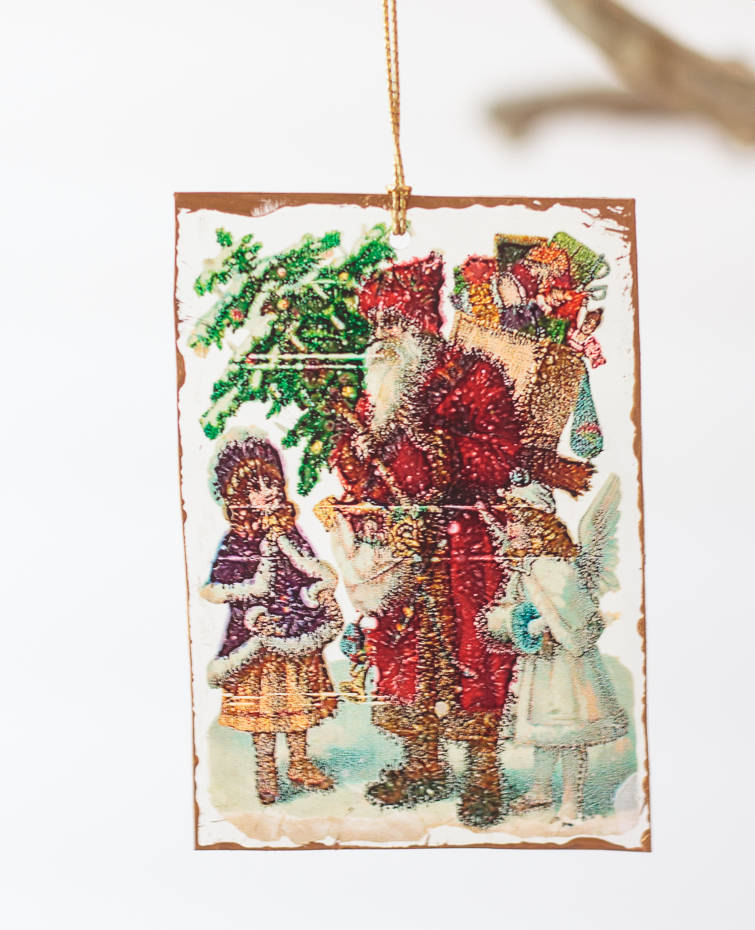
To add a little more vintage charm to these vintage Christmas postcard Shrinky Dinks ornaments, I added some gold liquid leaf to the edges. I finished them off my adding some gold cord to hang them.
Don’t forget to pin this post to make your own Shrinky Dinks Christmas ornaments
While all these ornaments look really pretty on a tree with lights shining through them, I think you could also make Shrinky Dinks jewelry out of them. How about making a pretty pendant charm to go with your Christmas sweater? Or adding one to your keychain around the holidays. They would also make pretty gift tags.
You can use other printables to make your Shrinky Dinks Christmas ornaments.
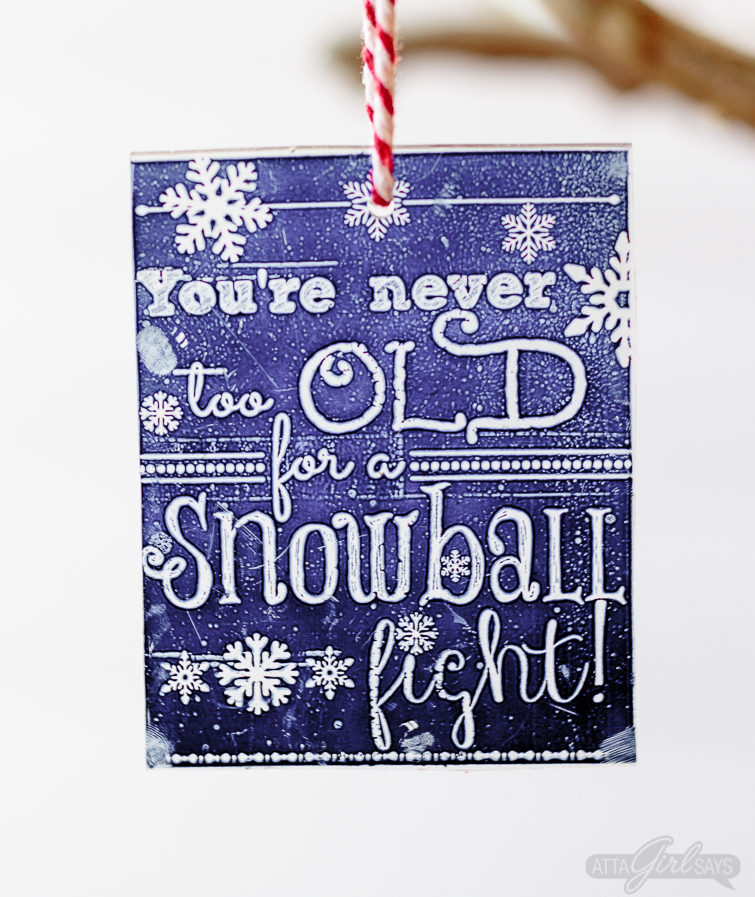
I also made some ornaments with my chalkboard snowball fight printable.

I used a purchased printable image from Lindsay Letters 12 Days of Christmas collection on an ornament. Now I just need to make the other 11 days!
If you don’t want to use your printer to make Shrinky Dinks, you can draw or stamp on the paper. When stamping, be sure to use permanent, alcohol-based inks.
Be sure to visit all the other crafters for more handmade Christmas ornament inspiration.
Here are all 12 bloggers in order of their appearance:
Day 1 – An Extraordinary Day
Day 2 – The How To Home
Day 3 – Celebrating Everyday Life
Day 4 – Atta Girl Says (That’s me!)
Day 5 – Hunt and Host
Day 6 – Lovely Etc.
Day 7 – Pet Scribbles
Day 8 – Sweet Pea
Day 9 – I Should Be Mopping the Floor
Day 10- Remodelando la Casa
Day 11 – Live Laugh Rowe
Day 12 – The Crafting Nook
Kristi Dominguez
Amy– these are seriously the prettiest! Love all the vintage graphics…they make my heart go pitter-patter!
Cami @ The Crafting Nook
Oh my Goodness!!!! They turned out absolutely beautiful! I have never tried Shrinkies and I’m so hooked. I might try them if I can find the Shrinky paper. Thanks for the inspiration!
Hugs
Cami
Atta Girl Amy
If you end up making any, please send me photos! And you should be able to find the Shrinky Dink paper on Amazon or at Target.
Mary Beth
Everything about these is perfection, Amy! You are so smart to make these with Shrinky Dinks. I can imagine an entire tree glistening with these beautiful ornaments.
p.s. I love vintage postcards, too, but I had no idea about the New York Public Library Collection. Now I know how I’ll be spending some down time.
Cristina
Well, Shrinky Dinks are something totally new to me and I’m in love! Awesome tutorial that I’m saving right now!
Diane
Amy, this is such a clever idea! And the vintage postcards just made it even better! Thank you so much for the wonderful tutorial. I’m glad you shared that the cards curl and that that’s okay in the end when they flatten out. Seriously, I would totally freak out if that happened and I would think I failed! You’ve got my wheels spinning with ideas, now.
Thank you so much for sharing your talents with us and for hopping with us another year. I LOVE having you on our “team.” {{Big Hugs}}
Atta Girl Amy
Thank you so much, Diane for your sweet comment and for having me as part of the blog hop. It’s been so much fun and so gratifying.
And yes, the curling up is part of the process, part of the magic.
Paula
Adorable!! You are so clever to think to make shrinky dinks into Christmas ornaments. I love the vintage postcard graphics that you used and these are going to look so pretty on your tree this year.
kim jones
you are a genius! I adore these to no end!!! I want to make them now! soooo fun
Pam
I love shrinky dinks!!! I actually have a hard time with them in the oven because I want to “save” them when they start curling up. It takes patience and faith they will flatten back out 🙂 ! Great tutorial!
Kelly S Rowe
Oh my goodness… so GENIUS! I absolutely adore these. Thanks so much for sharing, looks like I need to buy me some shrinky dink paper. Holla!
Atta Girl Amy
Do it!