

Learn how to use inexpensive silicone ice cube trays to cast resin figures that you can use to decorate Halloween treat jar and other spooky projects.
I know we’re down to the witching hour for Halloween crafts, but I couldn’t resist sharing these Halloween treat jars that are so cool and easy to make.
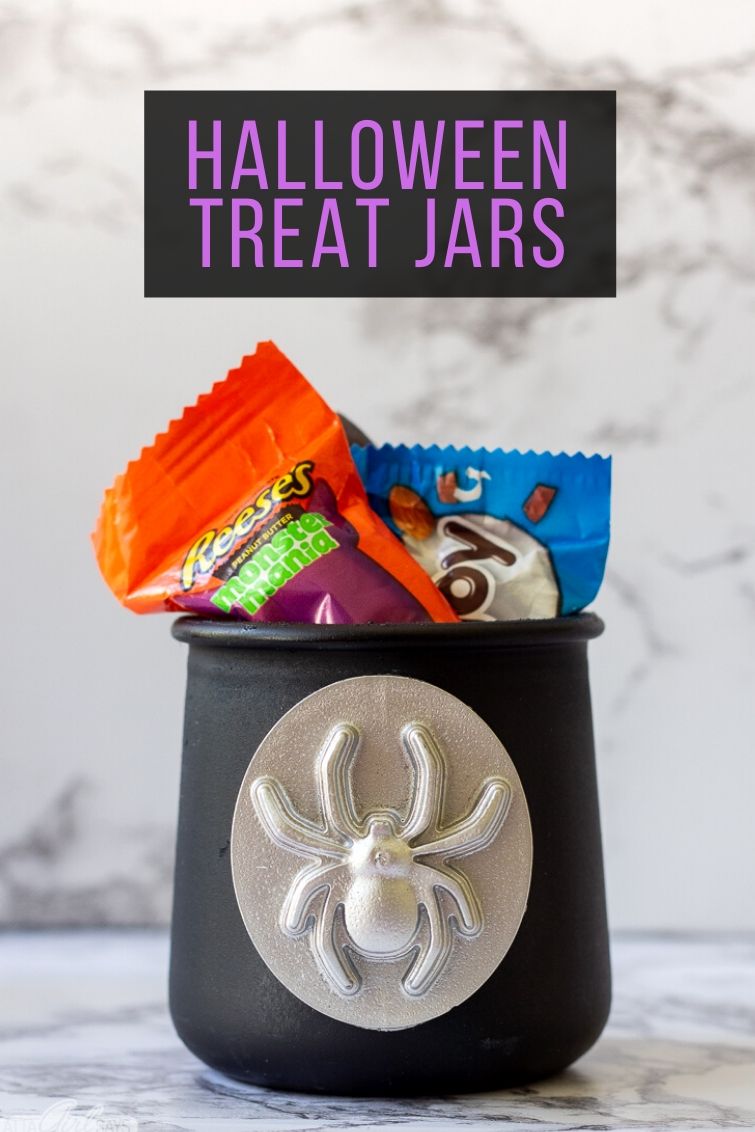
I used upcycled Oui yogurt jars, spray paint, a silicon ice mold from the dollar store and craft resin to make the candy-filled jars.
More Crafts You Can Make Using Oui Yogurt Jars
- Fall Tealight Candle Holders from Oui Yogurt Jars
- Beautiful DIY Crafts from Oui Yogurt Jars
- Mercury Glass & Sea Glass Votives
- American Flag Sand Art Jars
The coolest part of the project is using resin to cast the spooky pieces to decorate the jars. It’s like magic. Or science. Or maybe witchcraft!
Once I started making these resin figures, I couldn’t stop!
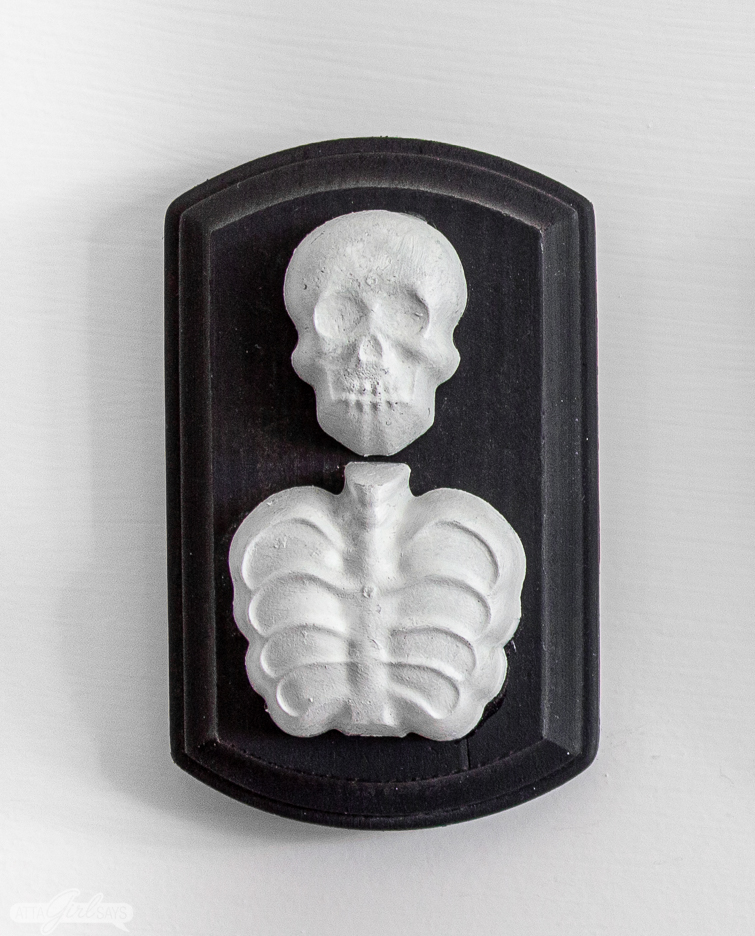
I also used some of the resin pieces to make spooky Halloween plaques. How scary would these look hanging on your walls at Halloween?
This post contains affiliate links for your shopping convenience. If you make a purchase based on my referral, I earn a small commission, at no additional cost to you. Read my full disclosure policy here.
Supplies for Halloween Treat Jars & Resin Plaques
To make these spooky Halloween treat jars and the resin plaques, you’ll need a few inexpensive supplies.
- silicone ice cube trays (You can find lots of different options online or even at the Dollar Tree)
- Amazing Casting Resin
- glass yogurt jars or baby food jars
- small wooden plaques
- rubber gloves
- paper cup
- wooden craft stick
- spray paint
- multi-surface craft paint
- hot glue or multi-surface craft glue

How to Cast with Resin
Before beginning this project, put down plastic or a drop cloth to protect your work surface. You may also want to wear rubber gloves to protect your hands.
I used Amazing Casting Resin, which is a two-part resin, for this project. You can find it on Amazon.

The kit comes with two different bottles of liquid solution that when mixed together go through a chemical reaction and harden. The kit also includes a set of measuring cups and stir sticks.
To create your resin figures, measure equal parts of Solution A and Solution B into the separate provided measuring cups.

Following the instructions provided with the Amazing Casting Resin kit, pour one of the solutions into a paper or plastic cup (do not use Stryofoam).

Then carefully pour an equal amount of the second solution into the cup.

Use a wooden stir stick to quickly mix the two solutions together. As the solutions combine, the mixture will become slightly milky.
You’ll only have about two or three minutes of working time before the resin begins to harden, so work quickly.
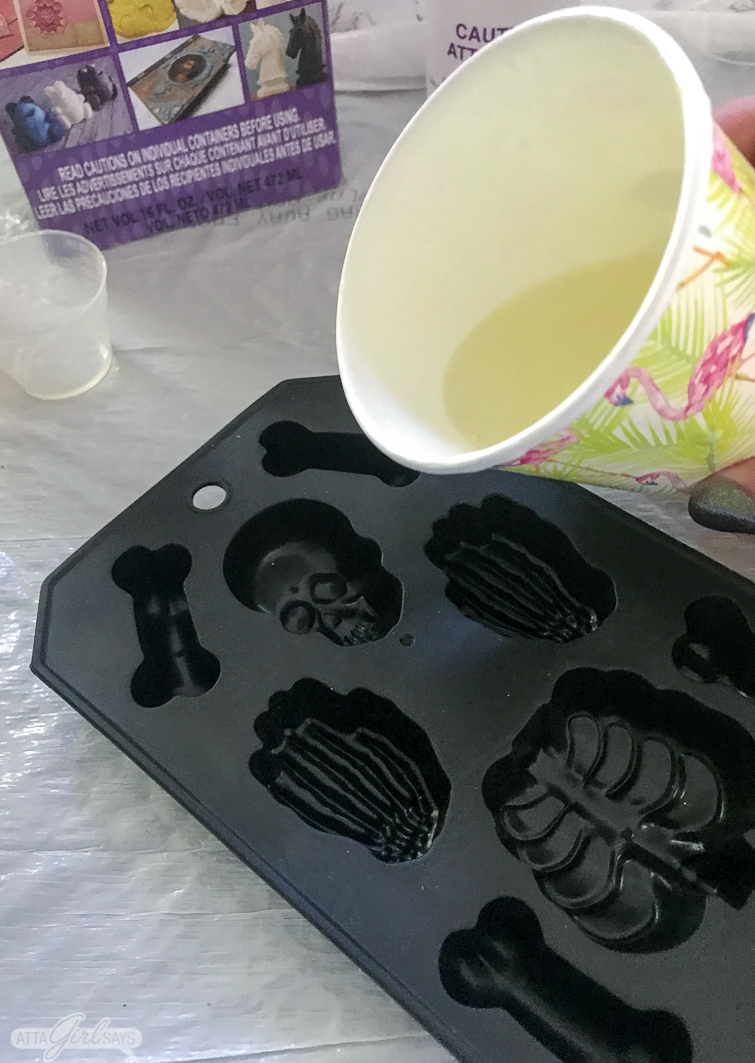
Slowly pour the well-mixed resin into silicone ice cube trays.

Try not to overfill the cavities. But if you have a few drips, you can easily remove those when the resin hardens.
Almost immediately, the resin will begin to cure and harden as a chemical reaction occurs when the two solutions are mixed.

The clear resin turns white as it hardens. You’ll also notice that it will become hot to the touch.

The resin will take anywhere from five to 15 minutes to cure, depending on how large your mold is. You’ll know it’s ready when the resin becomes white and solid and is cool to the touch.
At this point, you can pop the castings out of the mold.

When you first remove the resin pieces from the silicone mold, they may feel slightly greasy. You can wipe away any residue to prep them for painting.
You can use spray paint or multi-surface craft paint on resin.
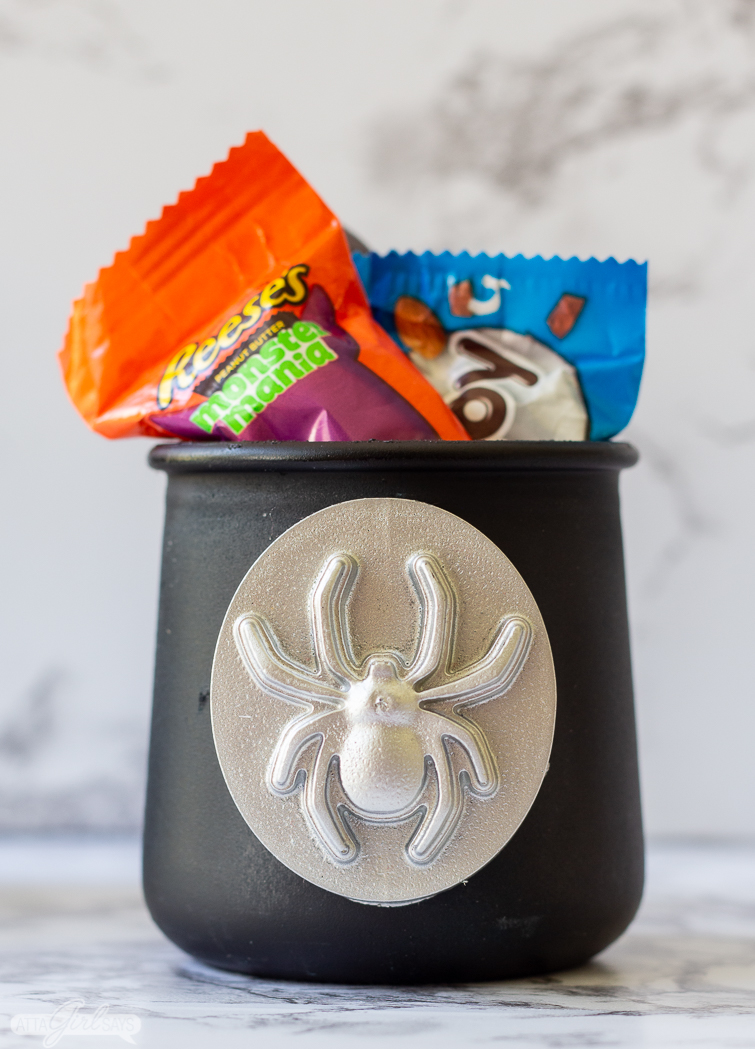
I used a silver metallic spray paint for the spider amulet on this Halloween treat jar. I painted the jar using matte black spray paint, and used hot glue to attach the resin spider to it.

To make the skeleton bones appear more realistic, I painted them with several layers of multi-surface acrylic craft paint in hues of ivory, gray and white.

I made a lot of different Halloween resin castings — skulls, bones, spiders, spiderwebs — plus some for other holidays. There are so many different ways you can use these resin pieces for crafts, and I can’t wait to make more castings. I’m thinking I may make some amulets and earrings out of the remaining bones and skulls I have.
Pin This! Halloween Treat Jars & Resin Craft
You may also enjoy these other Halloween crafts:
Spooky Dollar Tree Crystal Balls


Michelle James
Amy, these totally blew my mind! I would have never thought to use resin. What a creative idea! I can’t wait for the Christmas molds to come out now. 🙂