
I love looking back on our old vacation photos. They really take me back to a moment in time and all those special experiences we’ve had through the years as a family.

Like that time we had an ice cream party poolside in Florida. That face is what summer is all about. Skinned knees, sunburned cheeks, sweet treats and simple joy.

Most of our vacation photos are digital only — stuck on our phones and computers, and we only see them when Facebook reminds us of them.
At some point, I got out of the habit of printing photos from our trips. Can you relate?
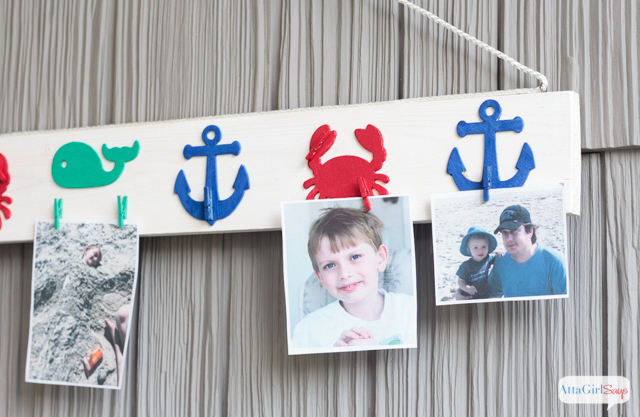
But I fixed that with this quick and inexpensive DIY project — a nautical picture rail for displaying your vacation photos.
Disclosure: This post is sponsored by DecoArt, and it also includes affiliate links. I only recommend companies and products I love. Read my full disclosure policy here.
Supplies
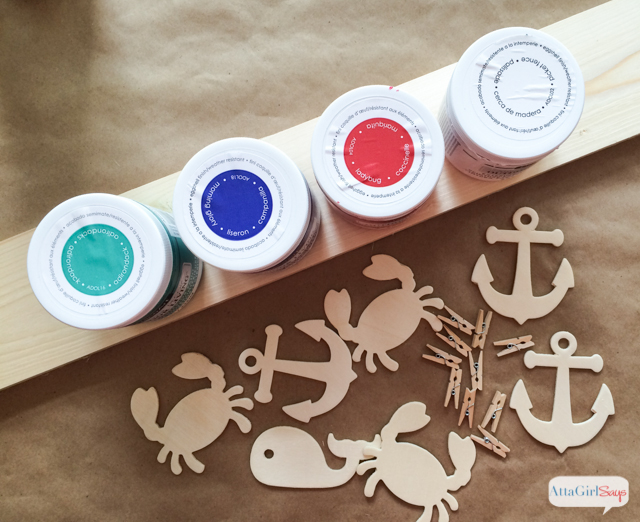
- DecoArt Americana Decor Outdoor Living Paint in Picket Fence
- DecoArt Americana Decor Outdoor Living Paint in Morning Glory
- DecoArt Americana Decor Outdoor Living Paint in Adirondack
- DecoArt Americana Decor Outdoor Living Paint in Ladybug
- Sandpaper
- Paintbrushes
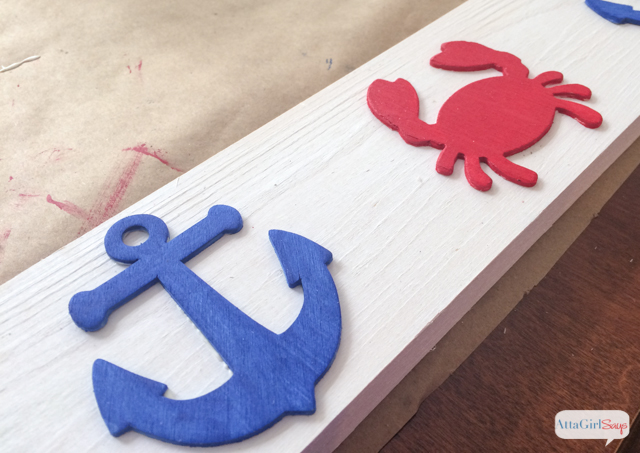
- Wooden crab cutout
- Wooden anchor cutout
- Wooden whale cutout
- Miniature wooden clothespins
- 1X4 pine board, cut to desired length
- wood glue
- toothpicks
- nylon rope
- screw eyes
Instructions
Cut a 1X4 pine board to the desired length for your picture rail.
I happened to have a 37-inch scrap board left over from our potting bench outdoor server project, so I used it, as is.
Sand the board and paint it with one coat of DecoArt Americana Decor Outdoor Living paint in Picket Fence. You can do additional coats for more coverage, but I liked the weathered, whitewashed look I got from a single coat.
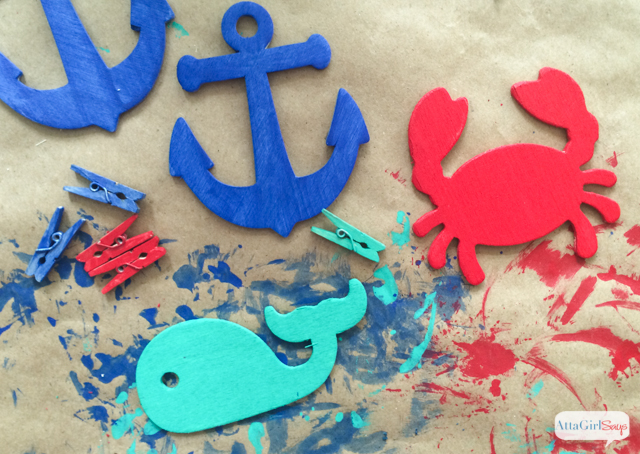
Paint miniature clothes pins and wooden cutouts from the craft store in alternating shades of Ladybug red, Morning Glory blue and Adirondack aqua Outdoor Living paint. (I found my nautical wooden cutouts at Michael’s, but you should be able to find similar at any craft store.)
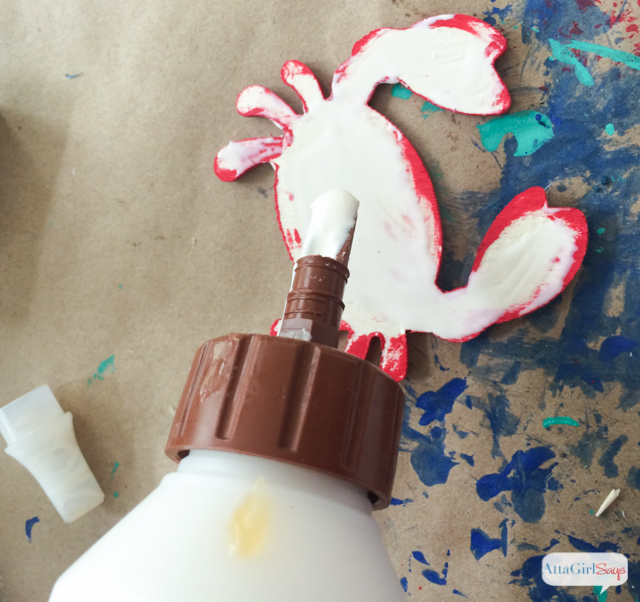
Once paint has dried, apply a thin coat of wood glue to the back of each nautical shape and glue to the painted board. Wipe away any excess glue before it dries.
You may need to place a heavy book on top of the wooden cutouts while you wait for the glue to dry.
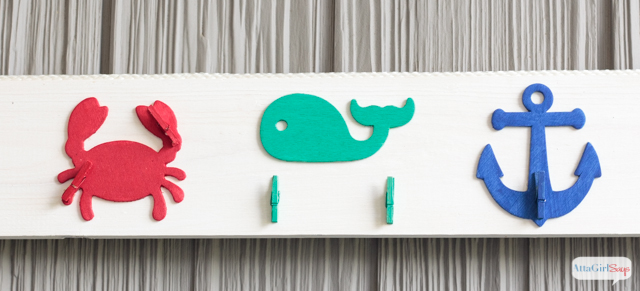
Use a toothpick to apply a thin bead of wood glue to the back of each mini clothespin. Attach clothespins to the cutouts or board to hold photos.
Allow the glue to dry completely, preferably overnight, before adding photos to your display.
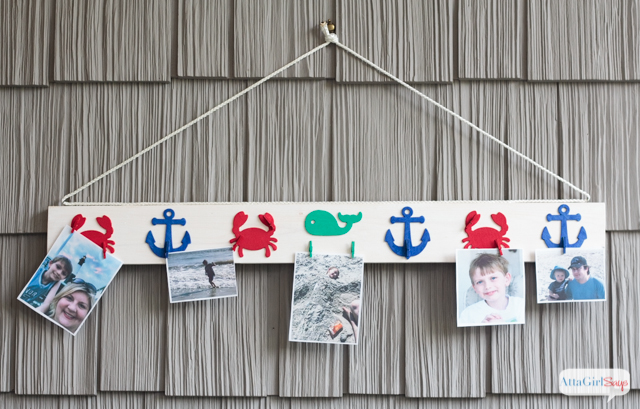
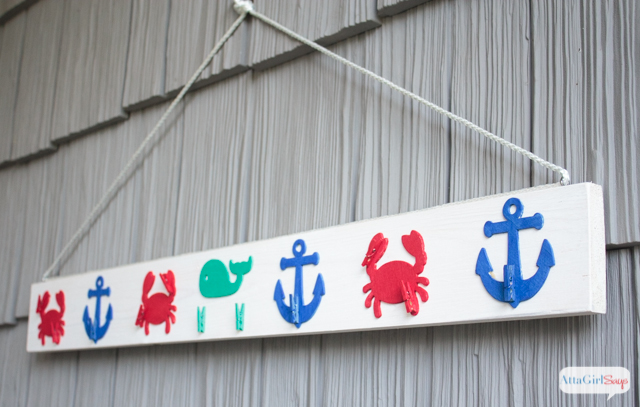
To hang the picture rail, attach a screw eye to each end of the board’s top edge. Thread nylon rope through the screw eyes and knot the ends to form a hanger.
Finally, print out some photos to hang from the picture rail.
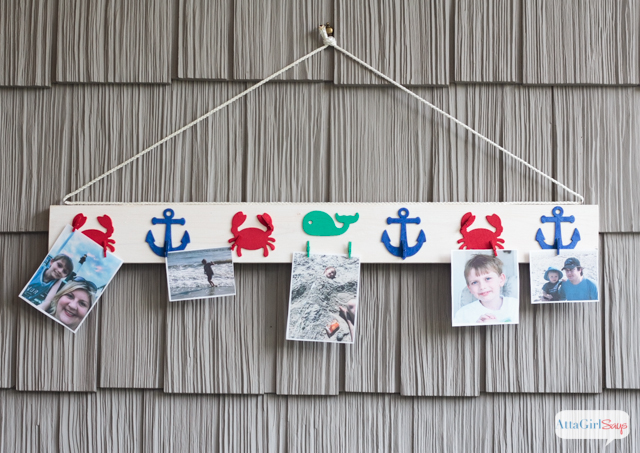
Since I used nautical wooden cutouts for my project, I used only beach scenes. But you can customize the picture rail to fit your vacation photos.
If you liked this project, be sure to check out these other fun DIYs.


No-Sew Beach Towel Party Banner
Frugal Hausfrau
How darling is this and perfect for any lake house!! Thanks for sharing with us at Throwback Thursday!
Mollie
Rachel Osborn
I love that this is something easy enough for the kids to help with! Mine would be so proud to help paint something that ended up on the wall of our home! Thanks for sharing this at the Family Joy Linkup!
Morgan @ Morgan Manages Mommyhood
Love how fun and easy this is!
samantha
Such a cute idea, I love the bright colors! Thanks for sharing at the Family Joy LInk Party!
creativejewishmom/sara
Adorable and love that nautical dresser too, fabulous! thanks for sharing on craft schooling Sunday!
Laurie
Adorable! This really turned out cute and such a fun idea! Pinned to share. Thanks for linking up and sharing with us for Snickerdoodle Sunday!
Lisa @ Fun Money Mom
I love all things coastal/nautical and this is a super cute idea! Thanks so much for sharing it with us at Share The Wealth Sunday!