
Turn vintage china into a pretty teacup bird feeder for your yard or garden. This project is a great way to use mix-and-match cups and saucers and thrift store finds.
My friend, Robin, hosts lovely tea parties in her English garden. Cucumber sandwiches, clotted cream, scones – the works — all served in her finest china. It feels like something out of Downton Abbey.

My idea of a garden tea party is a bit different, though.
Rather than serving tea and treats from fine china, why not upcycle it as garden art?

You can find pretty, but inexpensive china at thrift stores, antique shops and yard sales. And there are so many ways to repurpose it for the garden.
Turning a china cup and saucer into a teacup bird feeder is one of the easiest kitchen-to-garden upcycles.
[clickToTweet tweet=”Turn vintage cups & saucers from the thrift store into functional garden art! Learn to make a teacup bird feeder. #thriftscore #birdwatching #forthebirds #vintagechina” quote=”Turn vintage cups & saucers from the thrift store into functional garden art! Learn to make a teacup bird feeder.”]
If you don’t have anything in your cupboard for this project, you should be able to find a cup and saucer for just a couple of dollars at yard sales or local thrift stores. If you can’t find a matching set, no worries. Just pick pieces that coordinate. The birds won’t mind!
Disclosure: This post contains affiliate links for your shopping convenience. If you make a purchase based on my referral, I earn a small commission, at no additional cost to you. Read my full disclosure policy here.
Supplies for Teacup Bird Feeder
- Epoxy or a polyethylene glue, like E-6000, 3M Ceramic or 3M Super Strength Adhesive, that is made for bonding glass or ceramics.
- Cup and saucer
- bird seed
- Twine (optional)
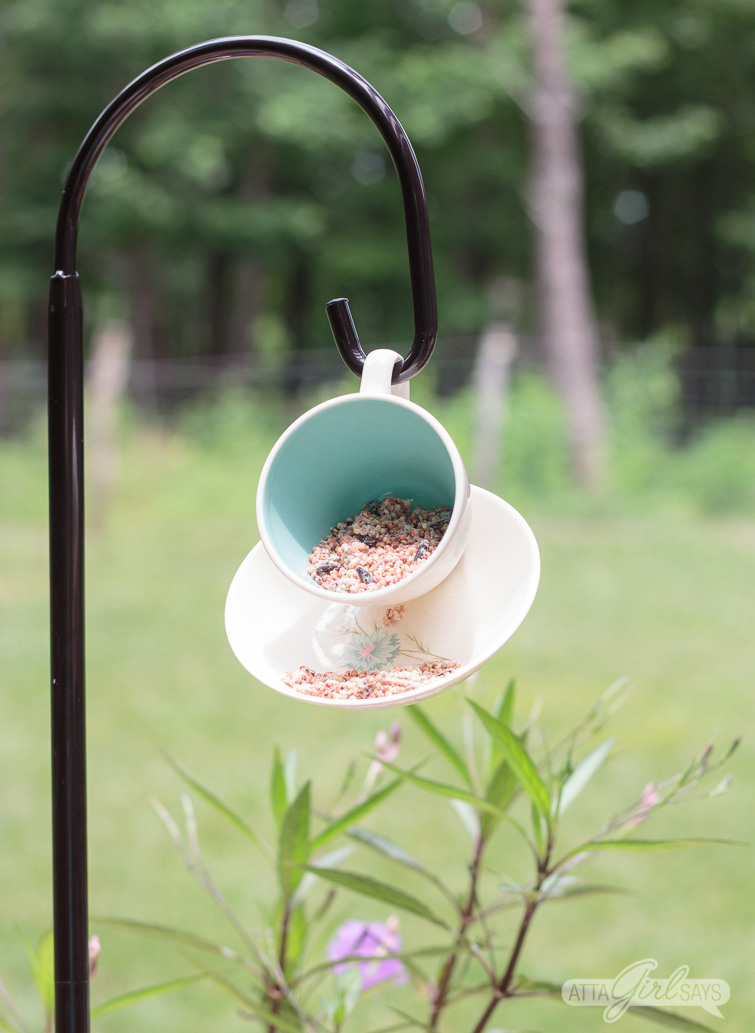
- Shepherd’s hook

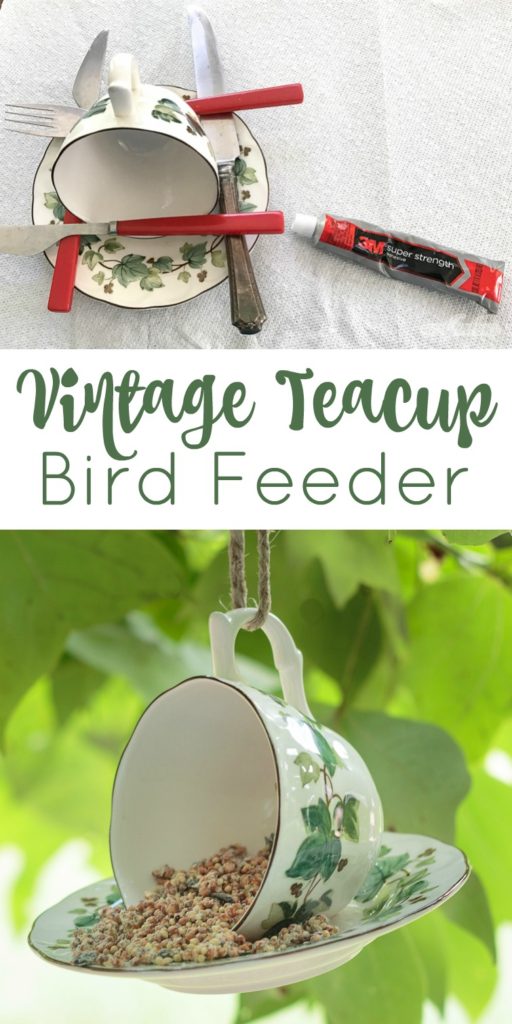
Before gluing the cup and saucer together, determine the best position for the feeder. Depending on the shape of the saucer, you may need to position the teacup on its side or at an angle.
The handle of the teacup should be facing upwards.
Once you’ve determined the right position, apply a generous amount of glue to the teacup and bond to the saucer. Press and hold for a minute. You may need to use something to hold the teacup in place while the glue cures. Utensils work great for this.
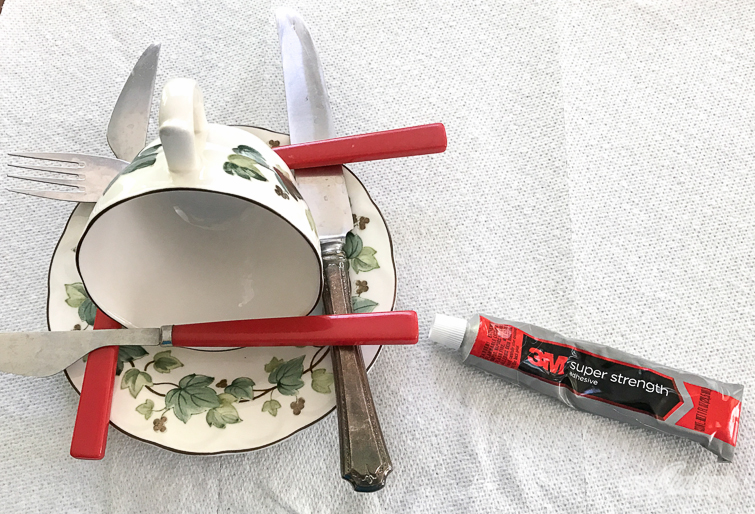
Allow the glue to cure and set for at least 24 hours. Use twine, if necessary, or a shepherd’s hook to hang the bird feeder in your garden, then fill with seed.

If you don’t want to hang the bird feeder, you can glue the saucer to a length of copper pipe or a repurposed stair spindle and stake it in your garden or flower bed.
You can also make a bird feeder out of a teapot and a larger plate, using the same technique.
You may also enjoy these posts:

Rustic Tobacco Stick Bird Feeder

“For the Birds” Table Makeover
Kris Spencer
If you live in a hot climate, you may want to use 100% silicone for the tea cup bird feeder. The glues mentioned here (E-6000, 3M, Epoxy etc) are good glues, but they do NOT necessarily hold up in the outdoors. Ceramics heat up and as the glue begins to often after a few days in the heat, the thing comes apart. 100% silicone is made for outside and made for glass and can withstand temperatures up to 400 degrees. I found a great article about glue and garden art on-line. If you have any problems with your teacup art coming apart, try the silicone.