

Botanical Easter eggs made with decorative transfers add a beautiful, vintage touch to your Easter decor. Make them using faux eggs or ostrich eggs.
After creating some artwork and making over a game table with a rub-on decorative transfer, I’ve been looking for other ways to use them.

Look at how pretty the transfers look when applied to eggs. These botanical Easter eggs featuring vintage plant and flower prints and watercolor florals make such a statement.
And they’re not just for Easter. Ostrich eggs are popular in home decor, and they look great displayed in a large bowl on a coffee table. Or showcase a favorite on a stand or large egg cup.

I found one shop online selling decorated ostrich eggs for $450 each! These cost a fraction of that to make.
You can use these technique on lots of different types of eggs — faux craft eggs, ostrich eggs, emu eggs and papier-mâché eggs. You can even apply the rub-on transfers to real eggs, but you’ll need to be extra careful that you don’t break the fragile blown-out eggs when applying the transfers.

I made an assortment of different botanical Easter eggs, some of which I painted with acrylic craft paint and others I left natural.

I used rub-on transfers from Iron Orchid Designs to create these decorated Easter eggs. But you can also find other transfers online and in craft stores.

I’ll include links to the transfers I used, plus other pretty vintage botanical options, in the how to instructions below.
This post contains affiliate links for your shopping convenience. If you make a purchase based on my referral, I earn a small commission, at no additional cost to you. Read my full disclosure policy here.
Supplies for Vintage Botanical Easter Eggs
You will need the following supplies to make these pretty Easter eggs:
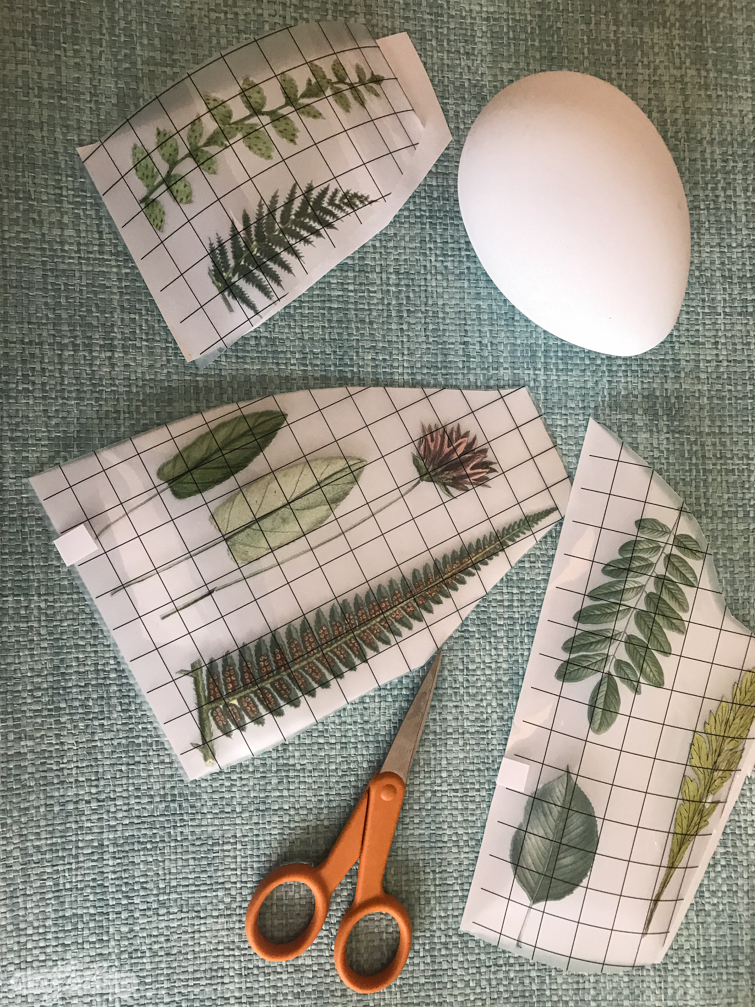
- decorative rub-on transfer and applicator
- scissors
- faux craft eggs, ostrich eggs, paper eggs, wooden eggs or blown-out real eggs
- painter’s tape
- craft paint (optional)
- furniture sealing wax (optional)
How to Decorate Easter Eggs with Vintage Botanical Illustrations
If desired, paint eggs with acrylic craft paint. I like using DecoArt Americana acrylic. I usually paint two coats to ensure the egg is fully covered.
Cut out flowers, leaves and other images from the decorative transfer to apply to the eggs. Be sure to leave the transfer on the backing paper until you’re ready to use it.
For this particular egg, I used images from the Fronds Botanical from Iron Orchid Designs. I also used elements from the Midnight Garden, Ladies in Waiting and Wander transfers. I’ve linked to online shops that sell Iron Orchid Design transfers and you can also find local and online retailers here.
Other places to find rub-on transfers
You can also find pretty rub-on transfers from A Maker’s Studio, at craft stores and on Amazon.
Once you have trimmed the decorative transfer, remove it from the backing paper and position the image on the egg, holding in place with painter’s tape or washi tape.
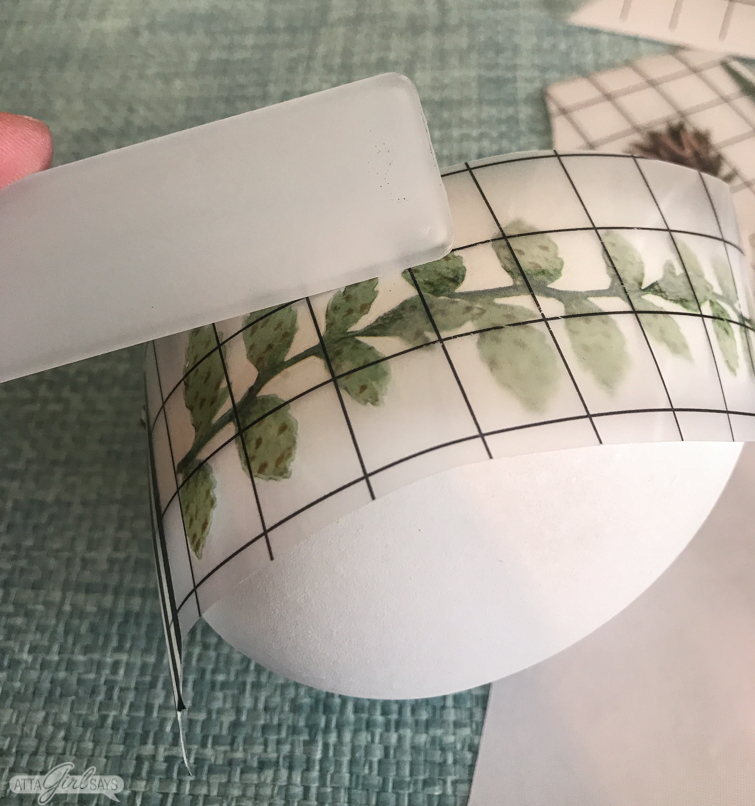
Use the applicator, included with the transfer, to rub the image onto the surface of the egg. Since you are working on a curved surface, instead of a flat one, you may have to work in small sections. Press the transfer sheet onto the egg before burnishing with the applicator tool.
For more tips on how to apply decorative transfers to eggs, including a video tutorial, be sure to check out this Instagram story highlight.

Once you’ve completely rubbed the transfer onto the egg, slowly peel away the plastic sheet to reveal the image.

Because the egg is rounded, you may see some small wrinkles in the design. You may be able to press or flatten those out with your fingers or by burnishing the design. I do this by placing the backing paper that came with the transfer over the image and going over it again with the applicator tool.
Continue adding more images on the egg. Be careful not to tape over any existing designs, as the tape may lift the image.

To finish the botanical Easter eggs, apply a coat of clear furniture wax and buff to a a shine. This step isn’t required, but I think it adds a nice sheen to the painted eggs. I don’t recommend waxing the ostrich eggs as they already have a glossy finish.

The technique works the same way when you’re using real ostrich eggs. You just have a bigger surface to work on, so you can showcase larger vintage botanical illustrations and designs.

This egg, made using the Wander transfer from Iron Orchid Designs looks like a handpainted watercolor.
Where can I find ostrich eggs?
I found some ostrich eggs at a local home decor shop, but you can also purchase ostrich and rhea eggs on Amazon or etsy. Some ostrich farmers may also sell them. (I have one I got from a farm a long time ago when I was a newspaper reporter.)
I’ve seen the eggs priced anywhere from $13 to $30 each, depending on size and the seller.
While I haven’t tried it yet, I think this technique would also be stunning on emu eggs, as well.
Pin This! Beautiful Vintage Botanical DIY Easter Eggs

If you love decorating and crafting with vintage botanicals as much as I do, don’t miss these other posts:
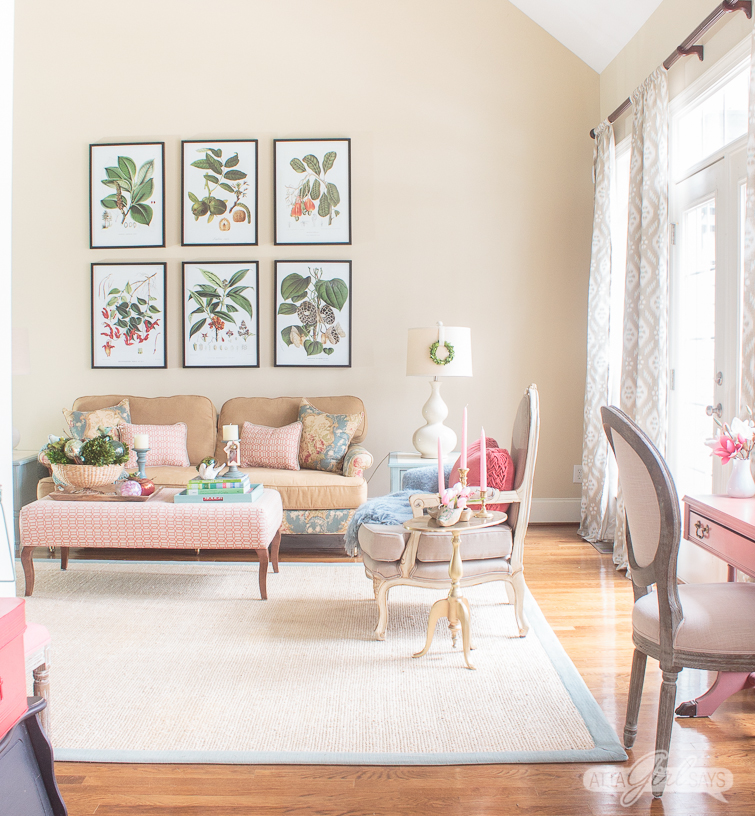
Inexpensive Botanical Art Group

Printable Seed Packet Favor Bags


Michelle James
These are stunning Amy! 🙂
Atta Girl Amy
Thank you, Michelle! I had a fun time making these.