
You know I’m always up for a party, especially a Halloween party that lasts all week long.

Today, I’m sharing a tutorial for how to make gorgeous pumpkins for your fall and Halloween decor using scrapbook paper. It’s all part of the Halloween Bash Blog Hop organized by Toni at Design Dazzle. More than 110 Halloween crafts, recipes, costumes, parties, recipes, printables and more from a whole bunch of bloggers!
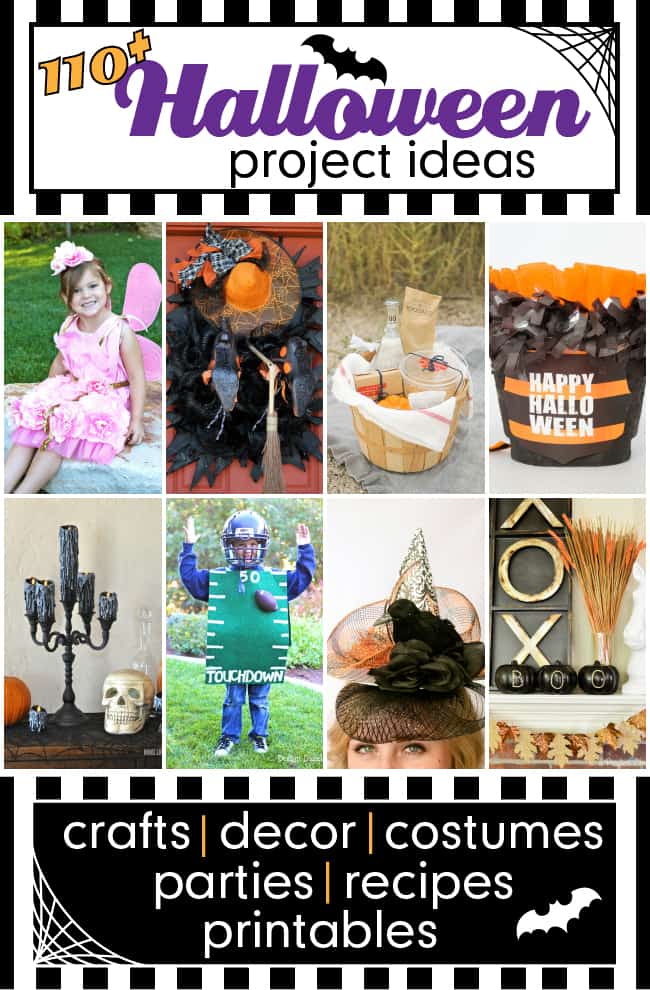
You’re sure to find a project or two (or 10!) to incorporate into your Halloween festivities. So be sure you hop around from blog to blog to check them all out.
For my project, I’m showing you two different methods for making paper pumpkins.

I can’t decide which one I like best.

All you need for either project is a 12-inch square of scrapbook paper. I like to use double-sided scrapbook paper since some of the underside will show.

- For the paper ring pumpkin, simply cut strips of scrapbook paper, about 1/2-inch wide and 8 inches long. (You can experiment with different lengths to make pumpkins of different sizes.) You will need 20-25 strips of paper for each pumpkin. The exact number really depends on personal preference and how full you want your pumpkin to be.
- Form paper strips into rings, securing with double stick tape. Try to make your rings are all the same size.
- String the rings onto twine, baker’s twine or ribbon and tie the two ends together to form your pumpkin. You may have to arrange and fluff the rings to get the pumpkin shape you want, and you may have to add or remove rings, too. Just play around with it until it has the look you want.
- Trace leaf pattern onto coordinating scrapbook paper and cut out with paper snips. Bend and crease the laves to give them dimension.
- To make your pumpkin stem, roll a small piece of burlap and secure with hot glue. When I was making my paper pumpkins, I used a variety of different things for stems — a clothespin wrapped in jute twine, and paper straws wrapped in twine. Pretty much anything cylindrical works. It just needs to fit inside the center of your pumpkin.
- Make tendrils for the stem by wrapping thin strips of scrapbook paper around a pencil or skewer.
- Insert stem into paper pumpkin and secure with hot glue. Use glue to attach leaves and tendrils to your pumpkins.

I made the orange pumpkins using this method. I think the shape of these is more like a real pumpkin.

A little round and squatty!
But I also made a few paper pumpkins using another technique.
For these pumpkins, you also start with a 12-inch piece of scrapbook paper and cut strips about 3/4-inch to 1-inch wide. Then, you punch a hole at the both ends of each strip. Stack the strips of paper together and thread a brad through the top of each strip and secure. Then, fan the strips out and and pull the loose ends together in the middle, securing with another brad. (You may want to check out this tutorial from Home Seasons or Martha Stewart’s version of paper pumpkins to see exactly how to make these. (I did not use the string, as Martha recommends, BTW, and I think my paper pumpkins turned out just fine.)
Now, are you ready to see the other awesome Halloween goodies my blogging friends have concoted?
Simply click on the links for step-by-step instructions for how to create each project. Have fun and pin away!
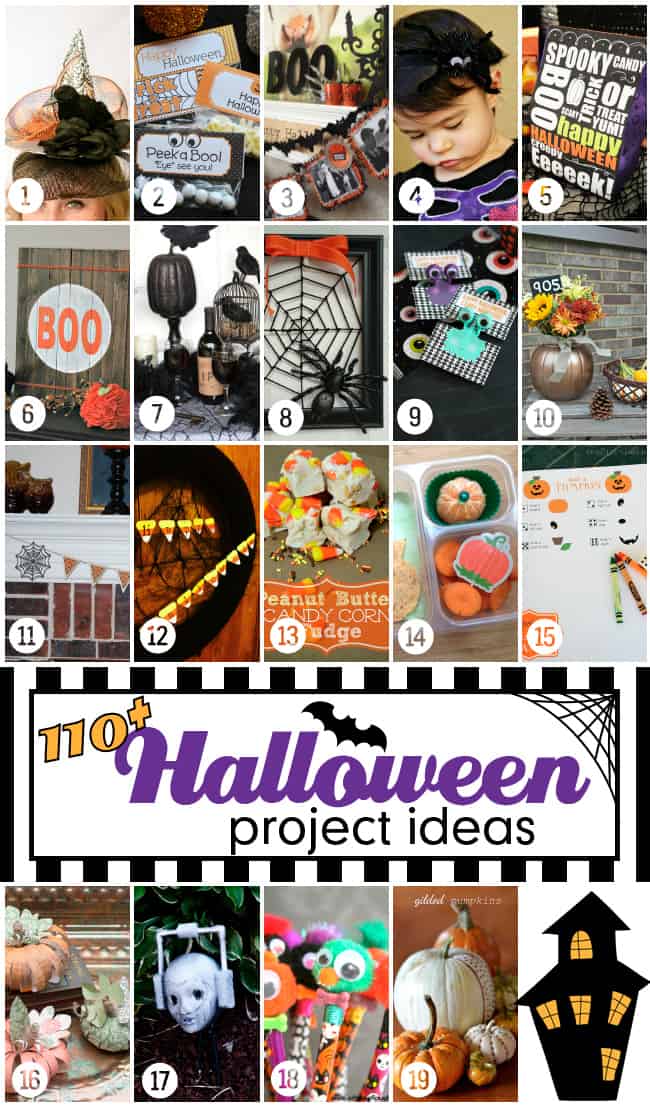
1. DIY Witches Hat Fascinator
2. Free Halloween Printable Bag Toppers
3. Hollywood Halloween Trivia Banner
4. Spooky Spider Headband
5. Halloween Candy Printables
6. Wooden Halloween Sign
7. Easy Hallowen Bottle Label DIY
8. Spider Web Wreath
9. Non-Candy Halloween Treat with Free Printable
10. Halloween Address Planter
11. DIY Halloween Spider Fireplace Wood Pennant Banner
12. Halloween Wreath
13. Peanut Butter Candy Corn Fudge>
14. Halloween Food Ideas for Kids’ School Lunch
15. Roll a Pumpkin Halloween Game
16. Scapbook Paper Pumpkins
17. Cyberman Head
18. Halloween Monster Pencils
19. Gilded Pumpkins
Follow our Fabulous Halloween Ideas Pinterest board for even more inspiration!
Follow Design Dazzle’s board Fabulous Halloween Ideas on Pinterest.
Helen G.
These pumpkins are cute!!! Thanks for sharing the tutorial 🙂
Kim @ This Ole Mom
Wow! Your pumpkins are adorable. Very creative. Pinned.
Linda
Love these. Pinned.
Kara
Such a simple but cute idea! I love how you used the jute to make the stems. It’s perfect!
Atta Girl Amy
Thanks so much, Kara!